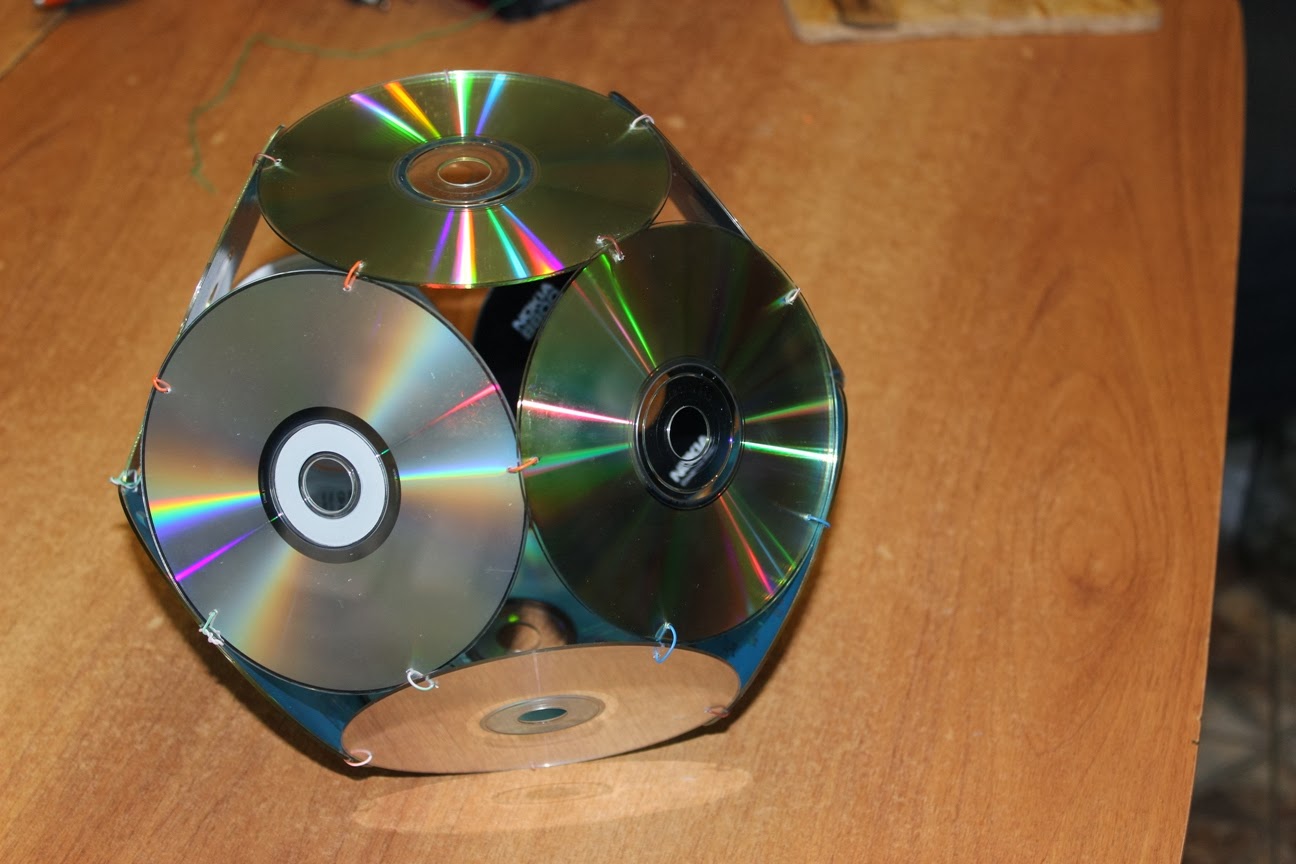
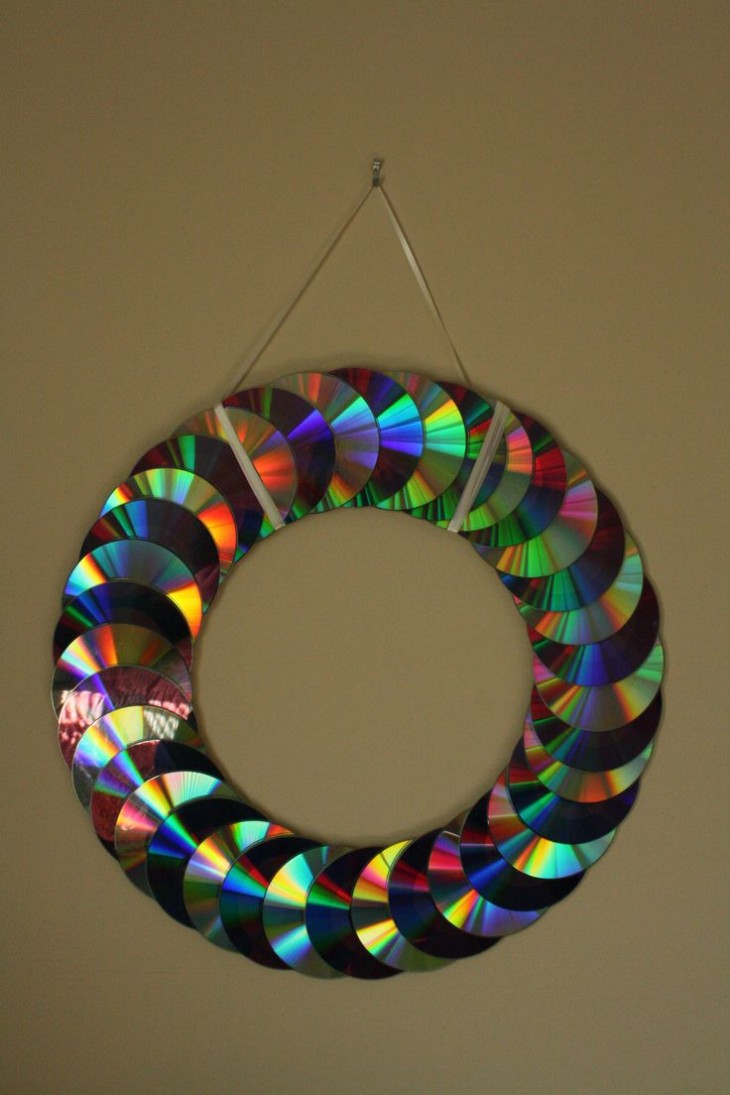
The second life of wadded and computer disks - Brilliant ideas of hand-made articles (95 + Photo). 11 brilliantly simple step-by-step master classes
. 11 brilliantly simple step-by-step master classes")
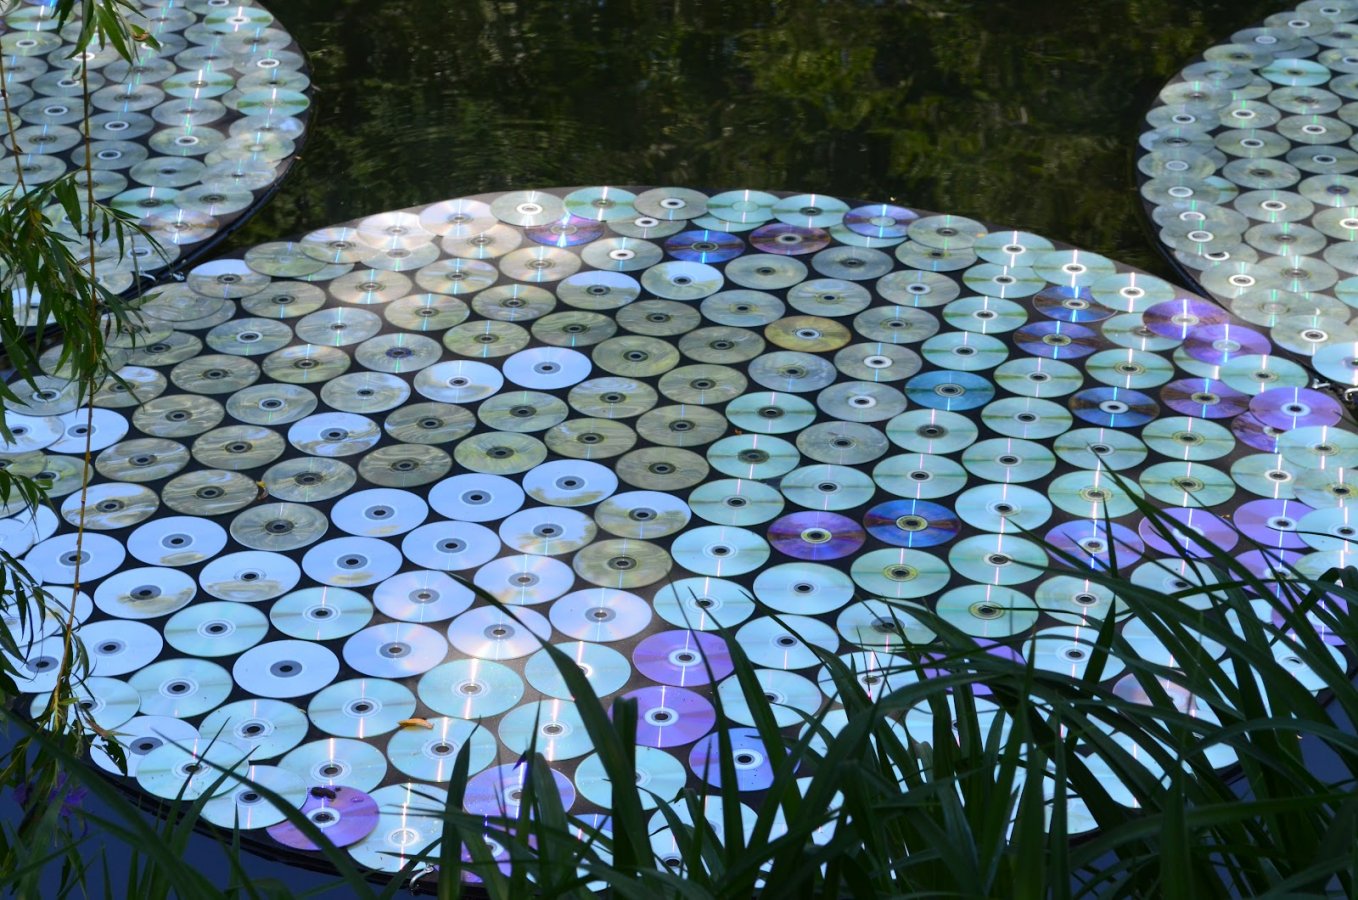
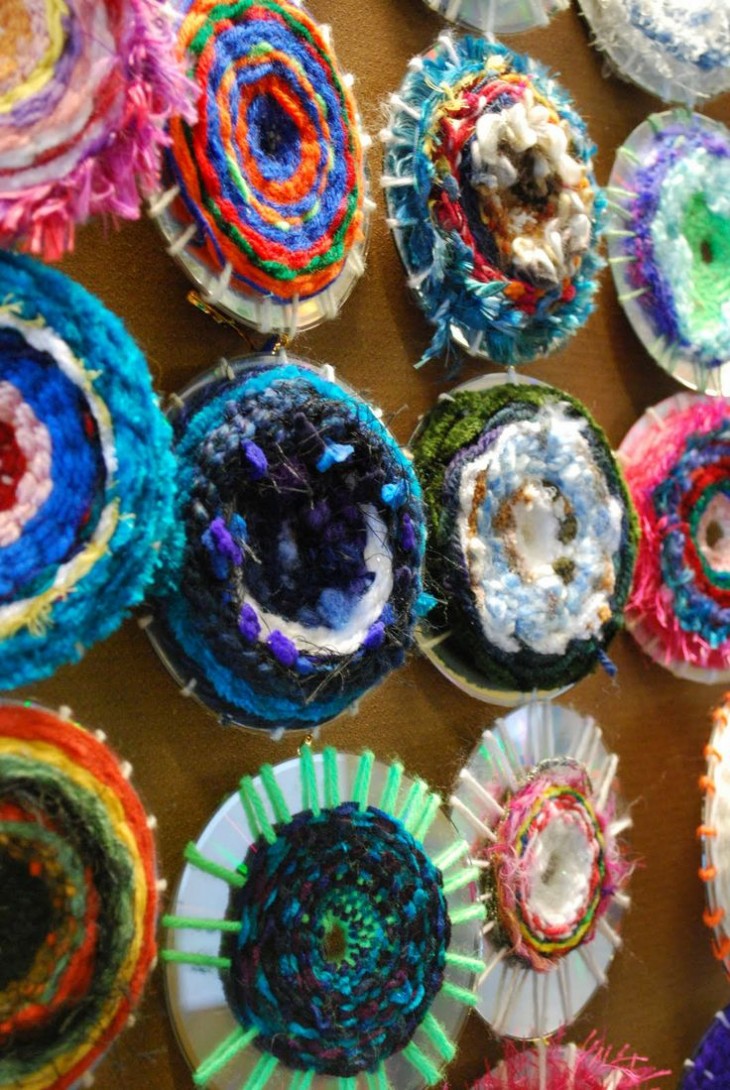
Over time, the house accumulates a lot of unnecessary things that take up too much space. But not all of them need to rush to throw out during the next general cleaning. For example, old CDs, DVDs and even cotton pads can gain a new life and become a stylish element of the interior. We have collected the best ideas of crafts from this material: simple for children and more complex for adults.
Content of this article:
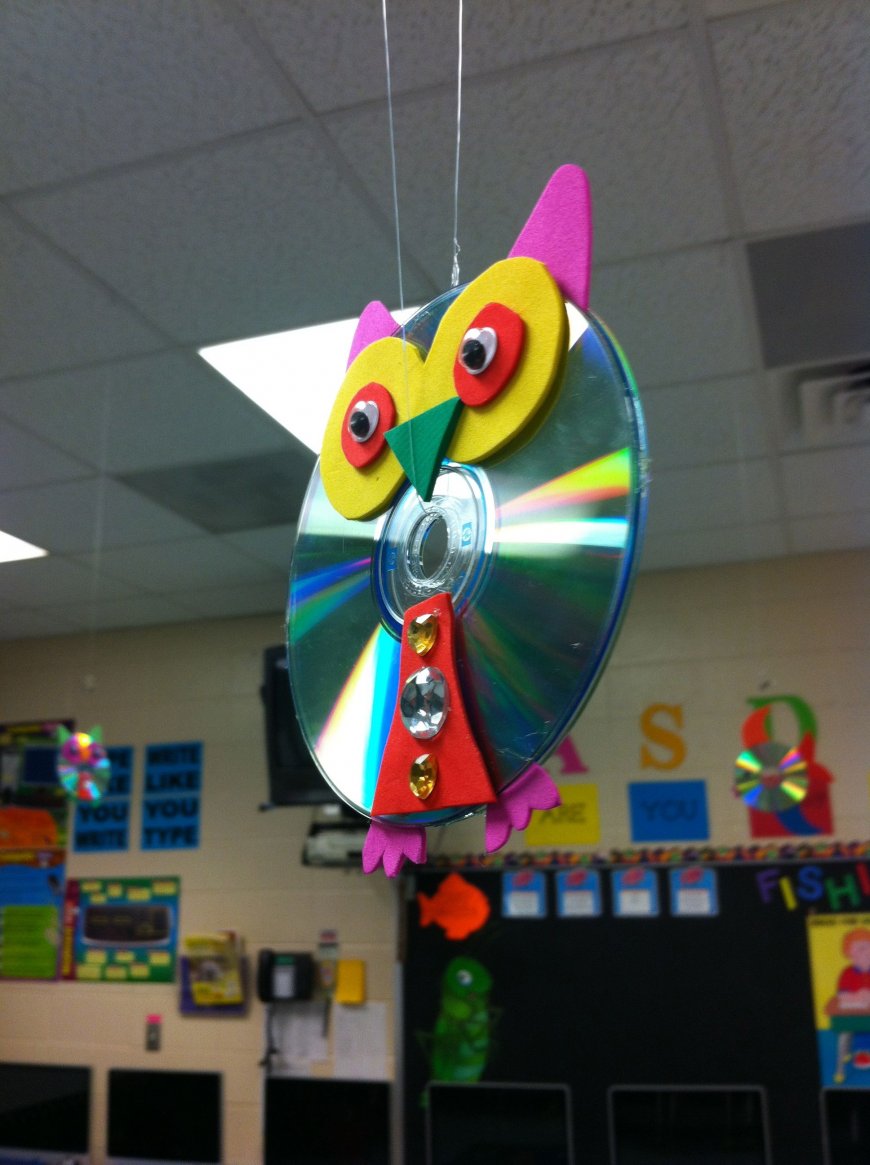
Variants of crafts for the New Year
With the approach of the long-awaited holiday, children and adults tend to decorate the house with cozy hand-made crafts. Computer disks can be found in any home, you can make a lot of interesting, beautiful Christmas decorations from them.
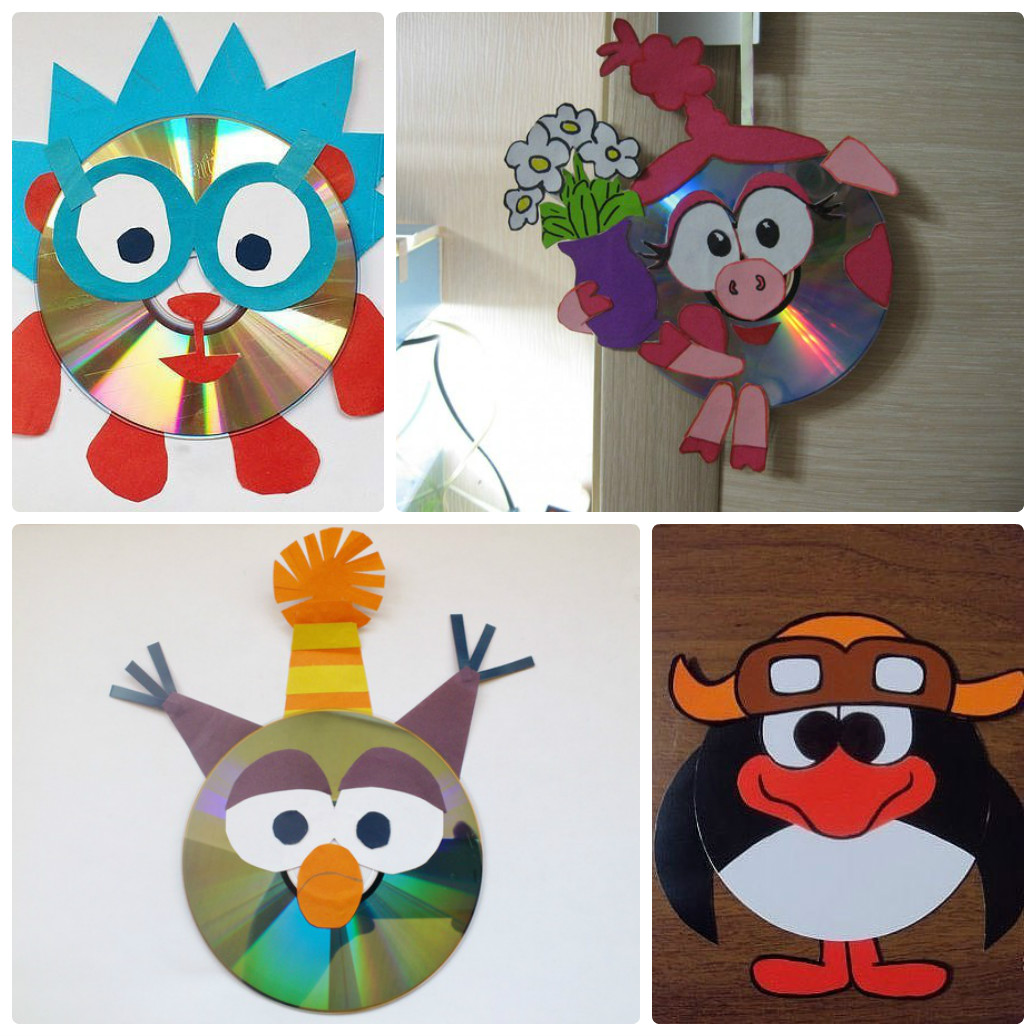
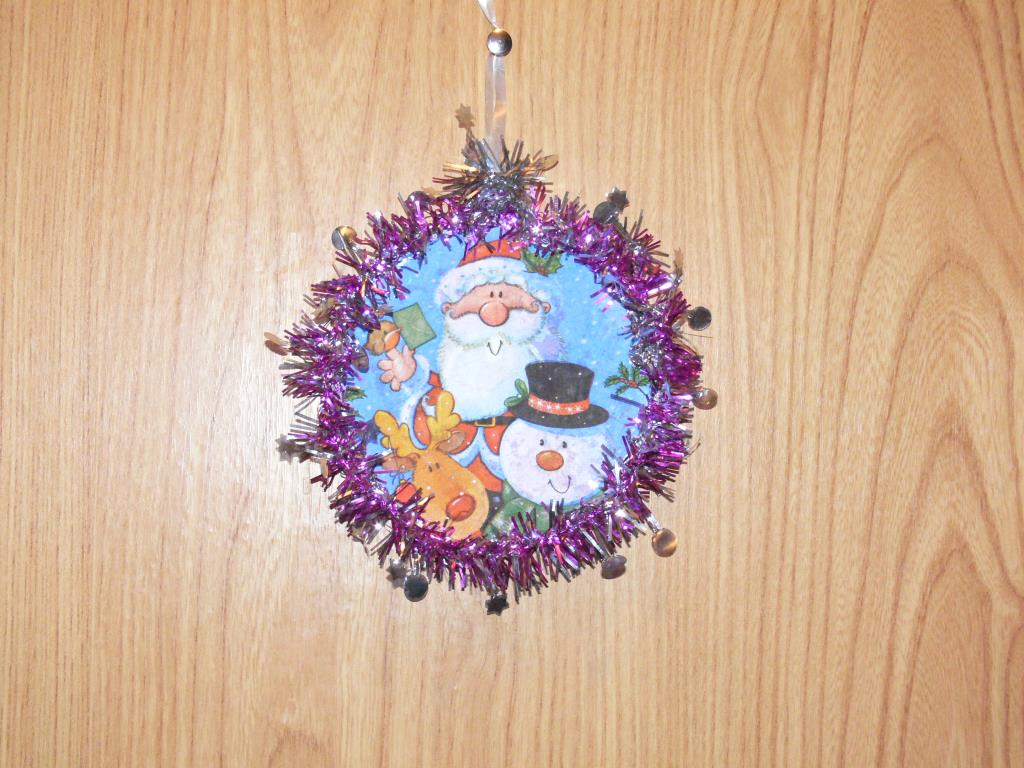
Beautiful smeshariki of disks
It will be interesting to you:OVERVIEW: How to make Bulk paper crafts with your own hands? 6 Step-by-step master classes for your decor
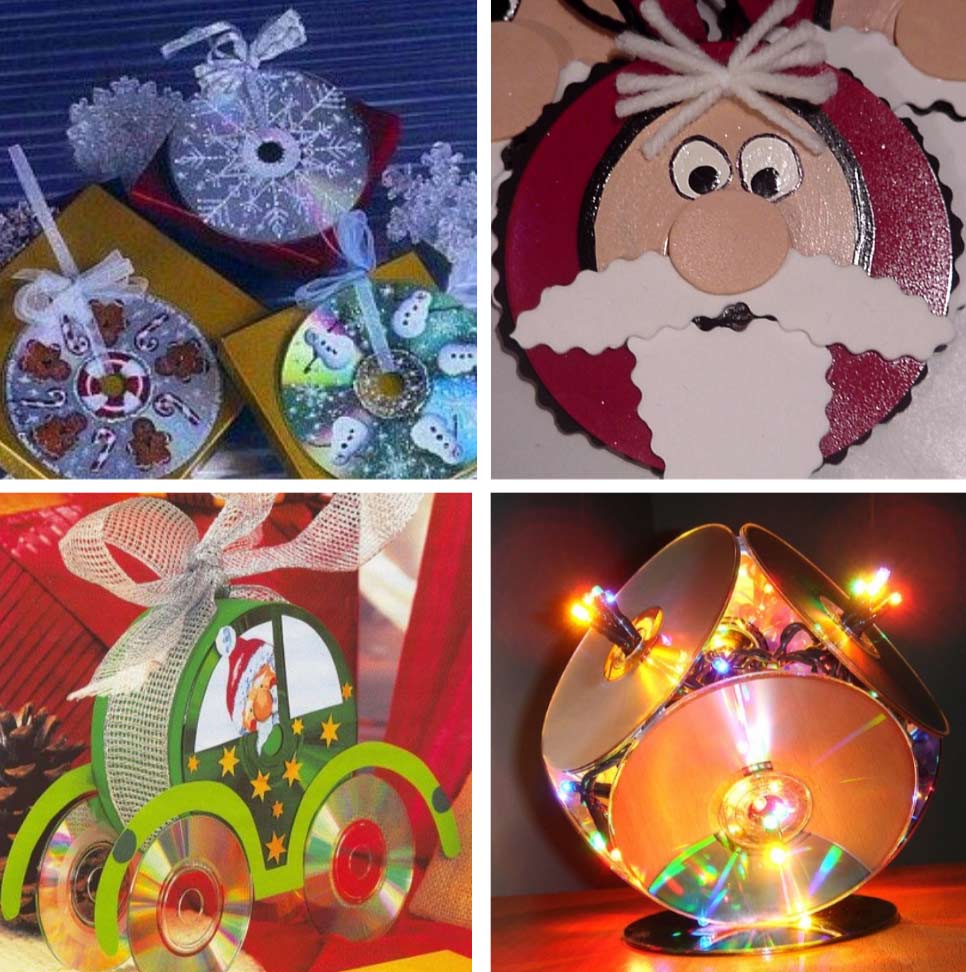
return to menu ↑Christmas toys
You will need:
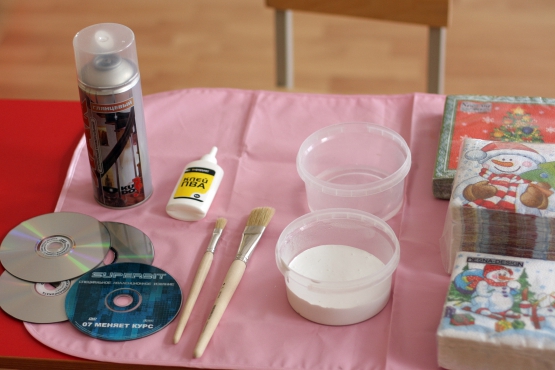
- Old CDs.
- Alcohol.
- Cardboard.
- Varnish
- Gouache of white, blue or any other light color.
- Paper napkin with a New Year's pattern (herringbone, Santa Claus, snowflakes).
- PVA glue.
- Glue gun.
- Organza or satin ribbon 2-4 centimeters wide.
- Lace or thin ribbon 0.5 cm wide.
It is very easy to make such an craft with your own hands.
Alternatively, instead of napkins, you can print any Christmas pattern on plain paper, but I recommend napkins, they are better placed on the work surface.
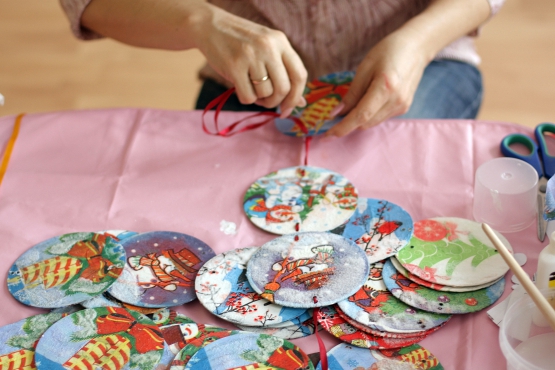
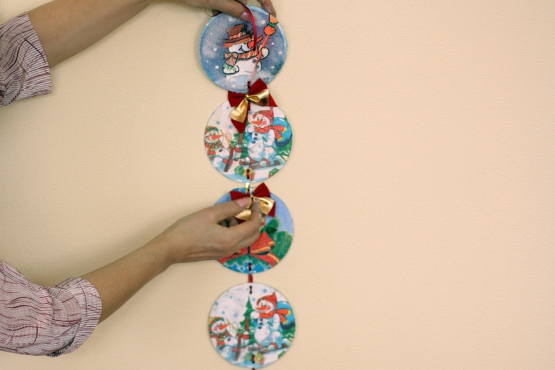
- To begin, degrease the surface of the CD with alcohol or cologne. After drying, apply several layers of gouache until it ceases to show through. In the central part we glue in the cardboard circle, which should be slightly larger than the hole in the disk.
- From a napkin we cut out a pattern, a drawing, or a circle a little smaller than a disk. Cover it with white glue, glue a napkin. To align the surface, apply a towel or soft cloth to the surface, smooth the folds.
- After drying, open all varnish.
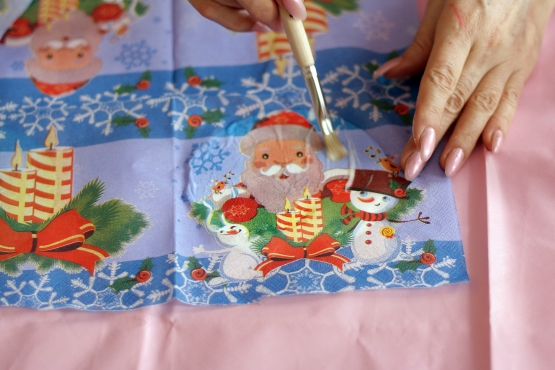
- Repeat all the above actions with the surface on the reverse side.
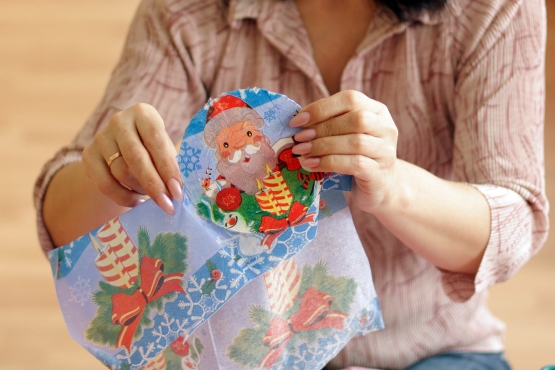
- From a tape we make a bow.The string is twisted into a loop, glued with a glue gun together with a bow to the top of the craft.
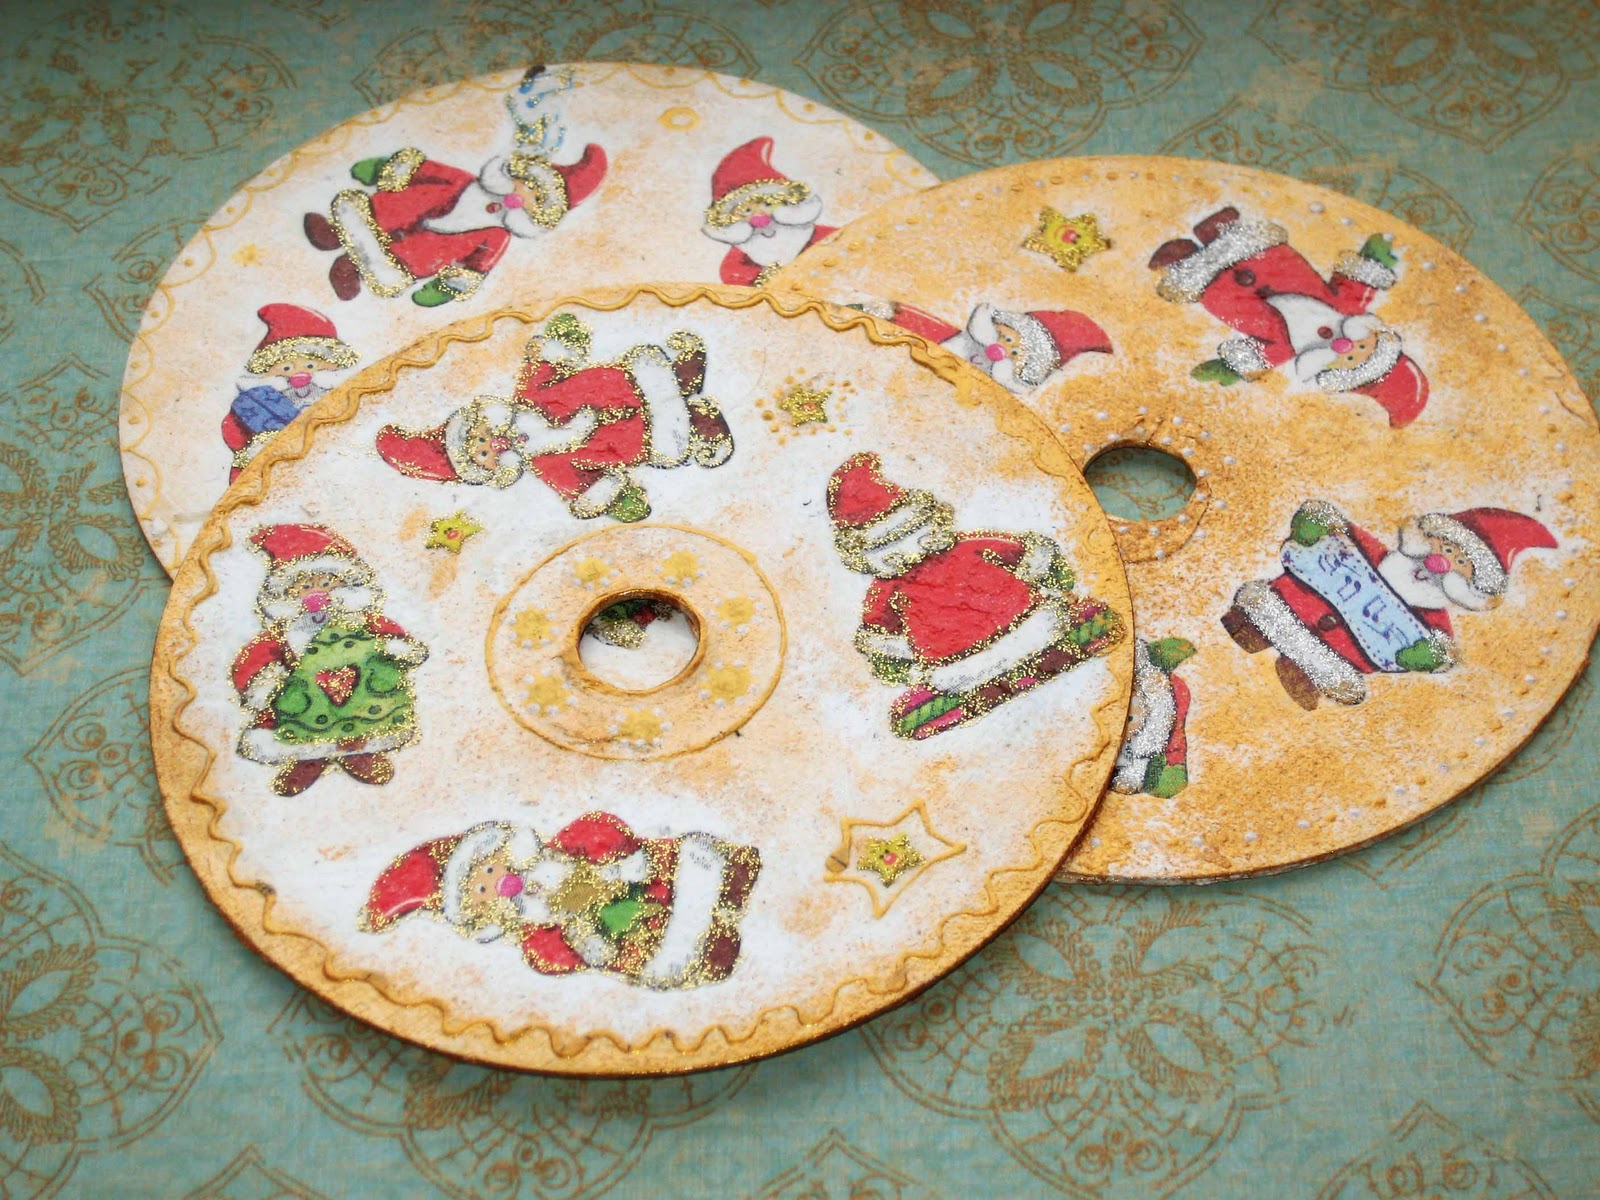
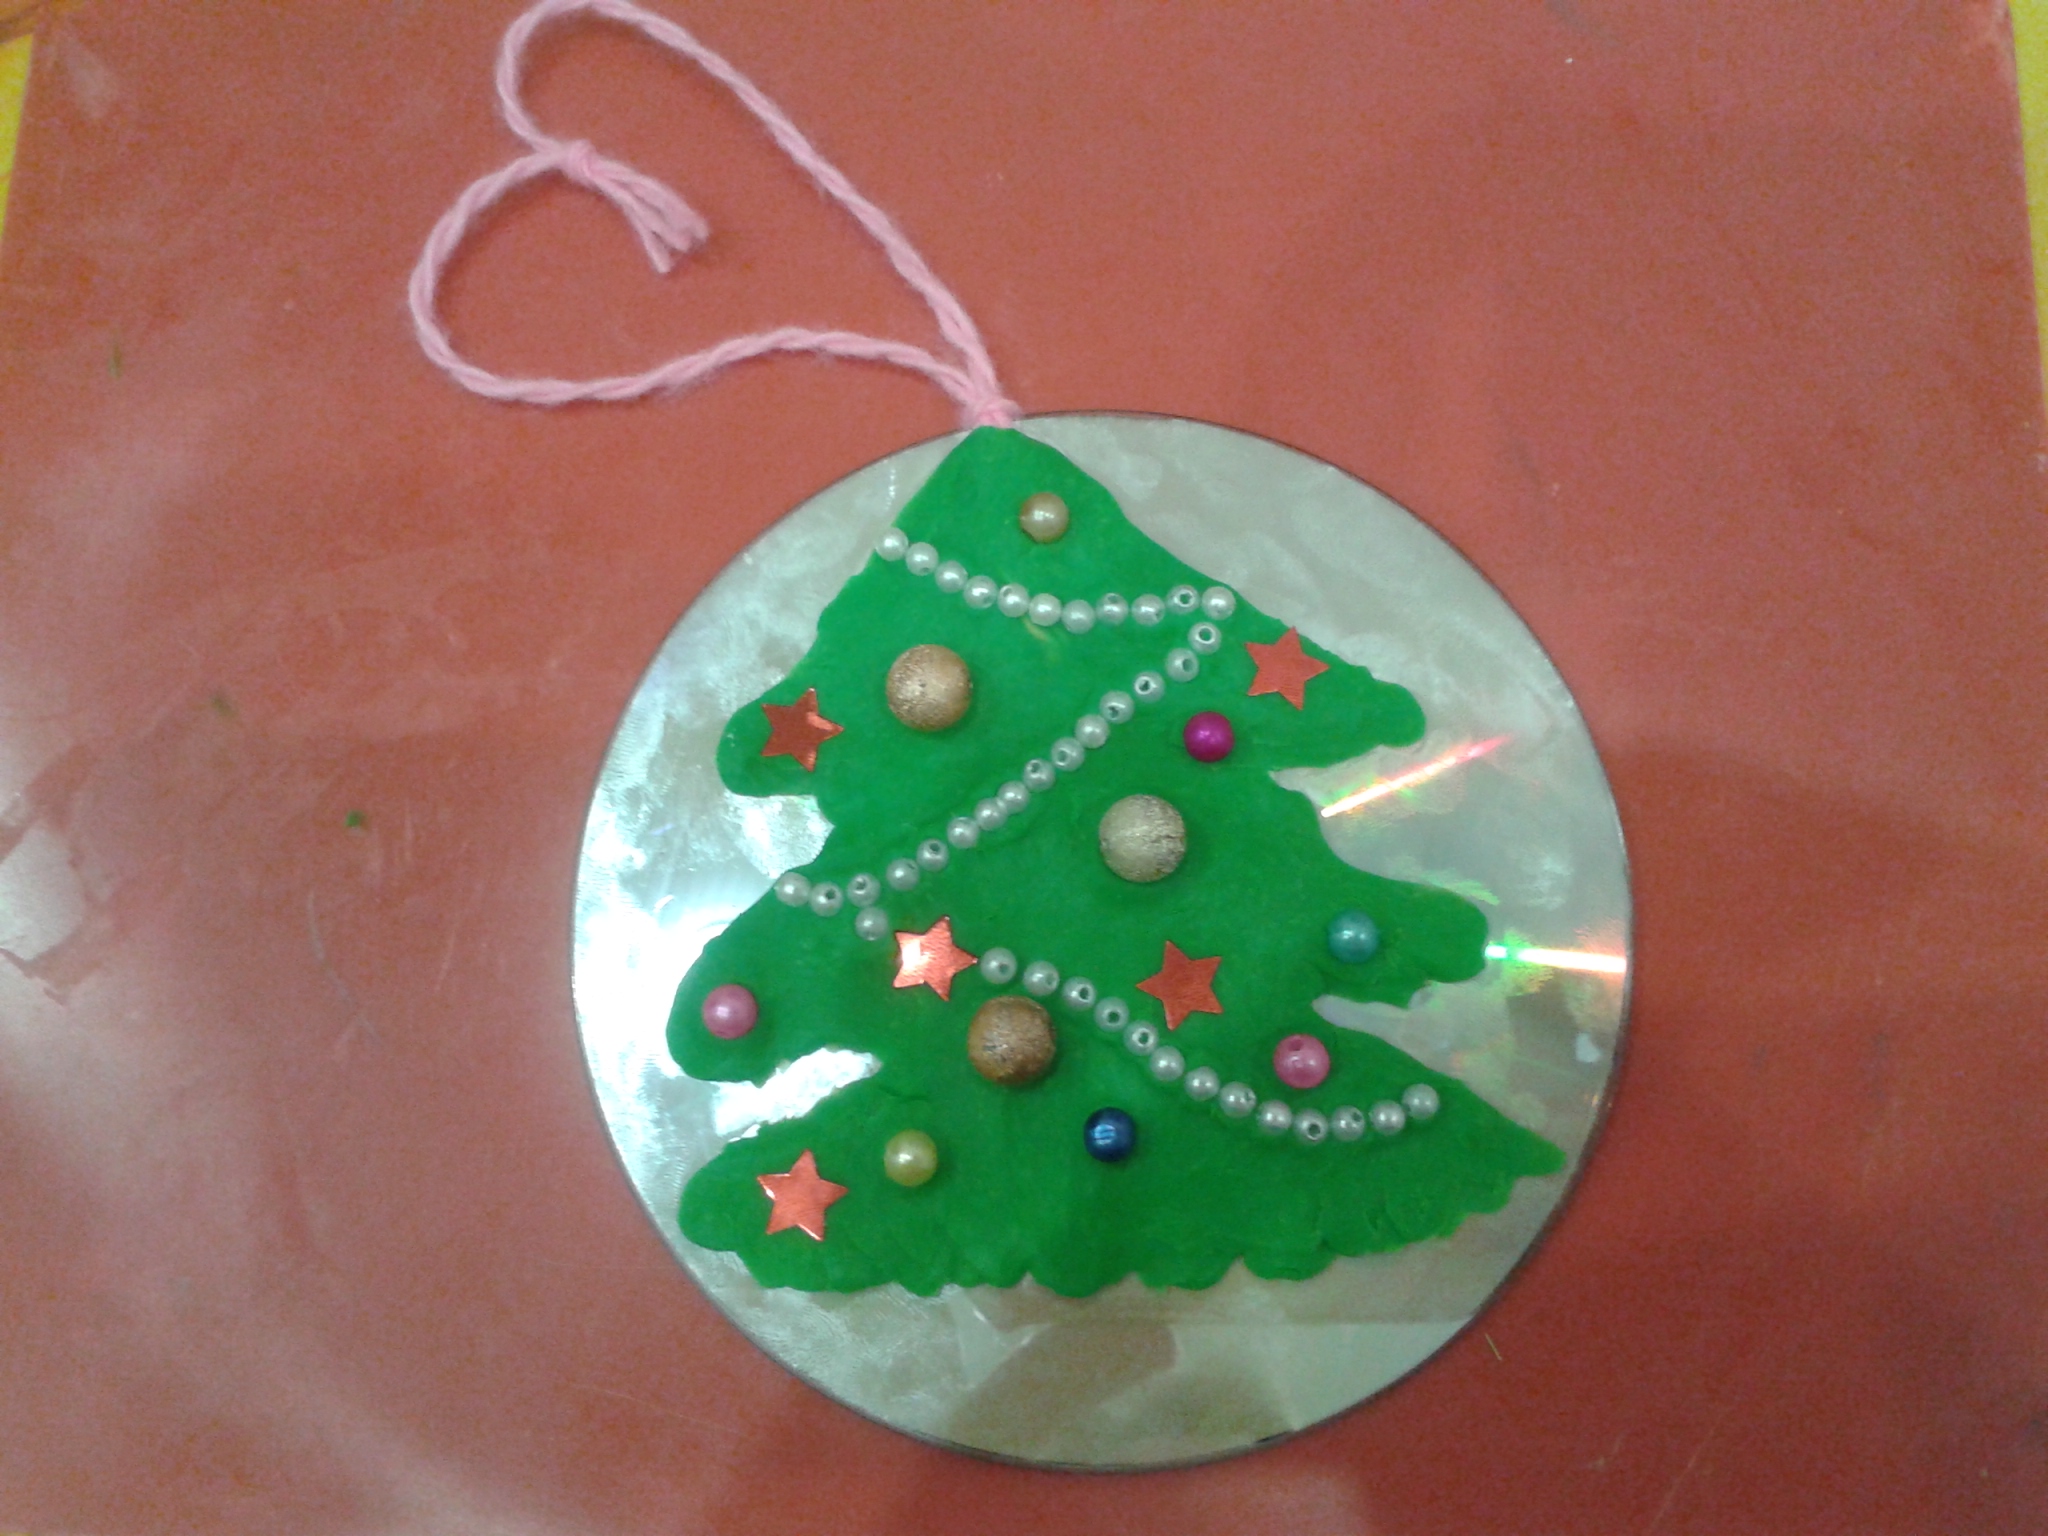
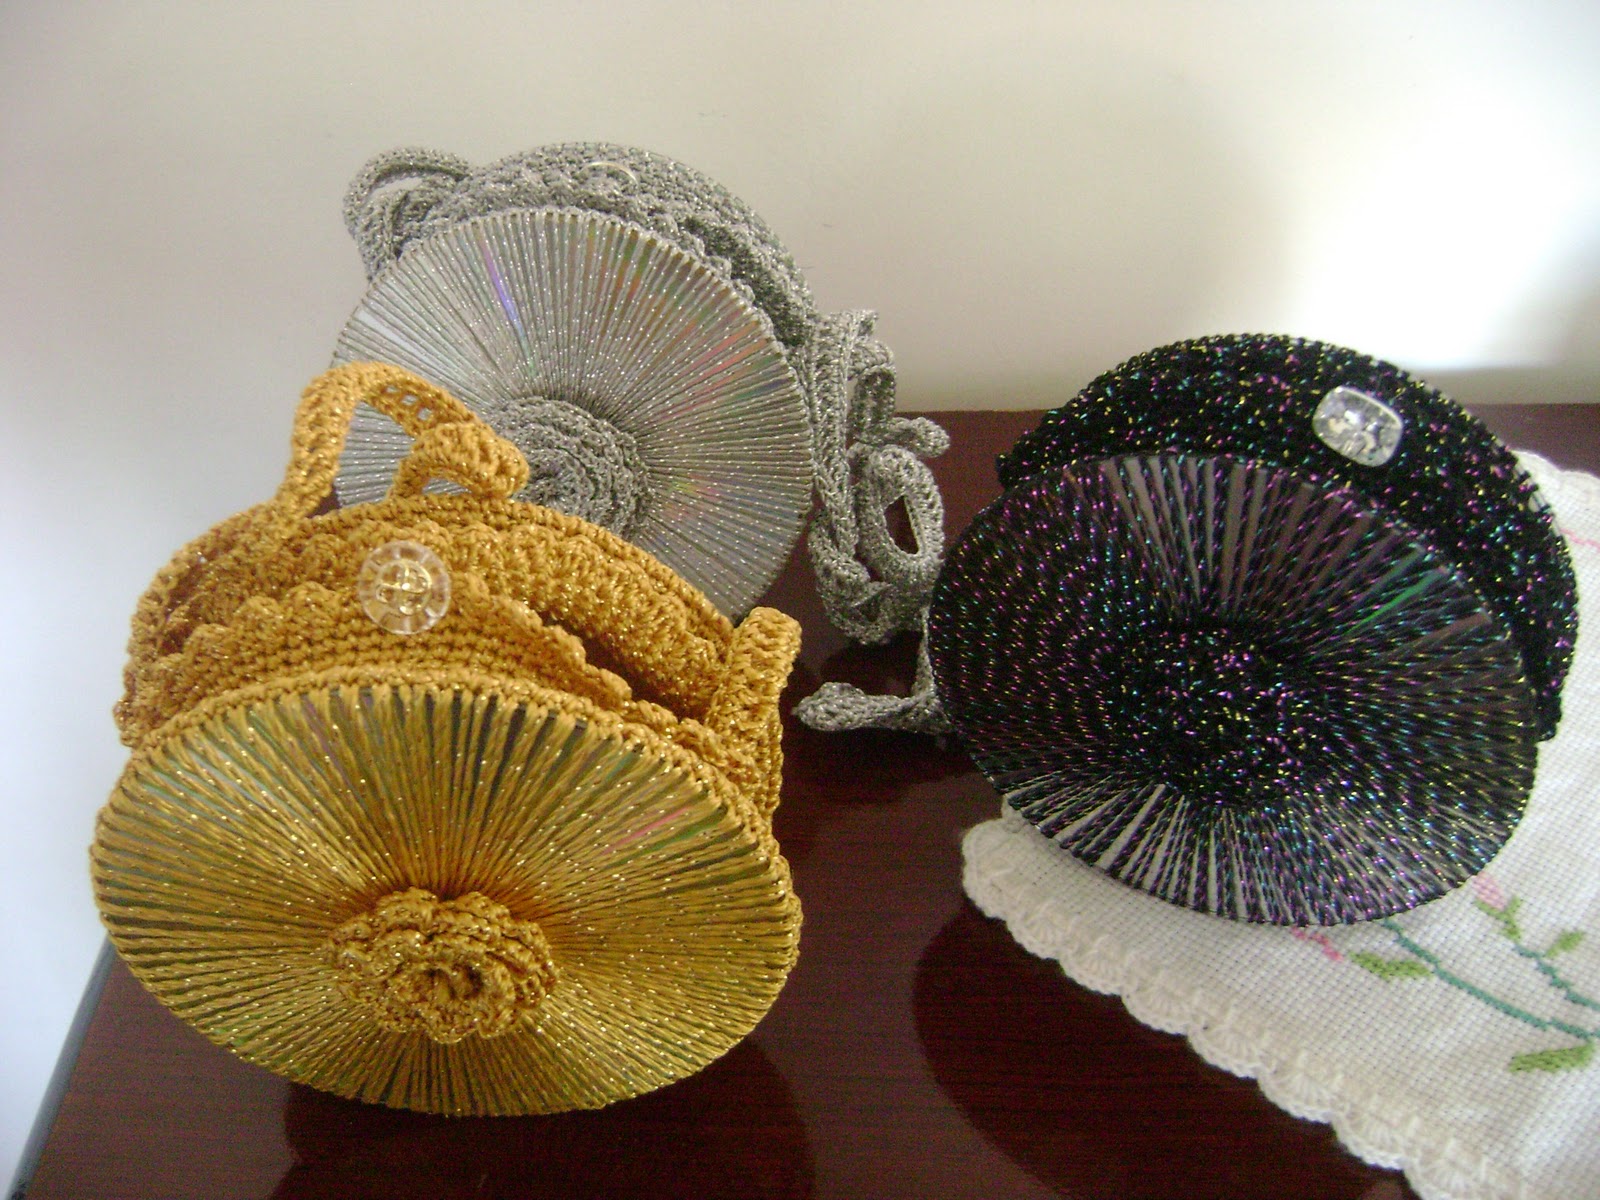
Decoupage disc stand
It will be interesting to you:REVIEW: Do-it-yourself crafts made from natural materials for every taste
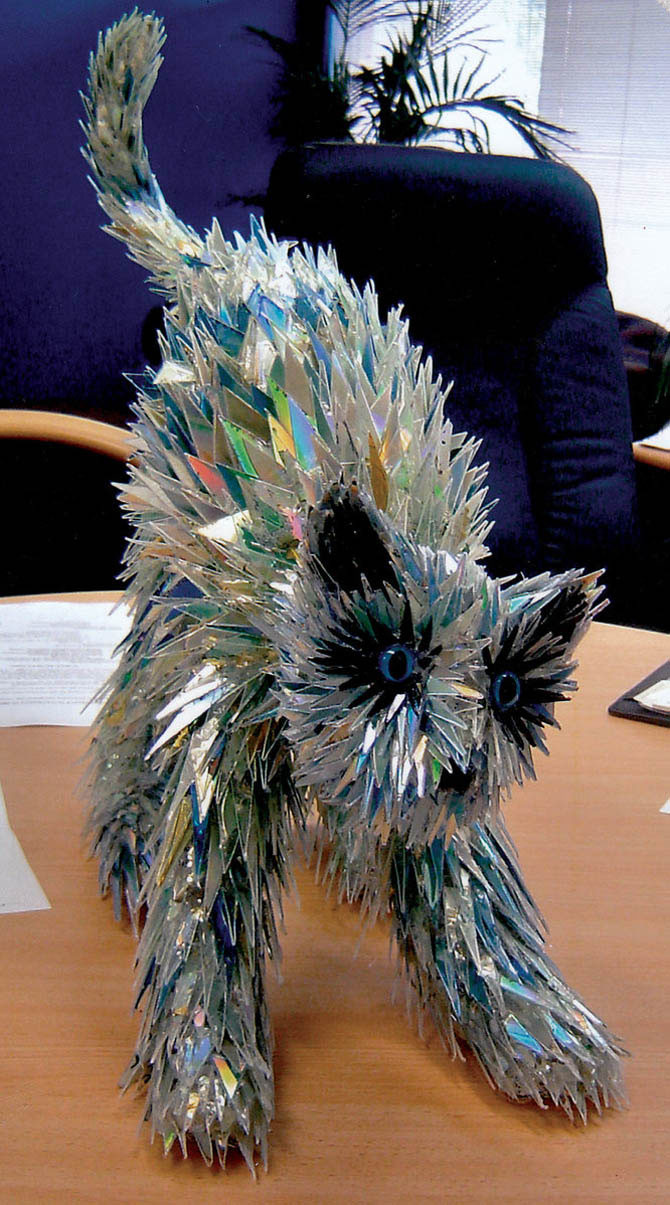
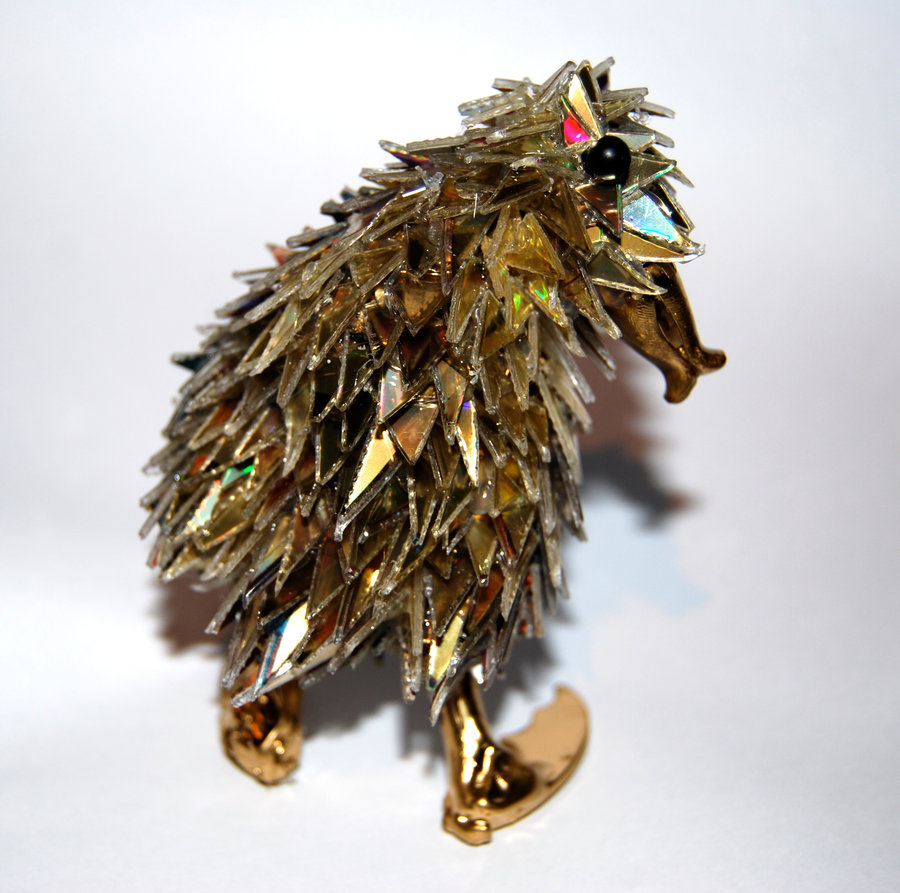
return to menu ↑Transformation of the old ball
This is a quick and easy way to upgrade your old Christmas balls. For crafts will need:
- Old Christmas toys.
- Glue gun.
- Computer disks.
- Scissors.
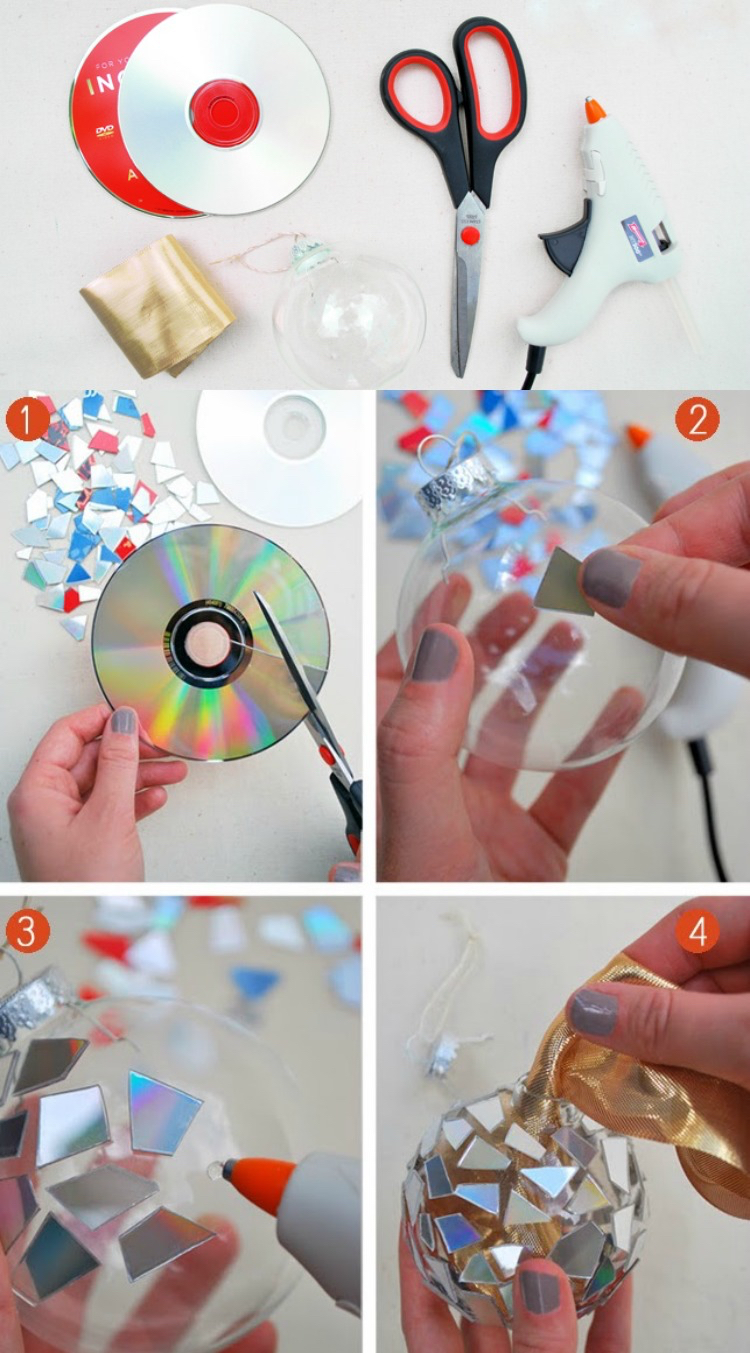
A ball of CD disks with their own hands
Cut the discs with scissors into small pieces, triangular and diamond-shaped. Glue the cut objects to the surface of the Christmas toy with a glue gun. The handicraft is ready.
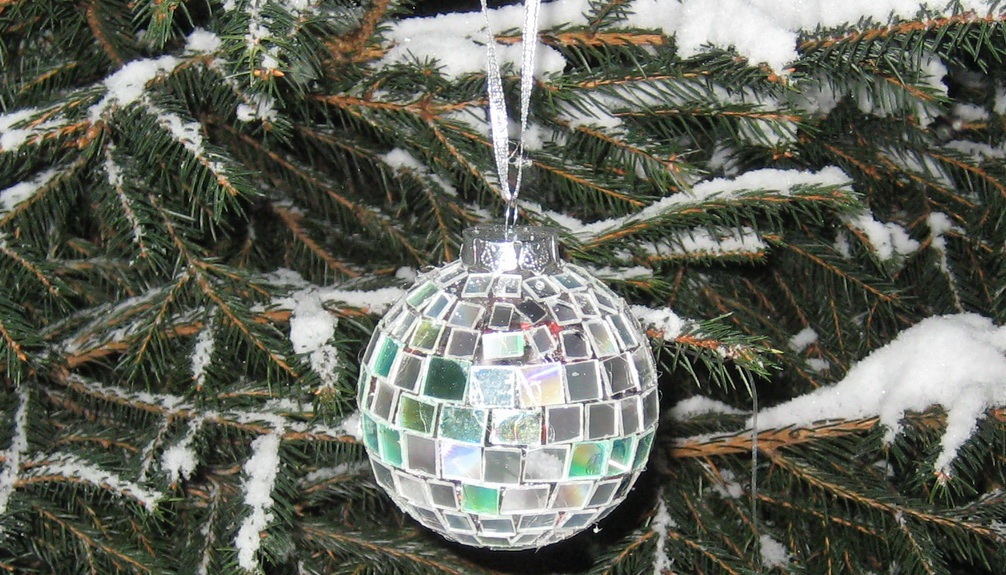
Beautiful Christmas toy
It will be interesting to you:REVIEW: How to make a DIY tree for the New Year with your own hands? We decorate the house before the holiday (185+ Photos)
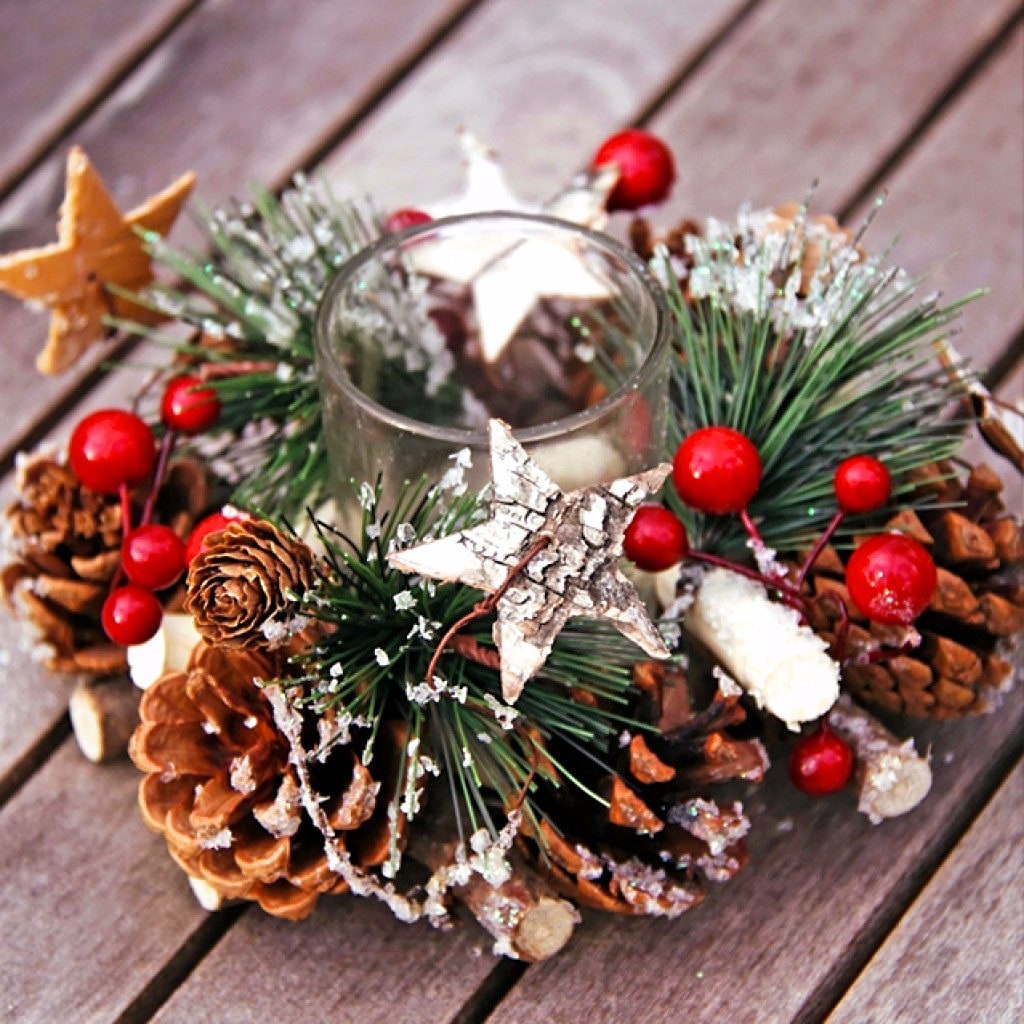
return to menu ↑Candlestick
This is a simple quick way to make a candlestick.
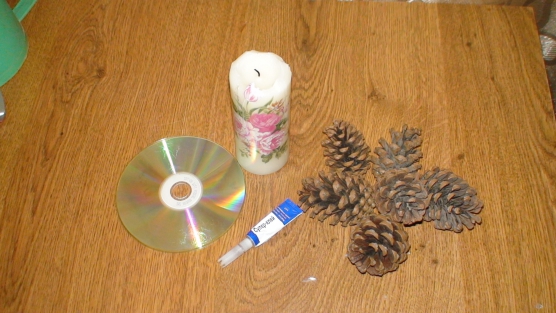
You will need:
- CD.
- 5-6 spruce cones.
- Glue or nail polish with glitter.
- Aluminum stand from the candle.
- Candle, with a diameter of 3-4 centimeters.
- Rhinestones, decorative pebbles.
- Rubber glue.
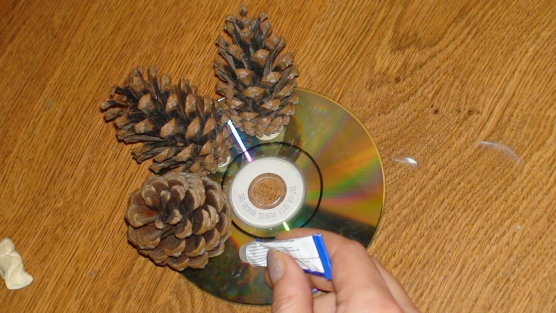
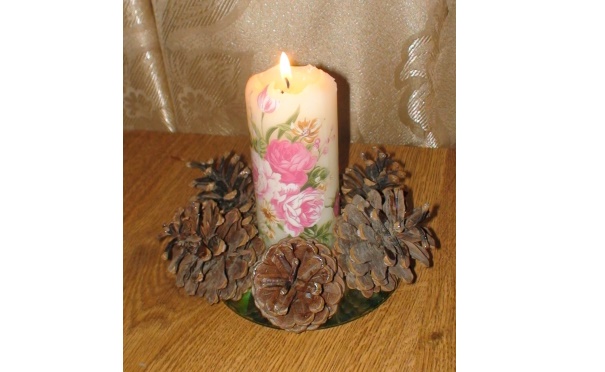
In the center of the product with rubber glue, glue the aluminum pan under the candle. To him in a circle attach with glue dried lacquer spruce cones. We decorate the free surface of the craft with rhinestones, sparkles and decorative pebbles. The candlestick is ready, you can safely put a candle in it.
Christmas toys from the cones made their own hands
It will be interesting to you:OVERVIEW: DIY handicrafts from a sheet of paper (7 step-by-step instructions) 130+ Photo: we start from the simplest. Collection of the best master classes!
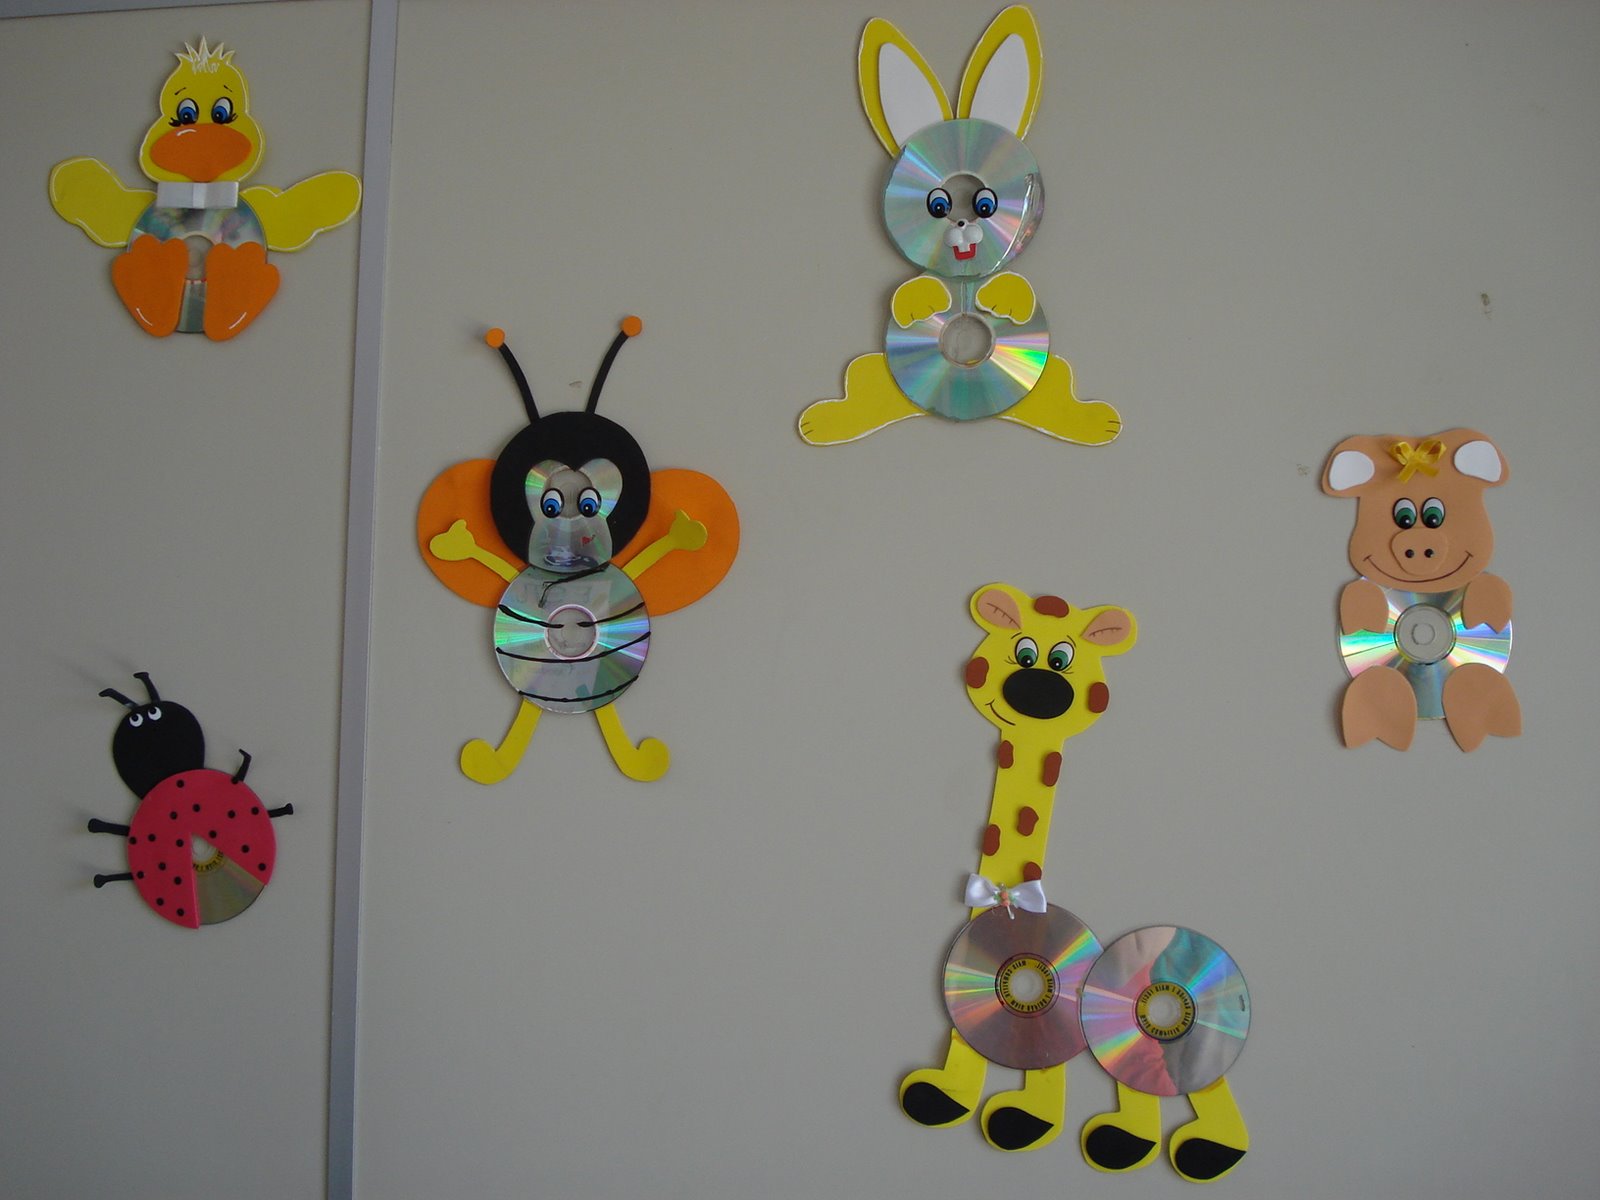
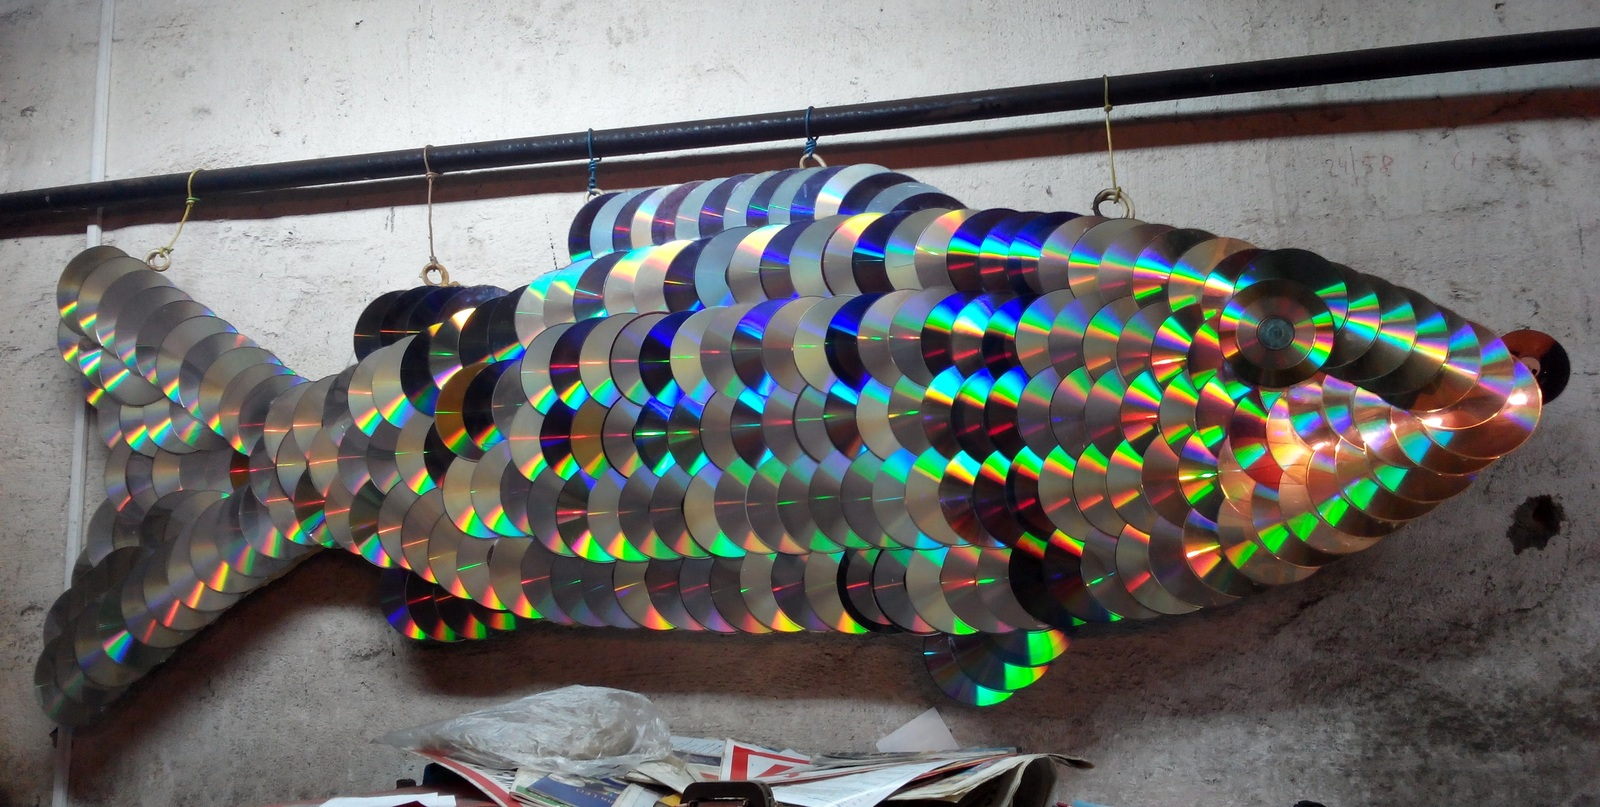
return to menu ↑ return to menu ↑CD Underwater World
Children love to be creative, from the discs they can make a lot of simple crafts, decorate a children's room with them. They can make souvenirs on their own or with the help of parents.
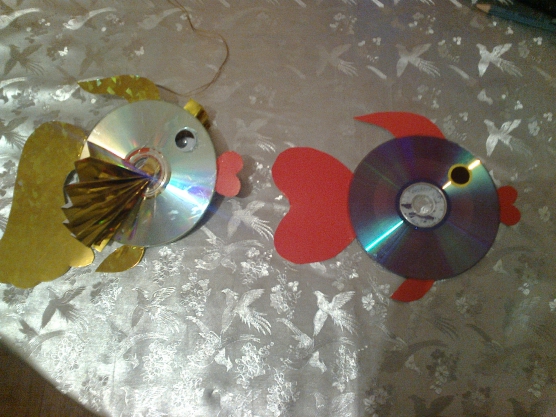
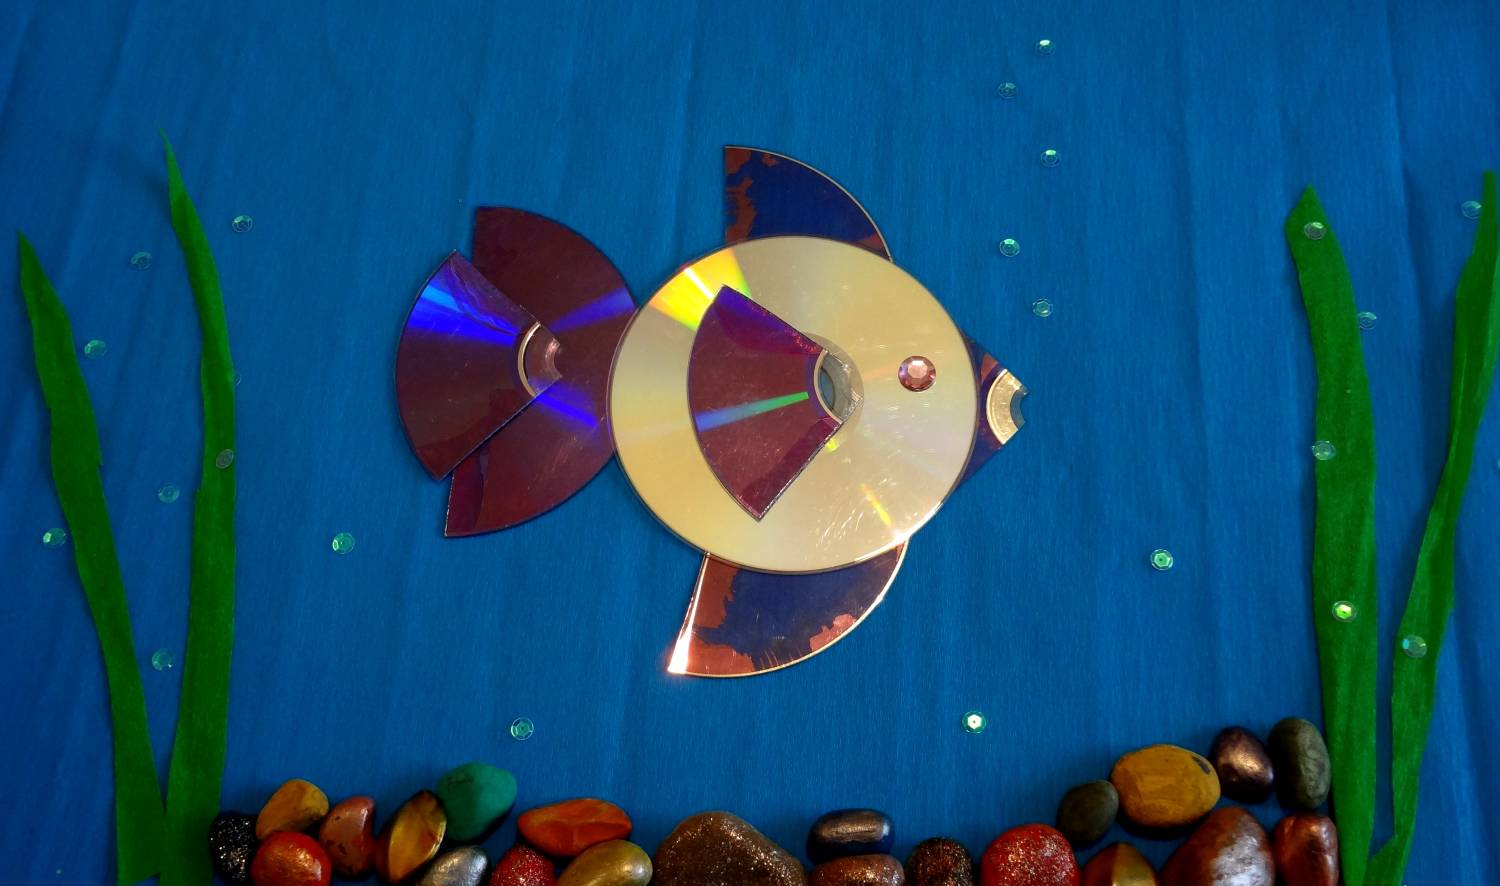
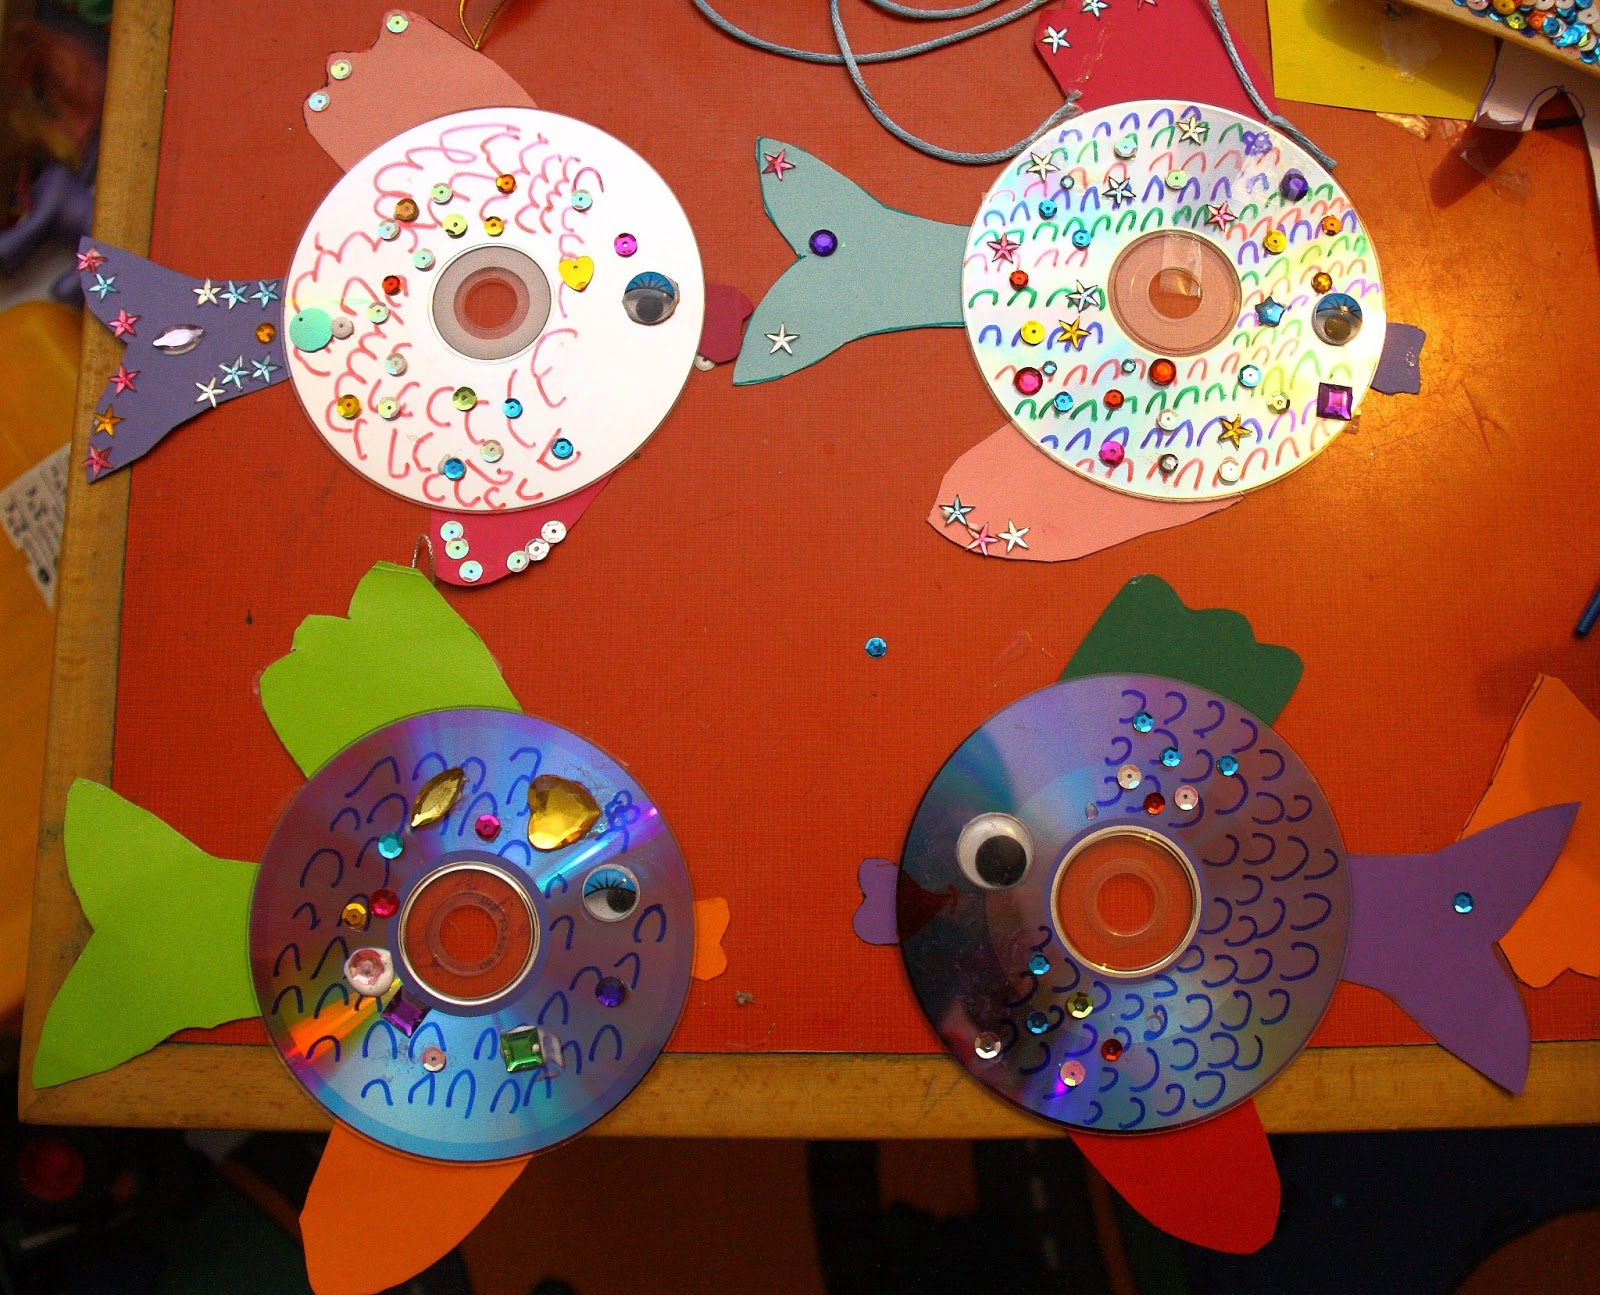
return to menu ↑Goldfish
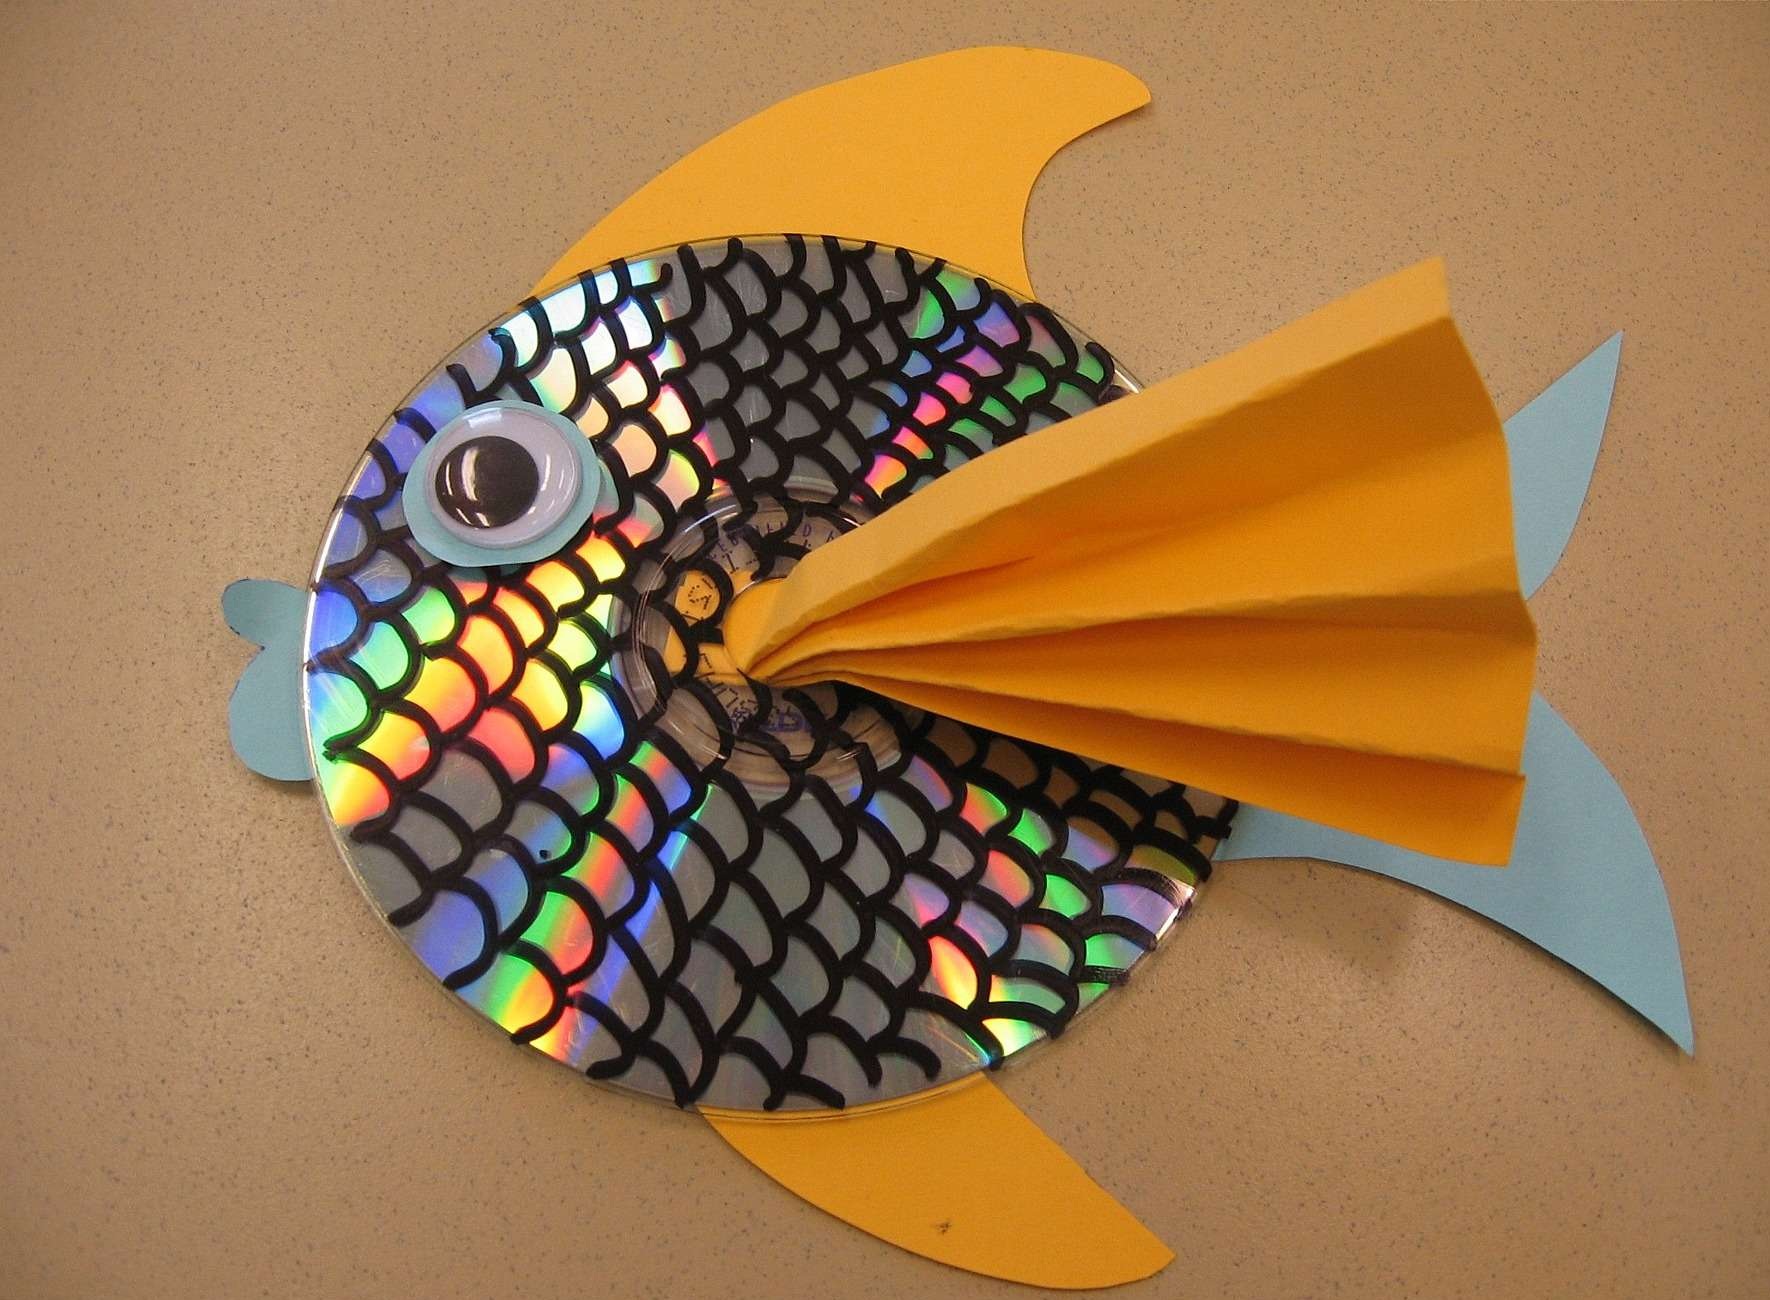
Beautiful fish, which can be done without difficulty
You will need:
- Glue gun.
- CDs.
- Color paper.
- Gold foil
- Scissors.
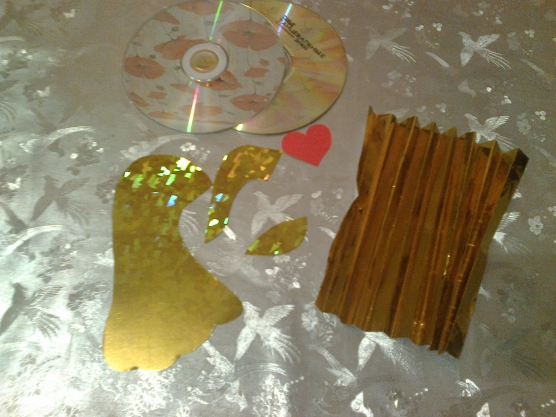
Cut out the colored paper eyes for future fish: a black circle a little smaller for the pupil, a larger white circle, which will become the main part of the eye. We glue them together. From red paper cut lips of arbitrary shape. Let's do the same with fins and tail, we will make them of gold foil of any shape.
Now you can proceed to the final stage. We begin to glue all the previously manufactured parts. First we glue the eyes and lips, the fins on top and bottom, glue the tail to the back.
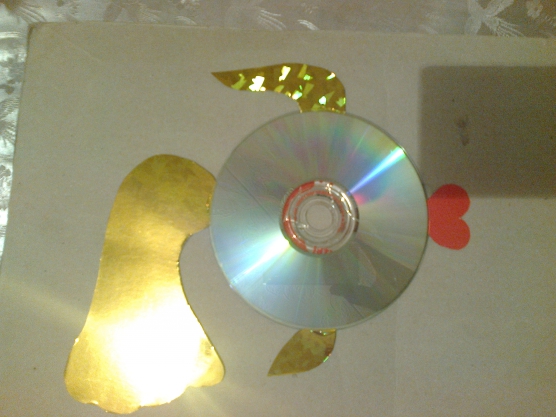
The goldfish is ready, it remains only to attach a string or thread to it, if desired, you can cover its surface with nail polish with gold sparkles.
It will be interesting to you:REVIEW: Crafts made of fir cones (large, painted) for the New Year (175+ Photos) Beautiful toys for the holiday!
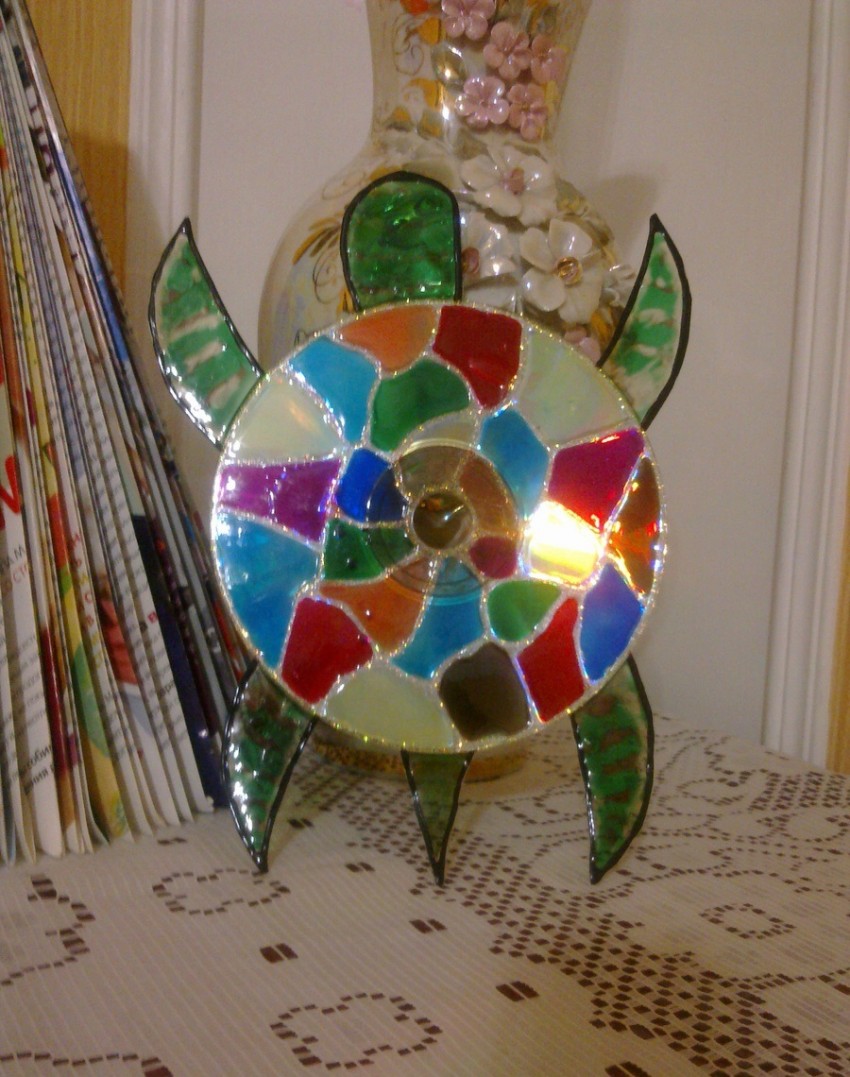
return to menu ↑Sea turtle
You will need:
- Plastic bottle.
- A simple pencil.
- CD.
- Stained paint and contour.
- Glue gun.
- Rhinestones, flat pebbles.
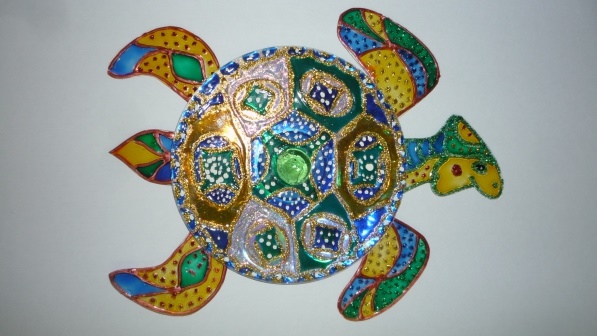
This handicraft will like any child.
In addition, for work you will need comfortable small scissors.
- Cut a piece of plastic from the bottle. On it we draw a pencil contour of the head of the future turtle, its paws and tail. Carefully cut out the selected.
- Let's take a drive - this is the future shell of a turtle. To begin with, draw a shell using a decorative contour in a circle. Then, draw the contour of the stained glass fragments around the entire circumference of the shell.
- After drying the contour, fill the selected fragments with stained paint. Apply the paint in several layers. Try to use different colors, so much more beautiful, more colorful.
- Glue the shell, head, paws and tail of a turtle with a glue gun. We decorate the shell with rhinestones, small pebbles, glitter securing them with glue. We stick two pebbles to the head as eyes. The turtle is ready.
It will be interesting to you:REVIEW: DIY Handicrafts for the New Year 2019 (120+ Photos) - Surprise loved ones with your imagination (+ Reviews)
return to menu ↑Sea bottom
For the manufacture of crafts will require a minimum of time and materials:
- Paints.
- Seashells of different colors, sizes and shapes.
- Colored beads (preferably transparent).
- Old drive.
- Rubber glue.
- Clear nail polish.
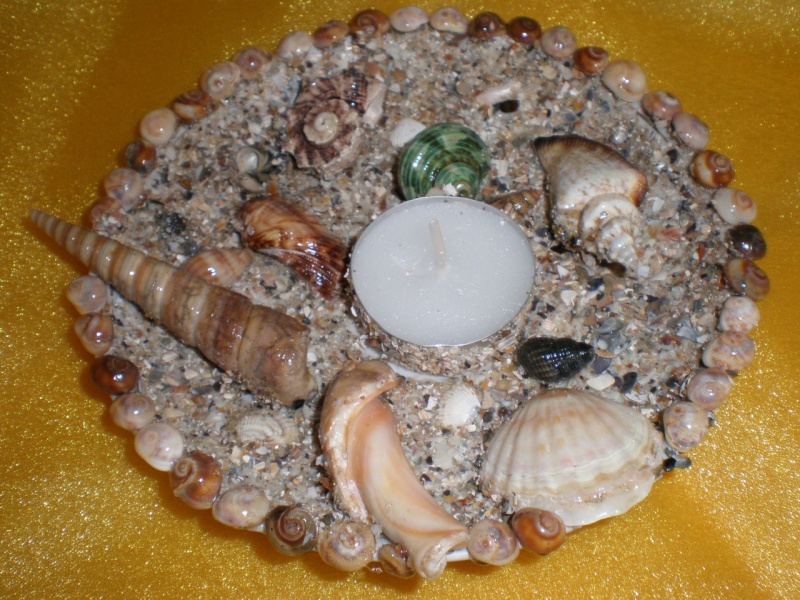
For such crafts you need really little time.
We paint the shells, each in a different color. Leave them to dry, cover the surface with clear nail polish. The remaining shells grind into small chips. Glue the shells to the disk, sprinkle it with shell crumbs, imitating the surface of the seabed. Additionally, we decorate the product with transparent pebbles, beads.
It will be interesting to you:OVERVIEW: Simple and voluminous DIY paper snowflakes: 75+ Photos with Step-by-step instructions. We decorate the house for the holiday (+ Reviews)
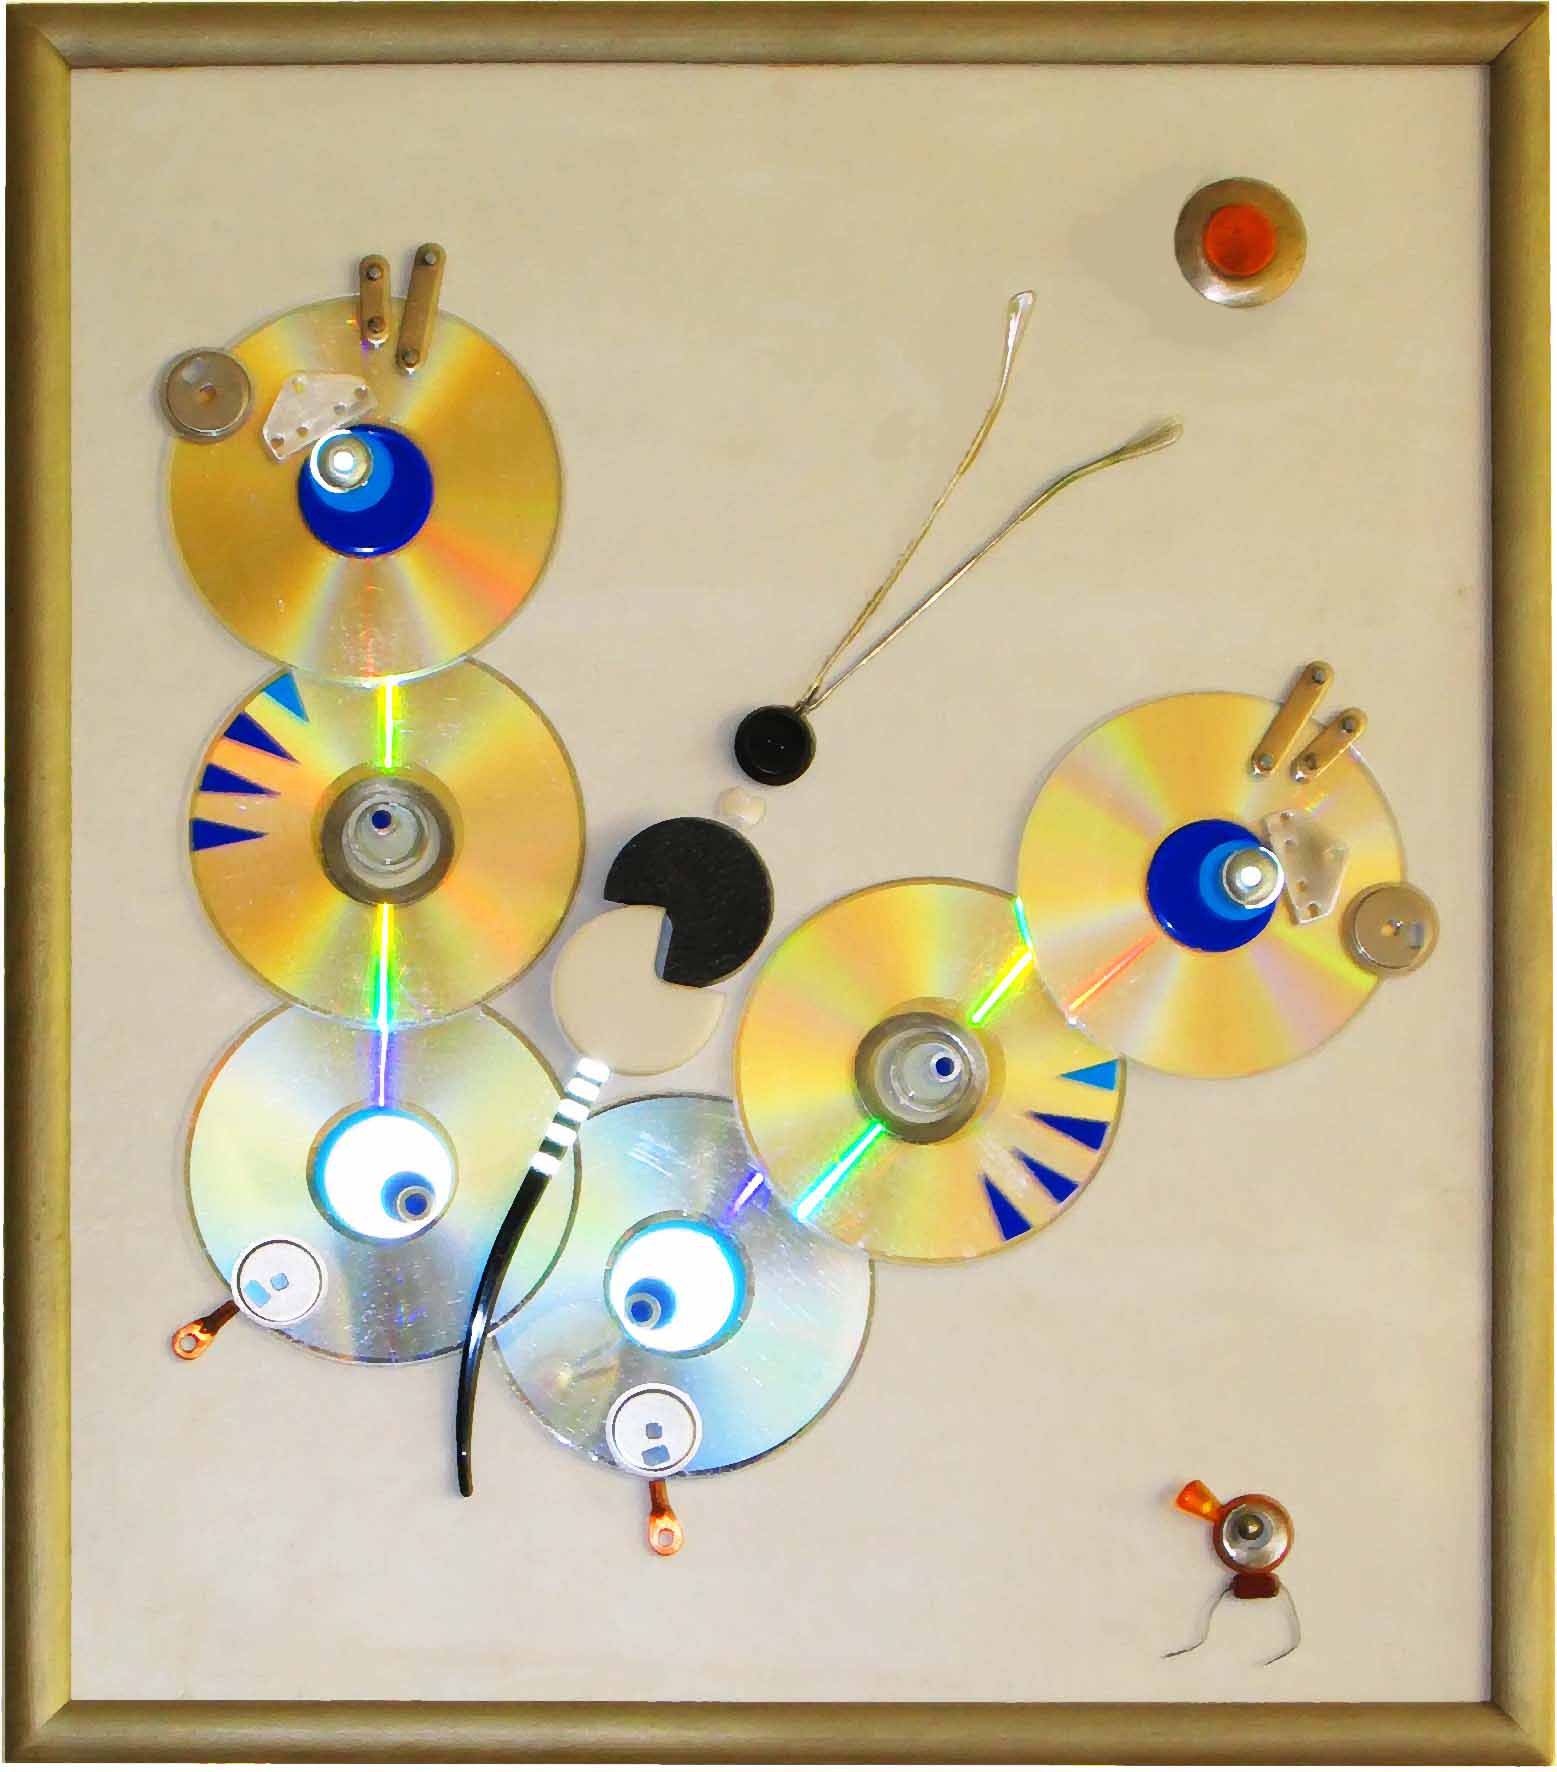
return to menu ↑ return to menu ↑Dressing with fragments
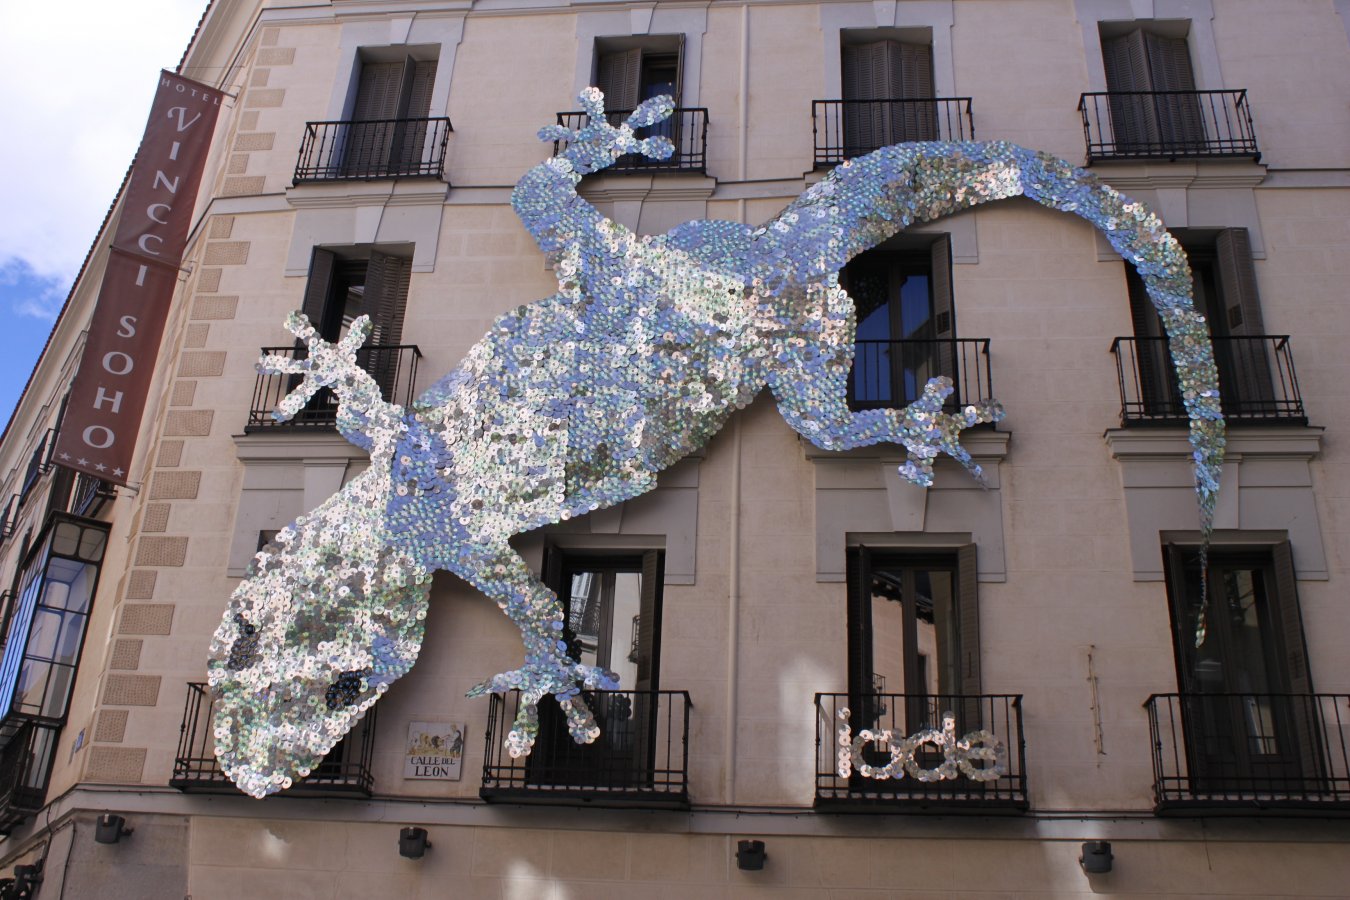
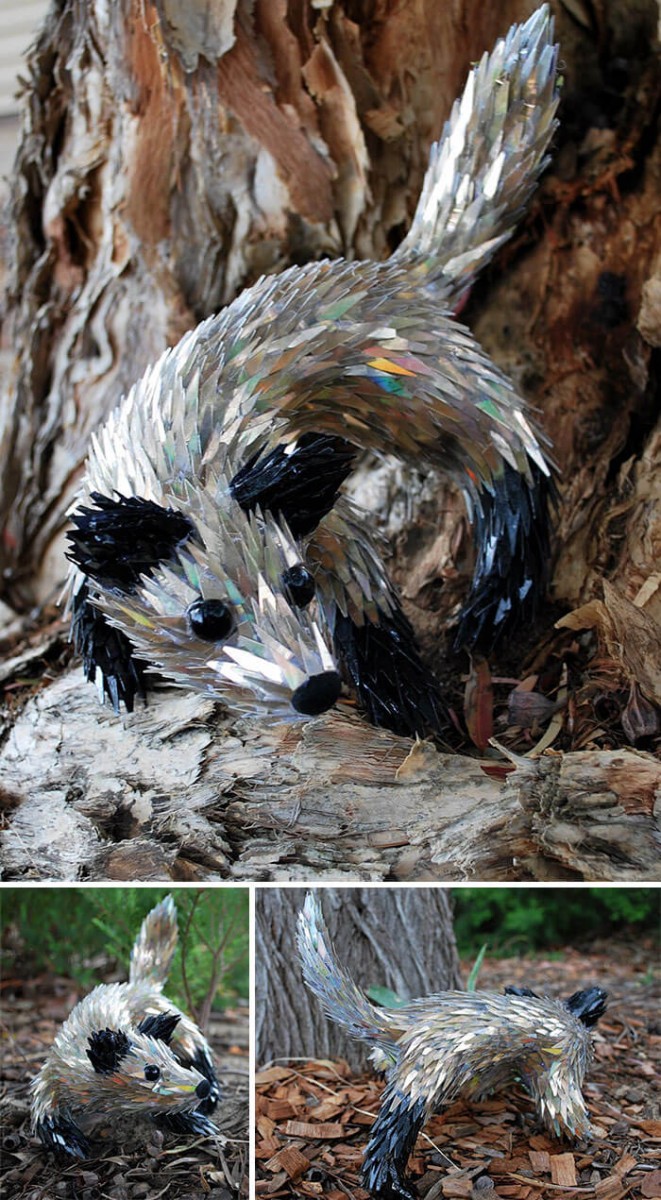
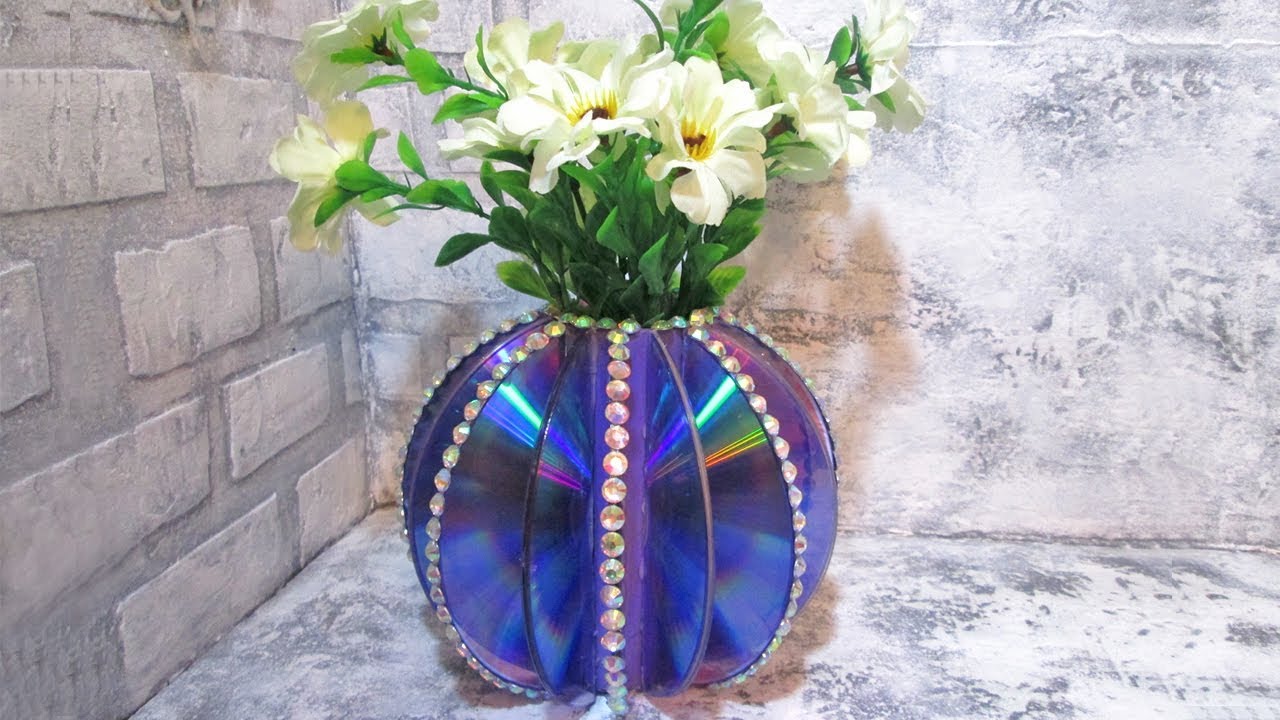
This material colorfully shimmers in the sun, has a bright shiny surface. This property can be used for decorating various items: jewelry boxes, photo frames, vases, flower pots.
return to menu ↑Picture frame
For the manufacture of crafts are needed:
- Rubber glue.
- Old CDs.
- Thick cardboard.
- Scissors.
- Gouache.
- Ruler.
- A simple pencil.

Brilliant idea to recycle disks
Before you begin, you need to measure the size of the desired photo for which the frame will be made. You can simply circle the photo on the cardboard, and around it you can already create the outline of the future frame.
- From a cardboard we cut a frame under the photos of the desired size. We paint it with gouache (can be in different colors) on both sides. Apply the paint in several layers so that the cardboard is not translucent.
- Cut the discs with scissors into pieces of different shape and size. Glue them to the frame, after attaching them to the surface and estimating how they will look. If desired, we use a thin brush to pass through the cracks, cracks between the fragments, painting them with white gouache.
- Leave the frame for 30 minutes until completely dry. Cut out the cardboard stand and glue it to the back of the frame.
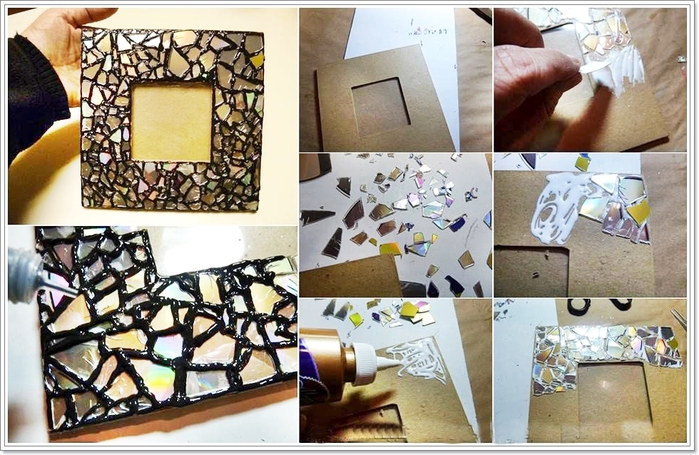
First, it is important to measure the size of the photo.
It will be interesting to you:REVIEW: How to make beautiful balls for the New Year 2019 with your own hands? Interesting and voluminous Crafts (115+ Photos). 9 step-by-step master classes
return to menu ↑Flower pot sparkling in the sun
Turning a regular flower pot into a magic pot is easier than ever. You will need old CDs, scissors, glue gun and a little imagination.
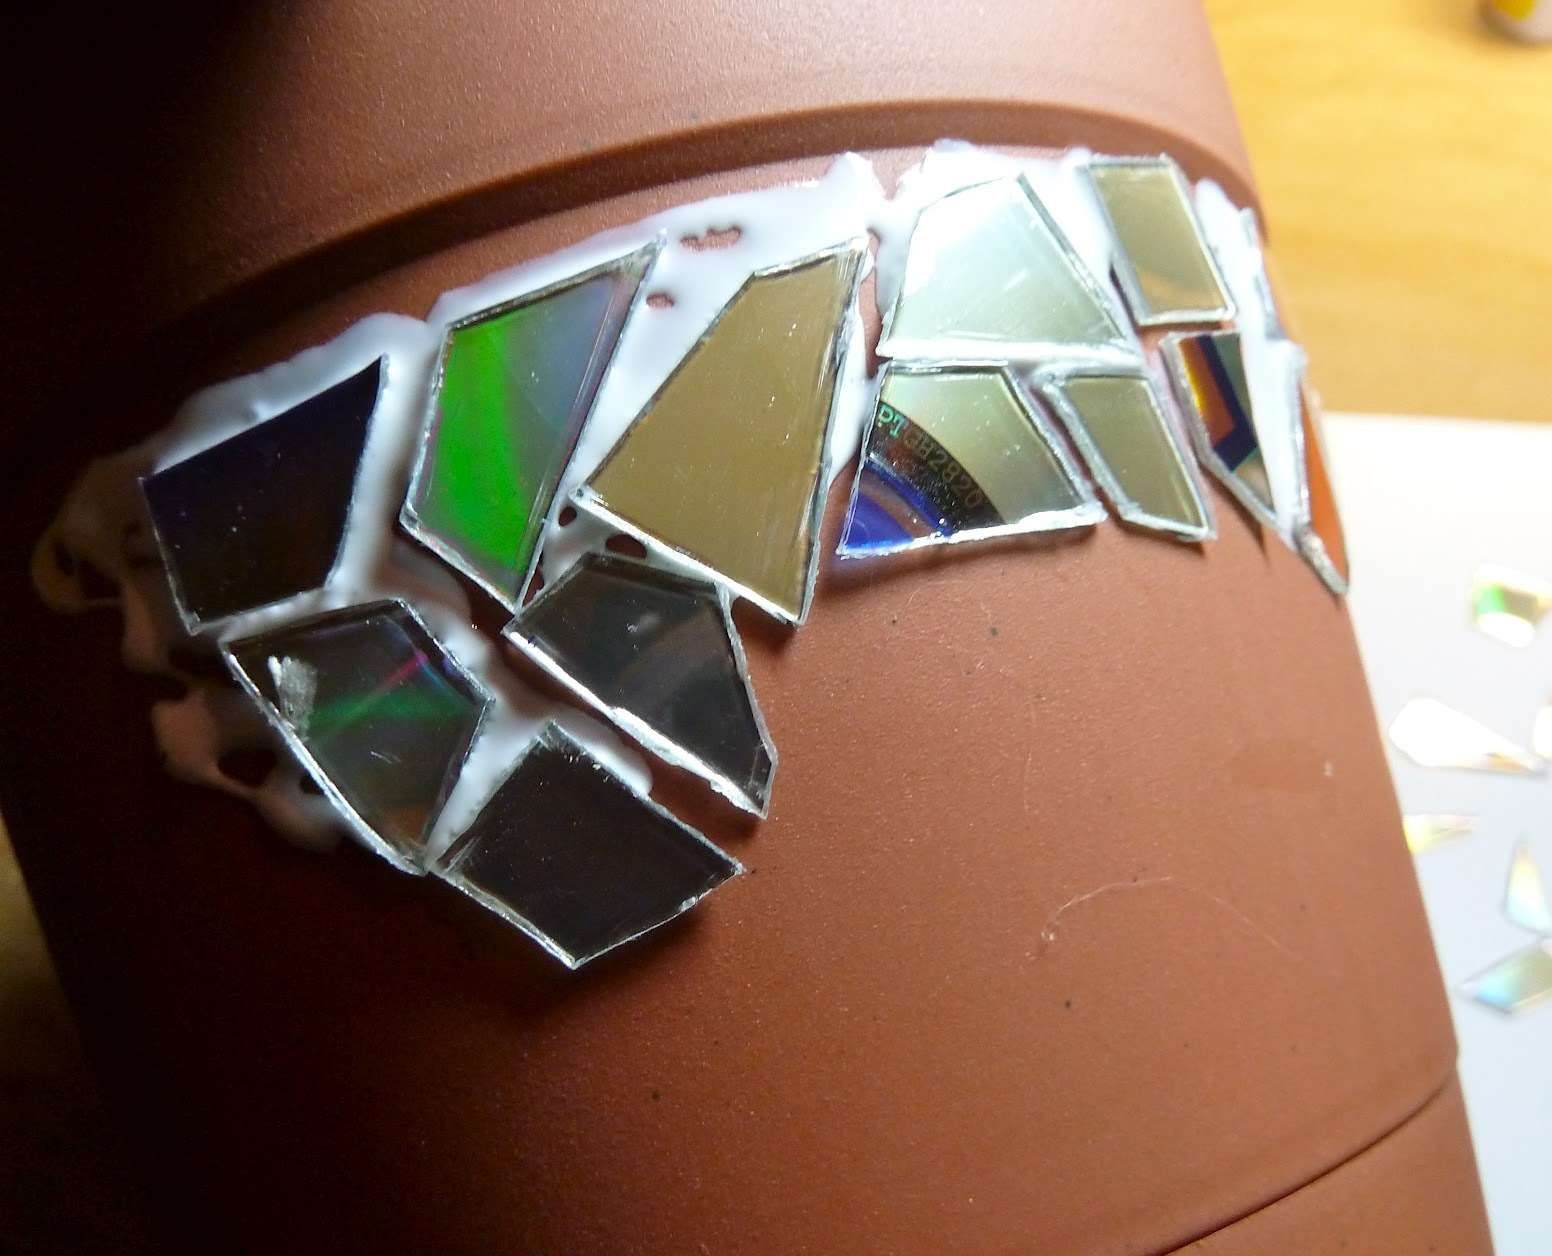
Apply to the glue in small pieces
To begin with, we wash the pot, if there are particles of earth on it, wipe dry. Cut the discs with scissors into small pieces of different shapes. Glue them to the pot with a glue gun. The handicraft is ready.
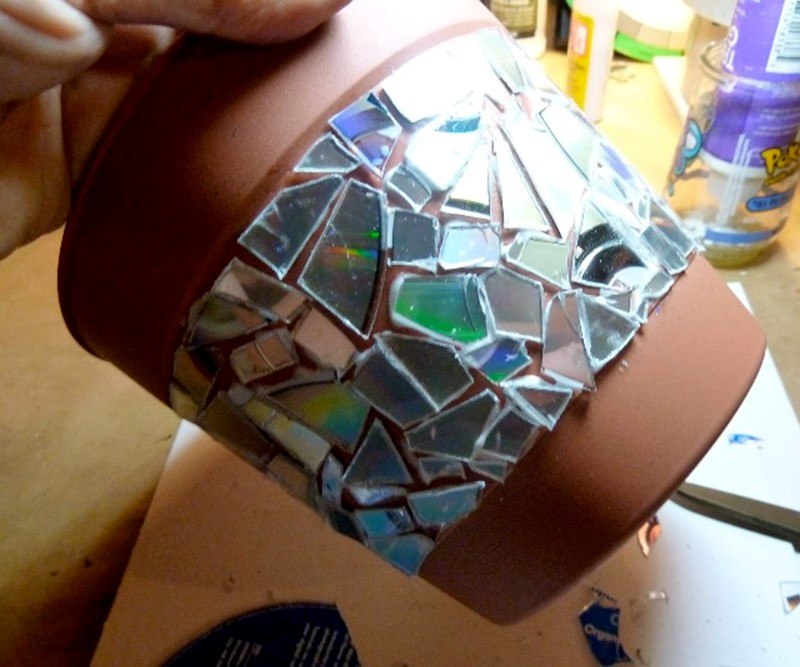
Ready option for a flower
It will be interesting to you:REVIEW: Decorations of paper toys for the new year 2018 Dogs. Make the holiday really bright!
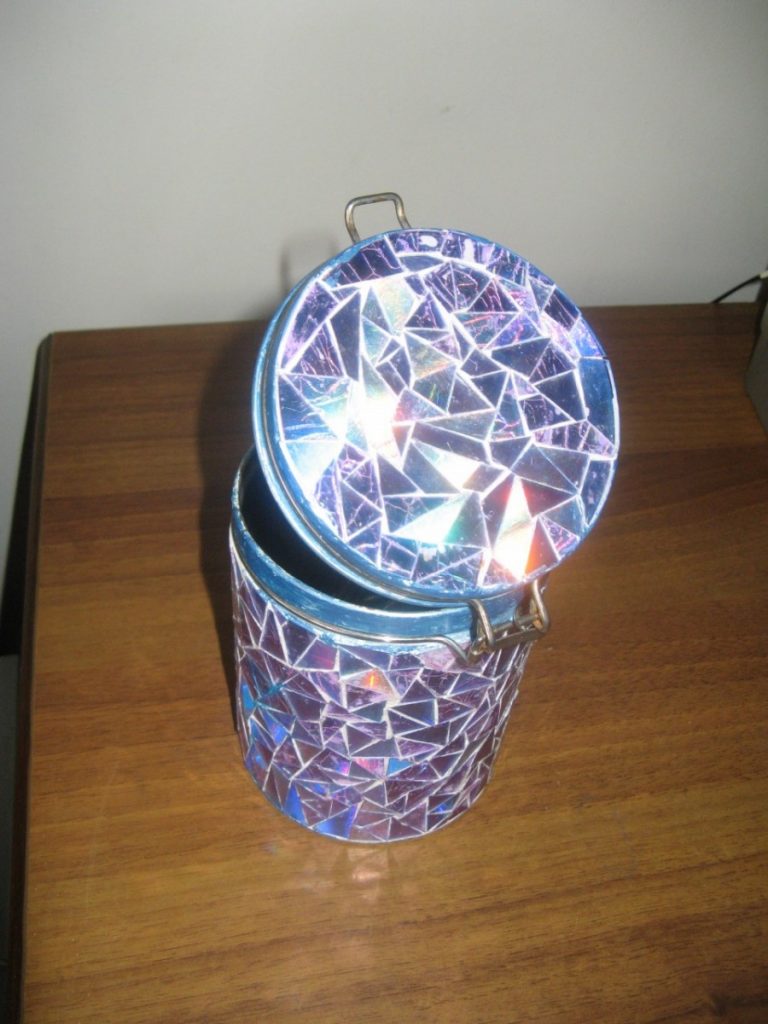
return to menu ↑Out of the box in the box
It is hard to believe, but an ordinary cardboard shoe box can turn into a beautiful and useful thing.
For the manufacture of caskets will need:
- Shoe box (it should be intact, preferably using a new box).
- Glue gun.
- Old CDs.
- Big scissors.
- Furniture stapler.
- A piece of cloth sufficiently sized to glue the box.
- Decorative elements: stones, rhinestones, beads, beads.
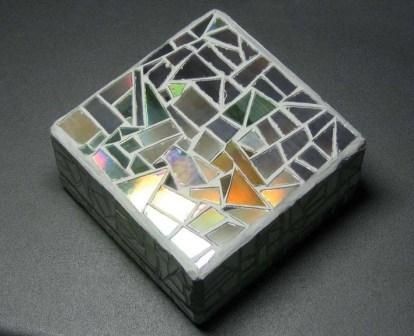
A small box for the most necessary
First, the surface of the box must be trimmed with a cloth. For these purposes, velvet is perfect, but you can use any other fabric that will look elegant. For each side of the box, cut out appropriately sized pieces of fabric, fix them on the back side with a furniture stapler.
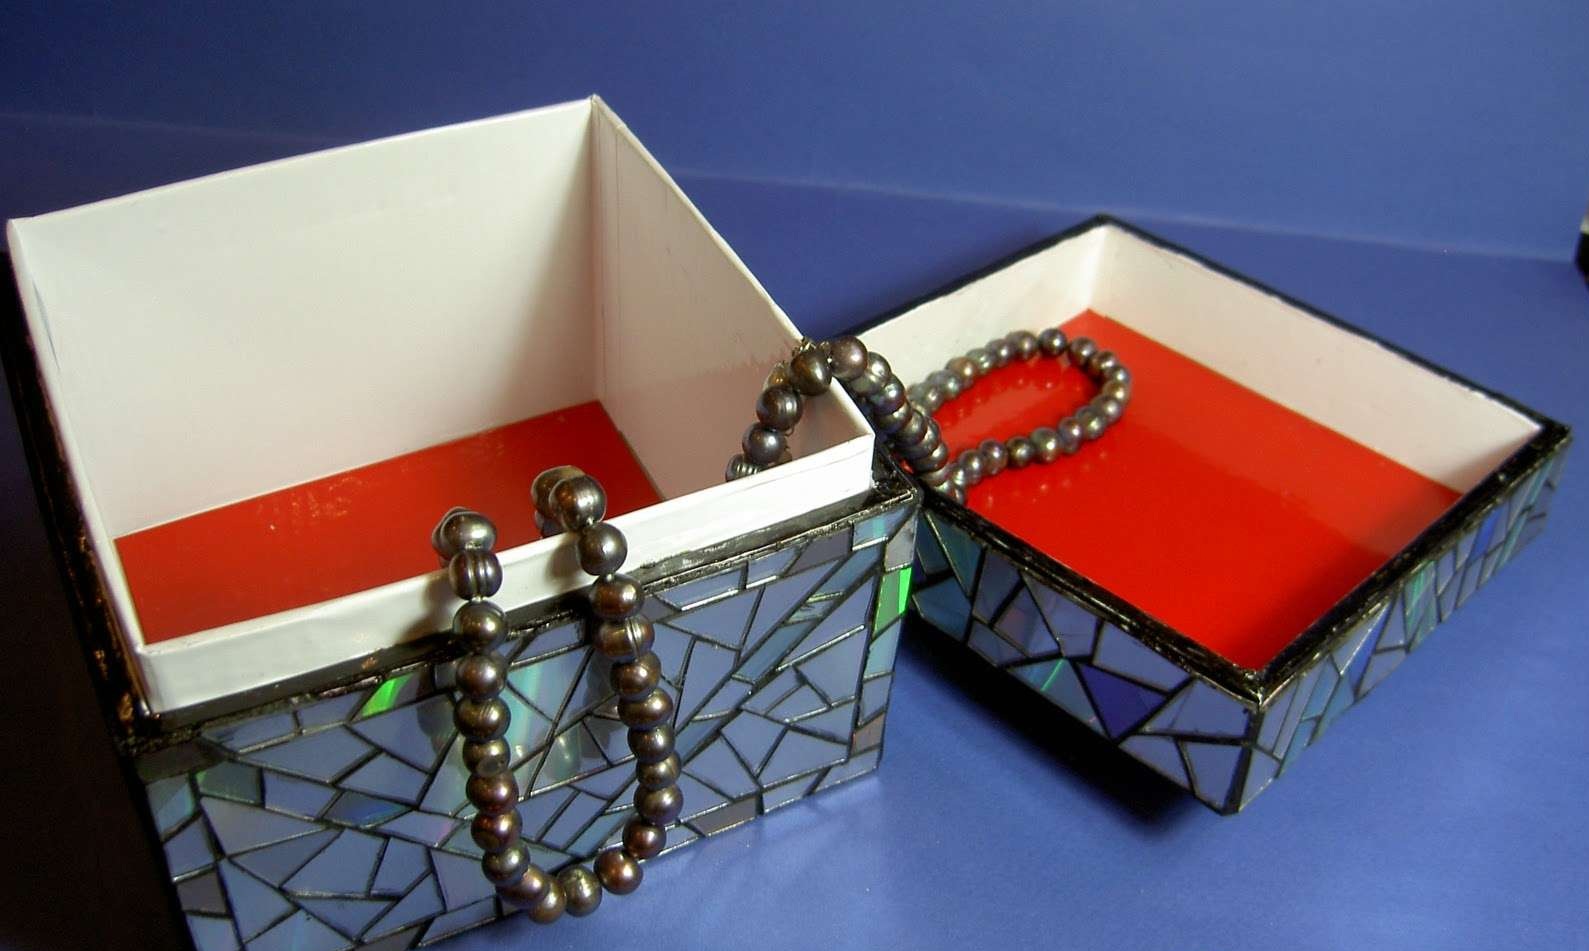
For every girl's jewelry
When the box is completely finished with fabric, proceed to the next step. We cut the compact discs with scissors, into large and small pieces. Glue them with glue-gun to our future box.
We decorate the finished product with sparkles, rhinestones, pebbles and beads, fixing them with glue. Casket is ready.
It will be interesting to you:REVIEW: Do-it-yourself templates for cereals and pasta for children (185+ Photos) - The original solution for home decorations and not only
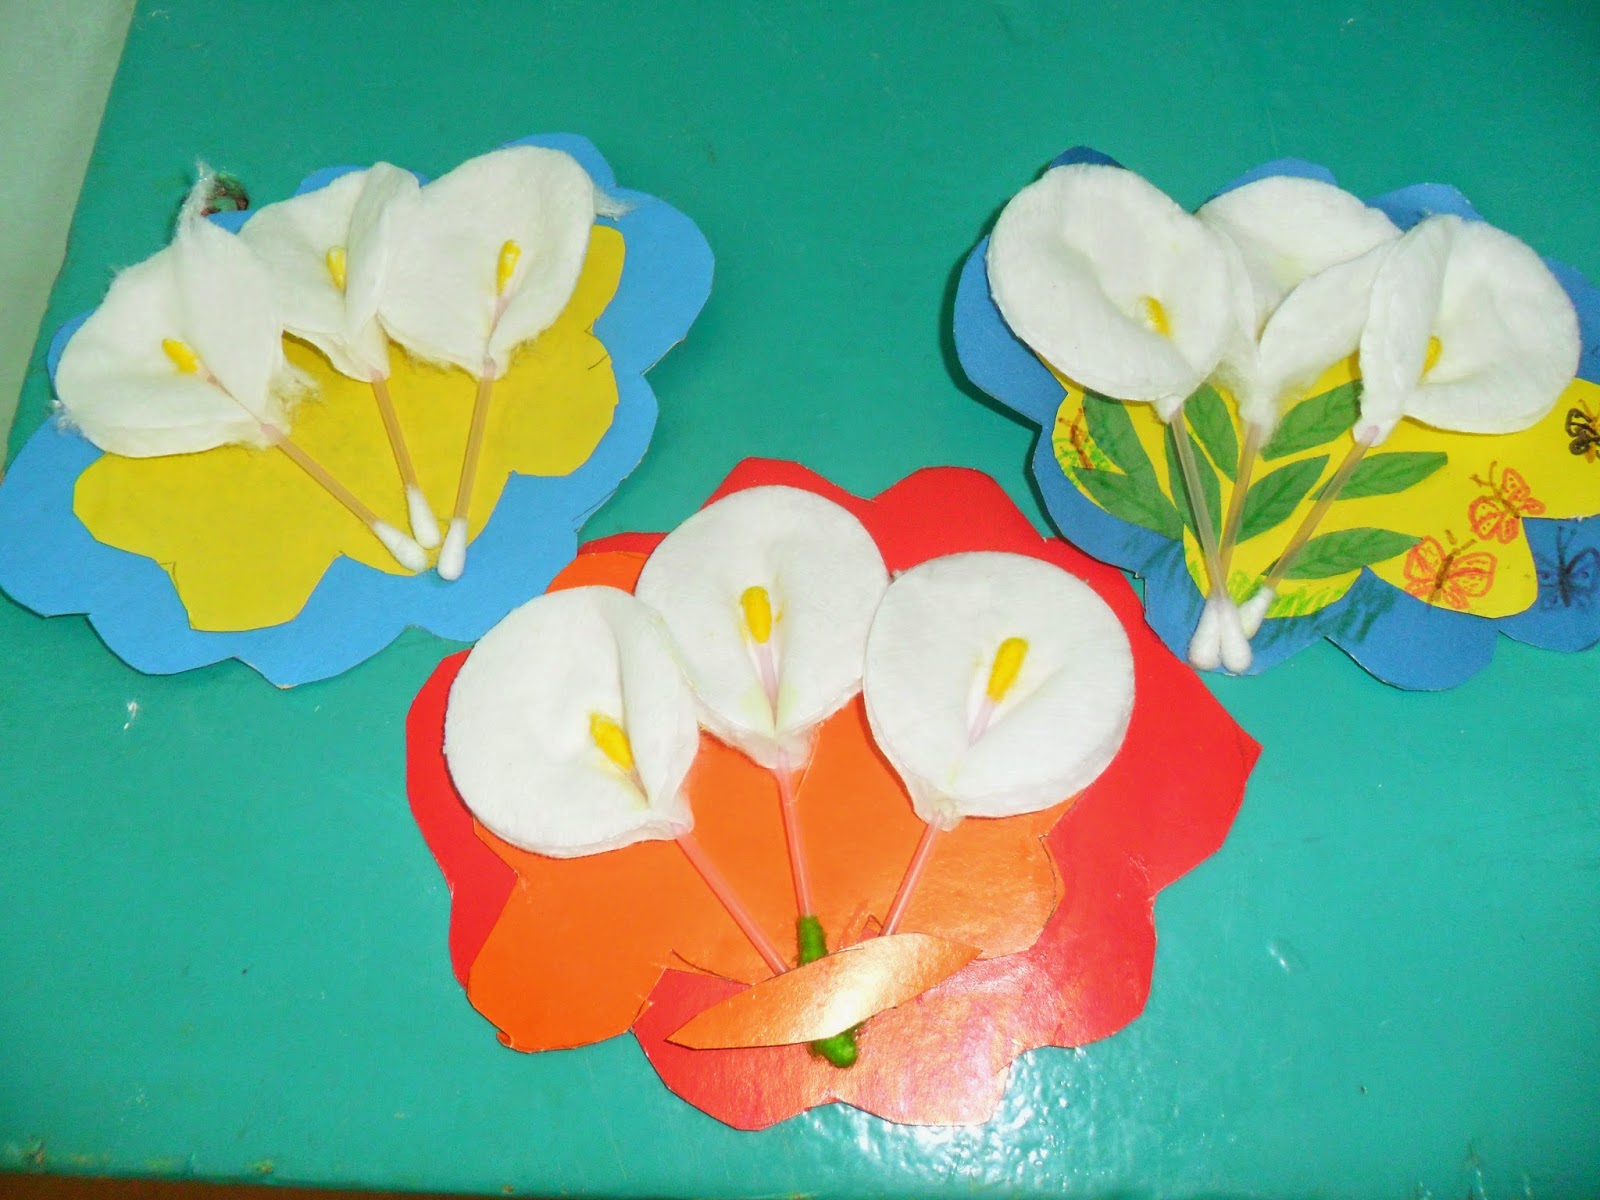
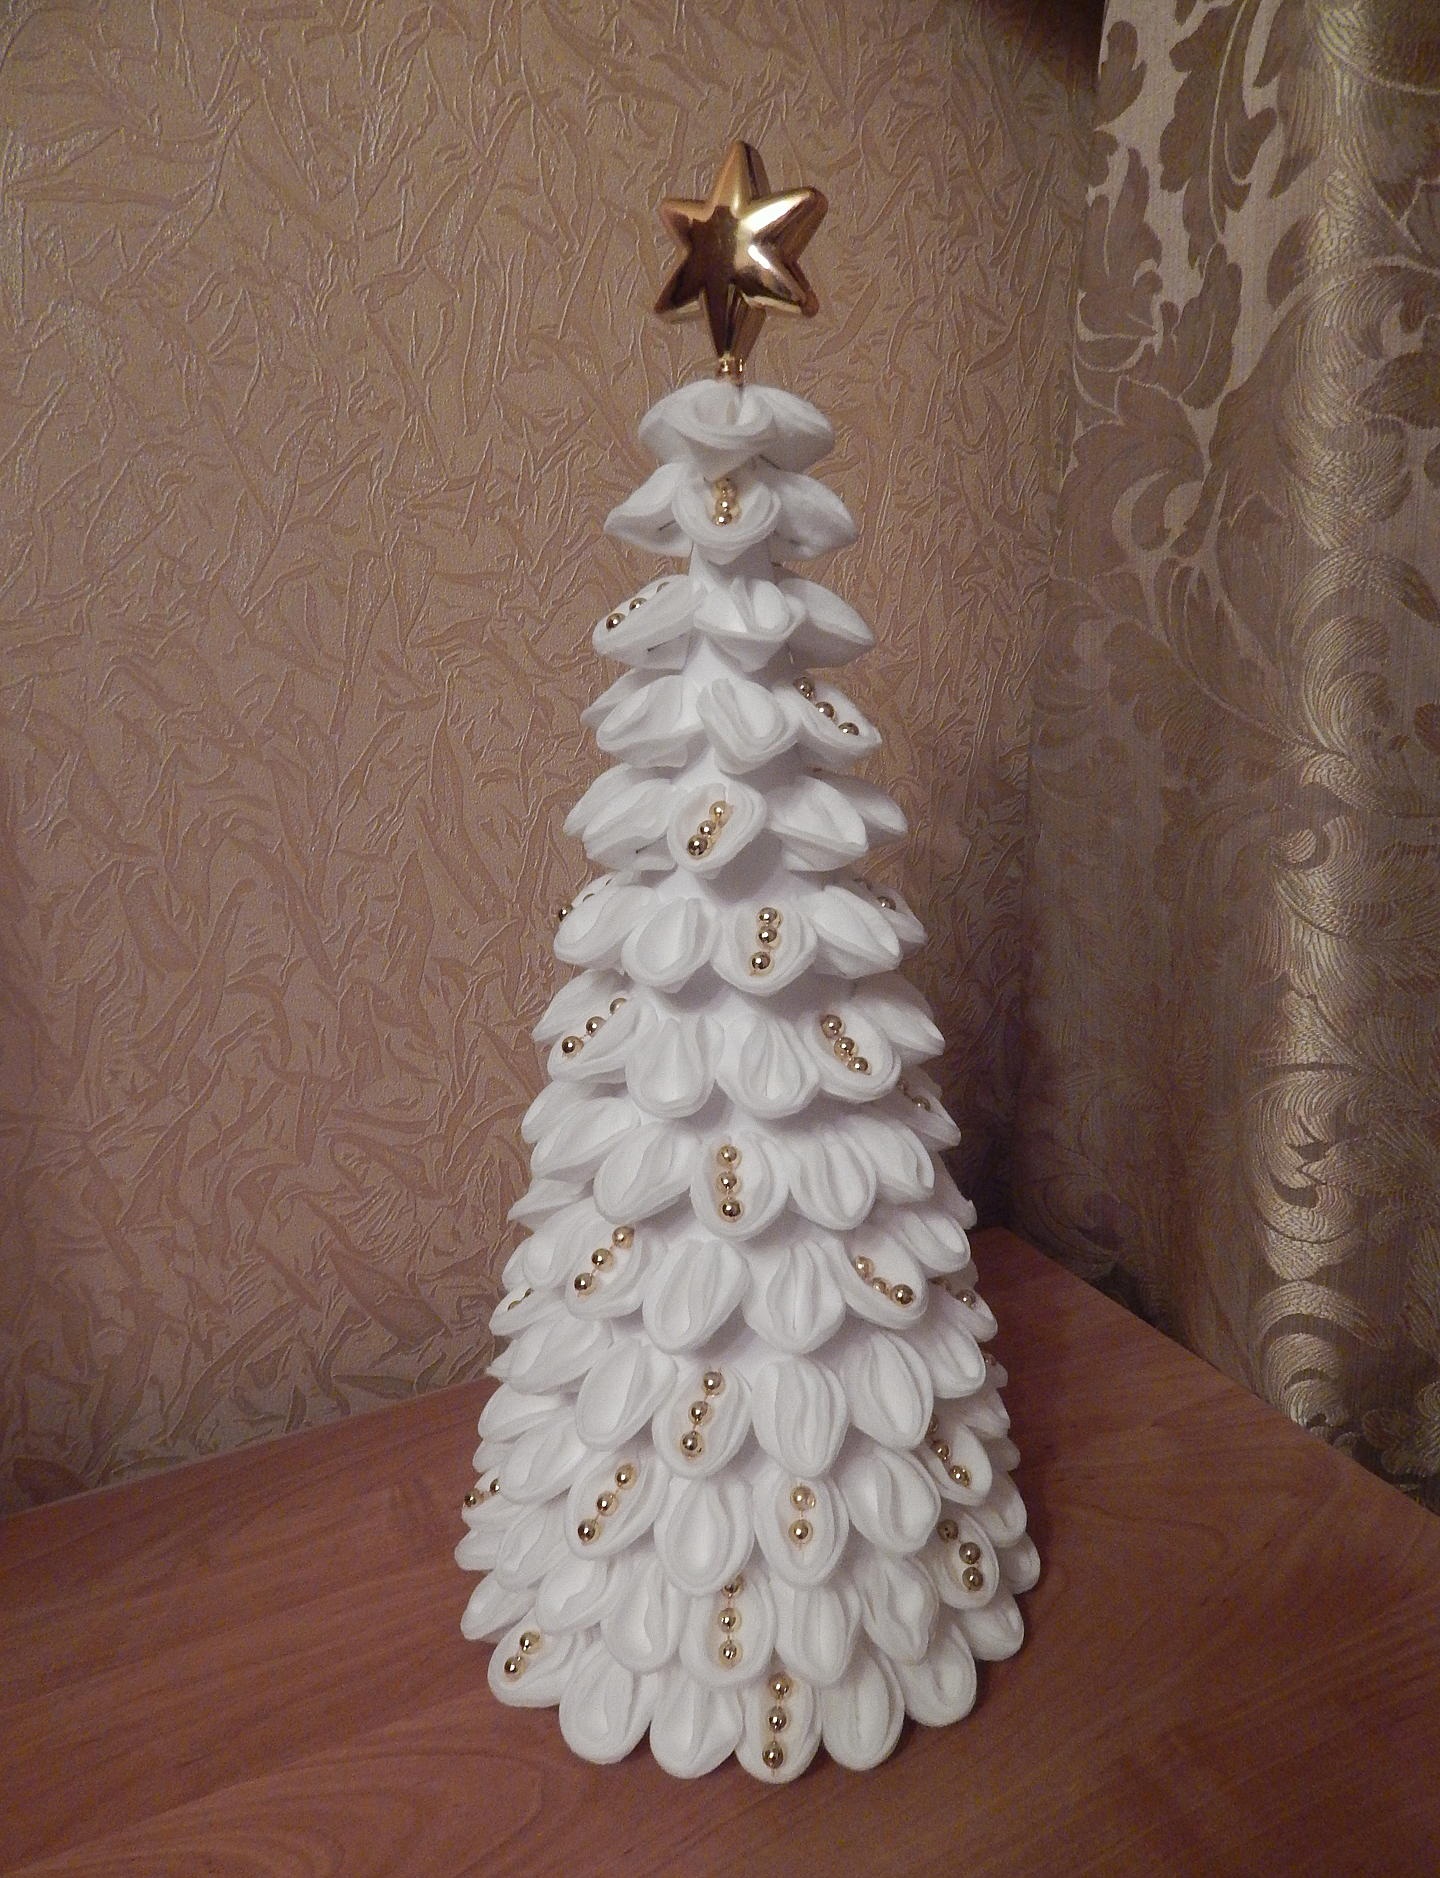
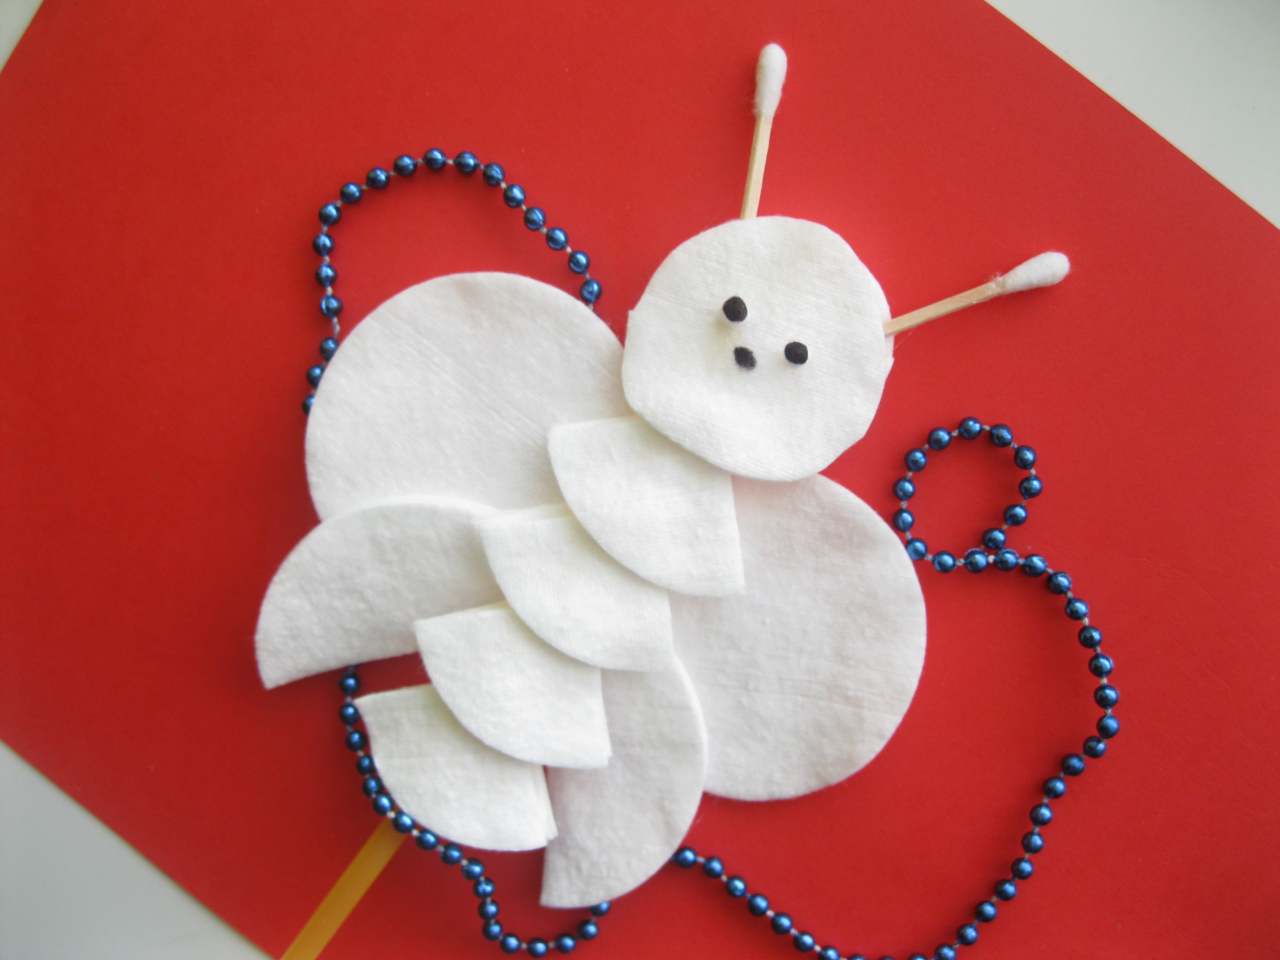
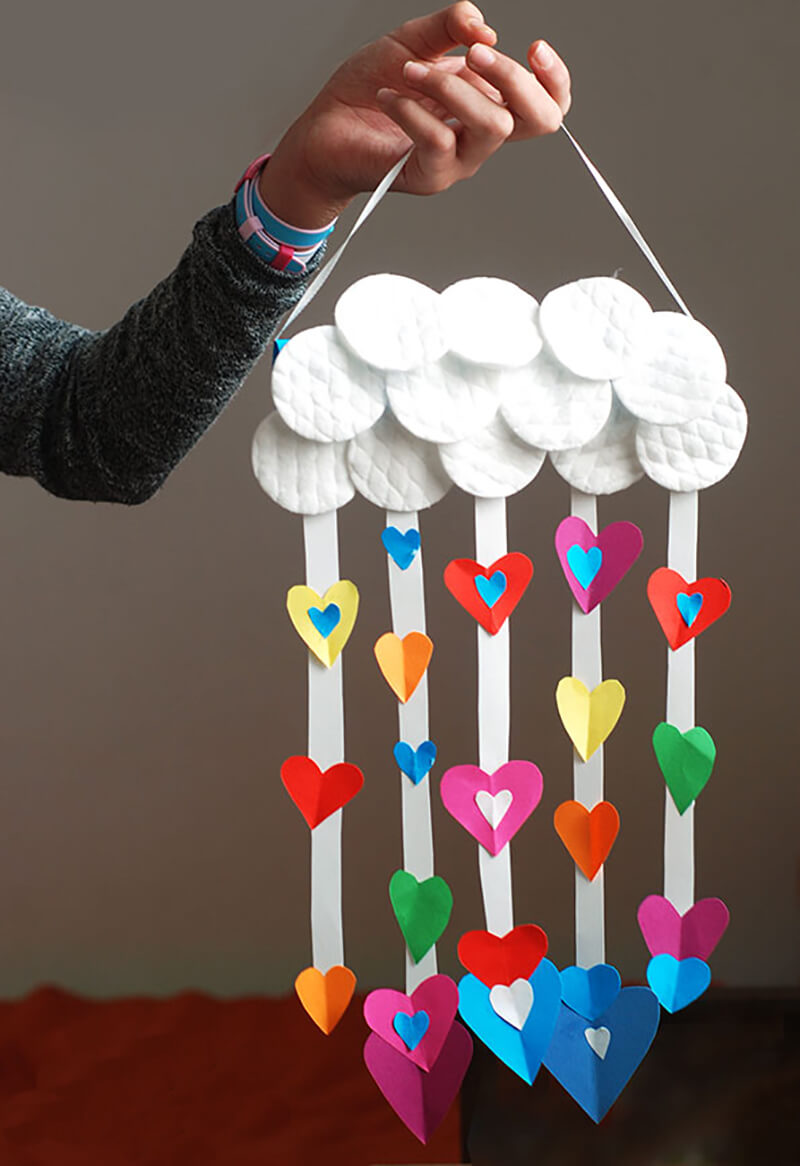
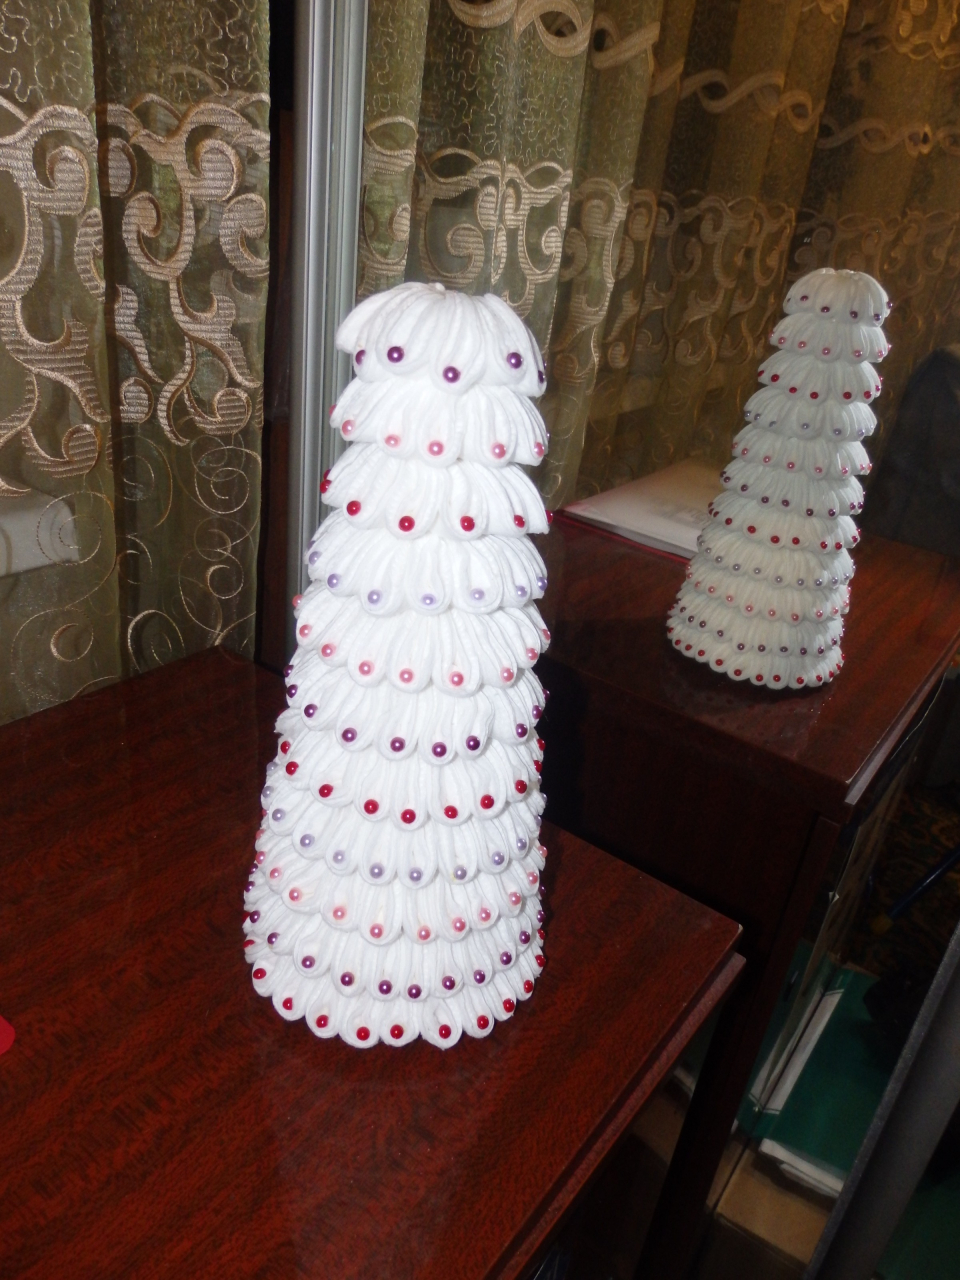
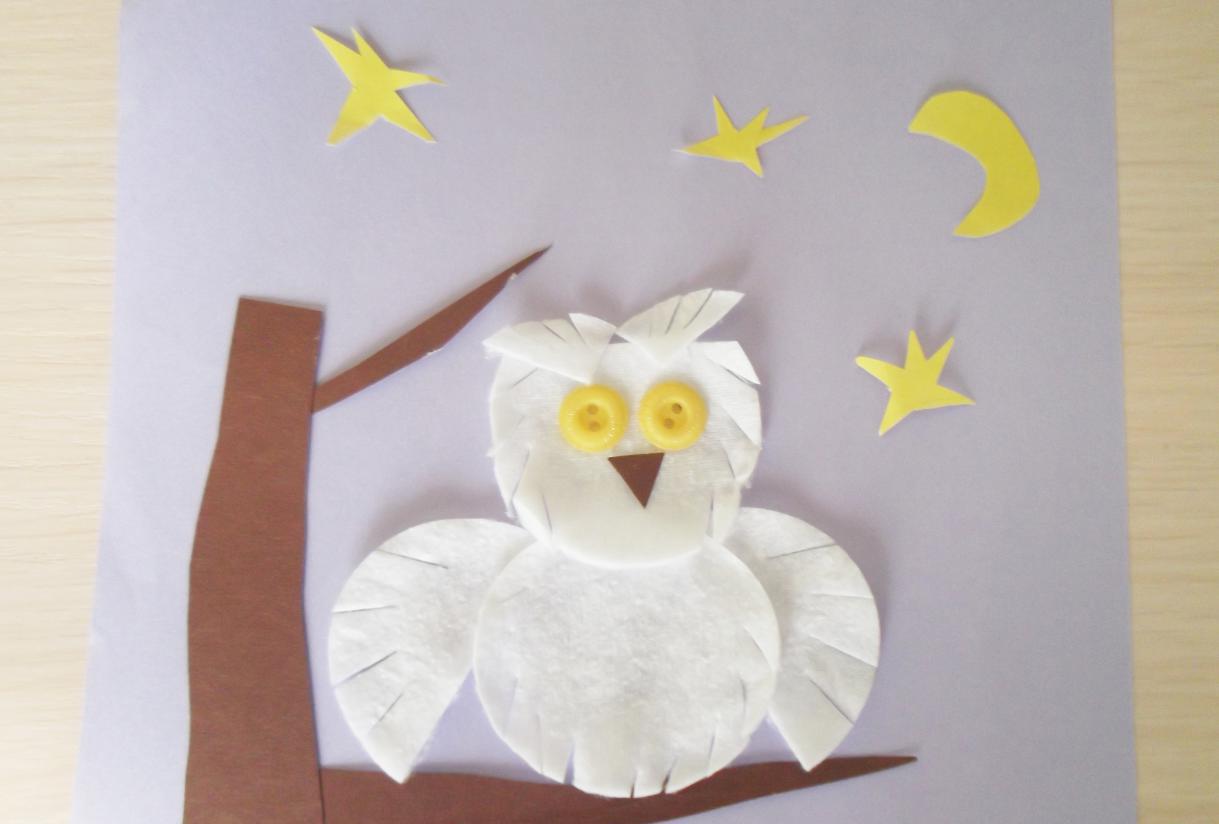
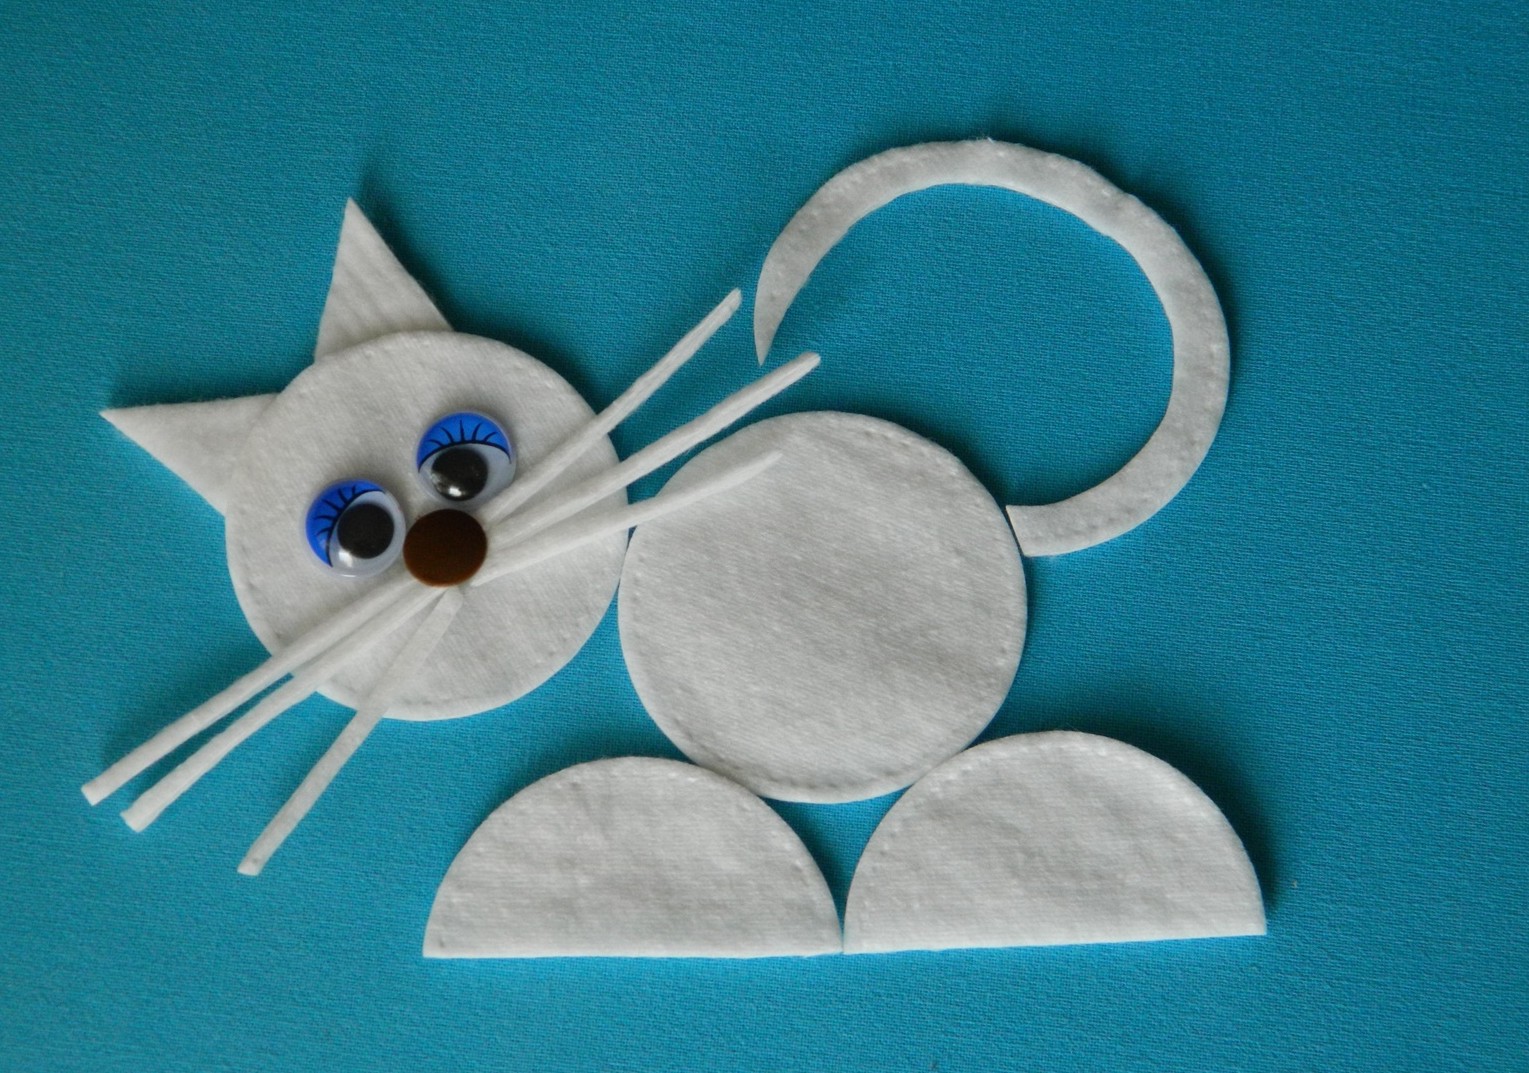
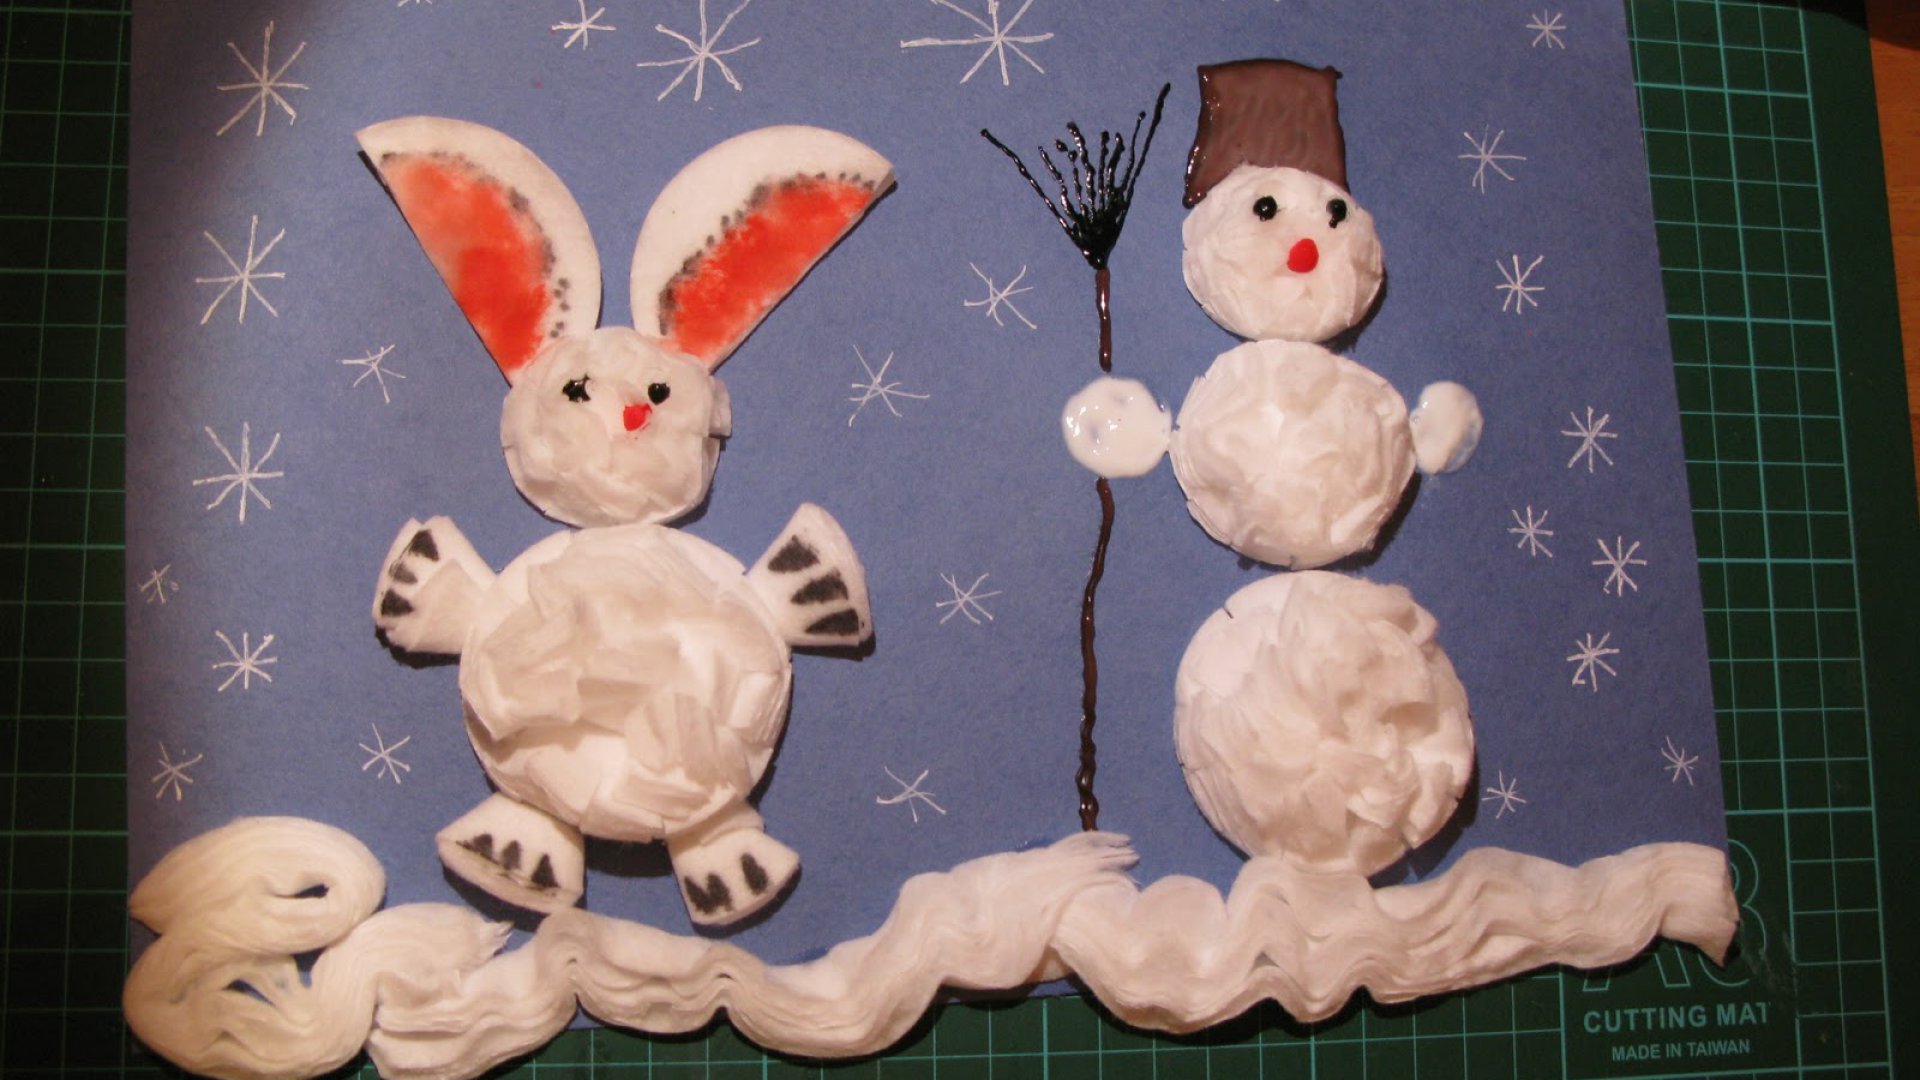
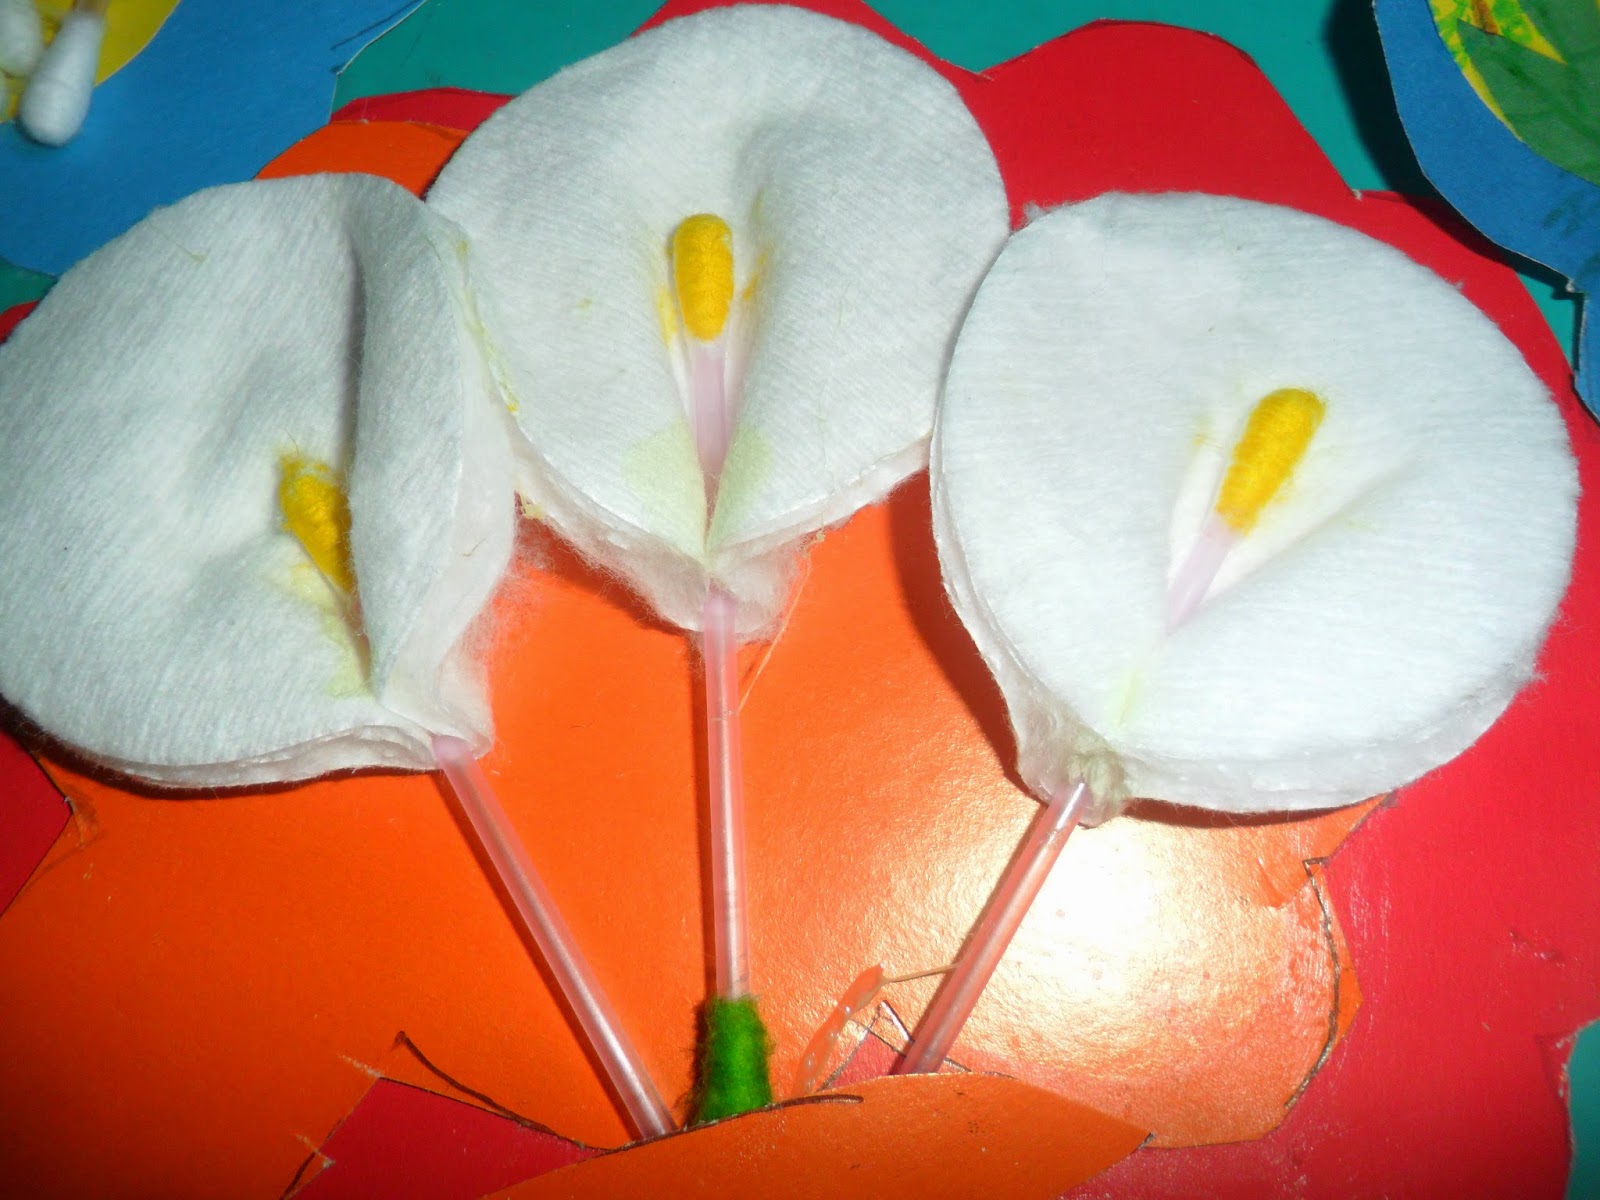
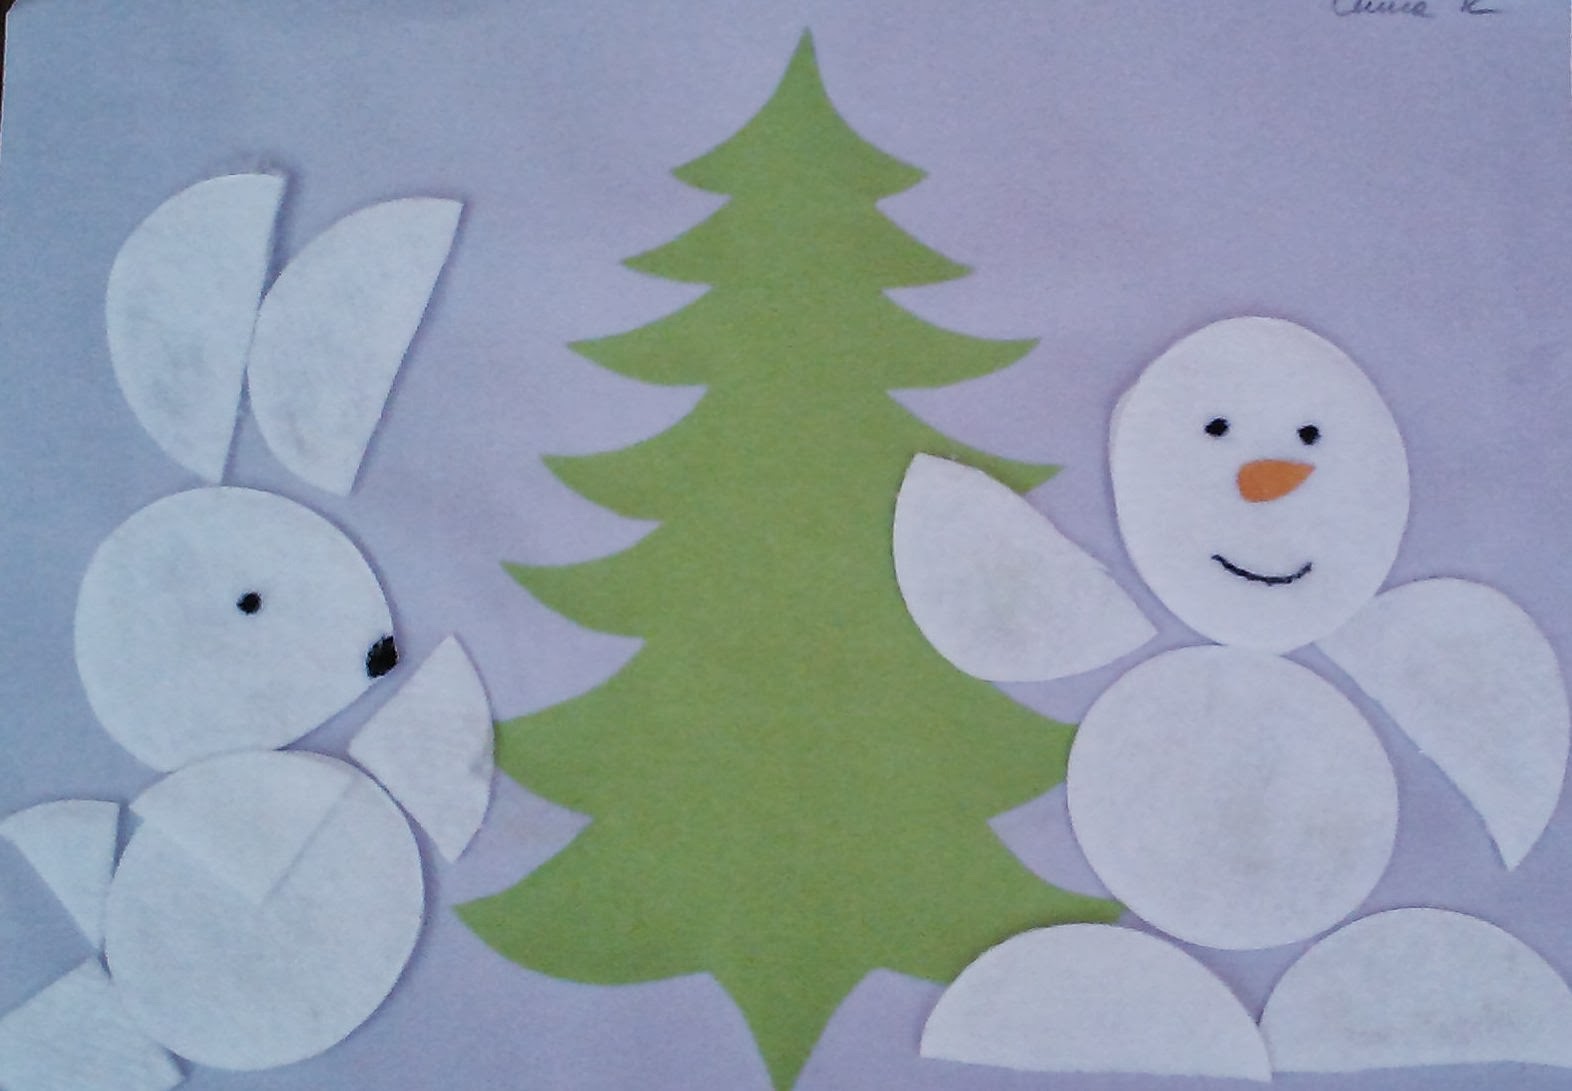
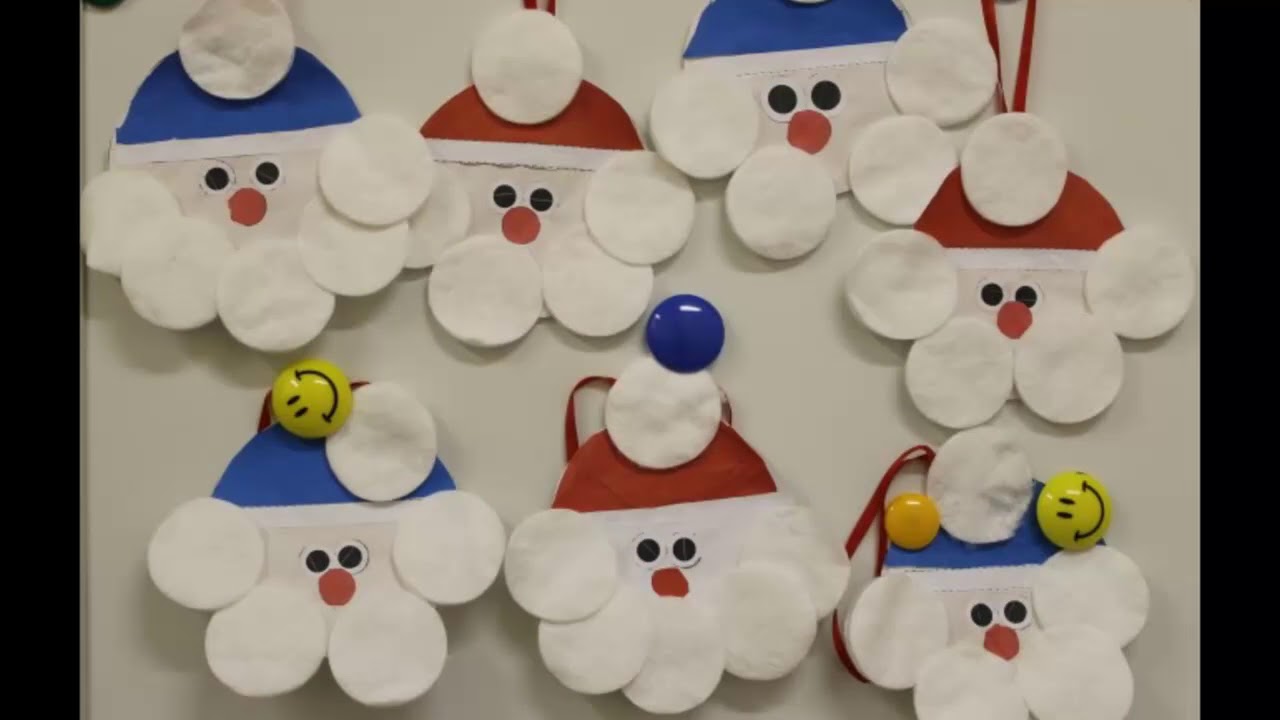
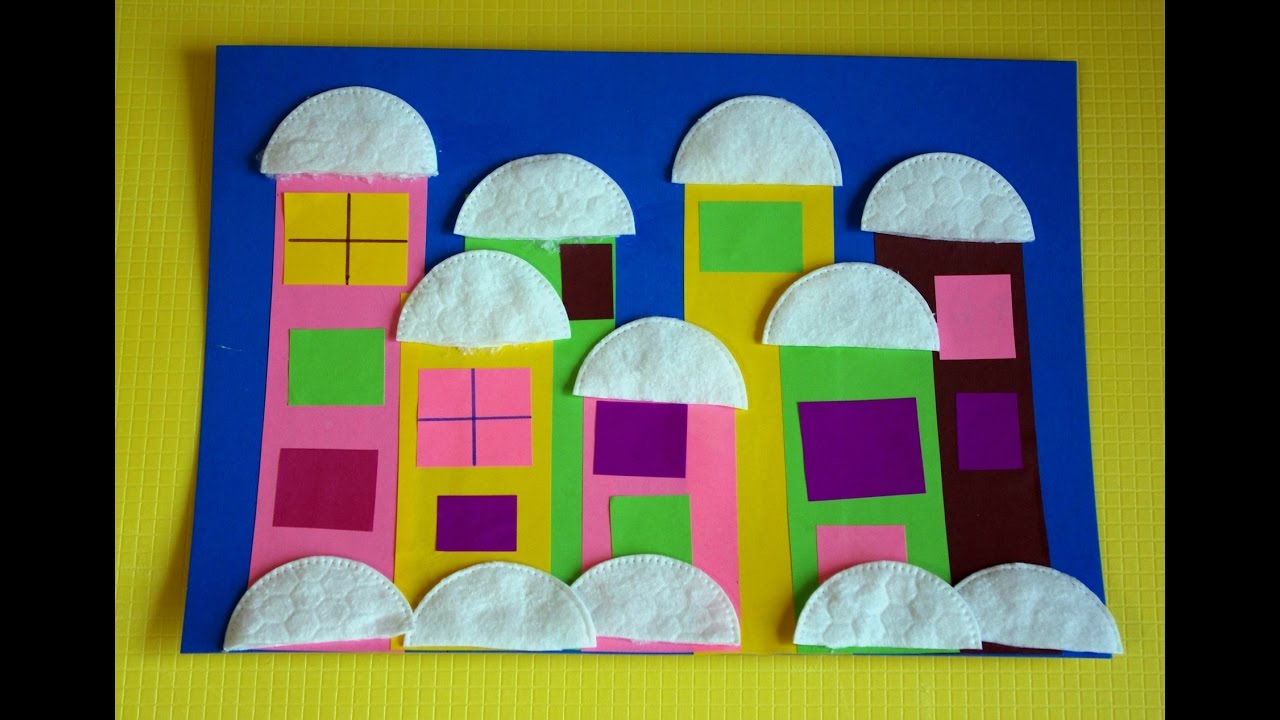
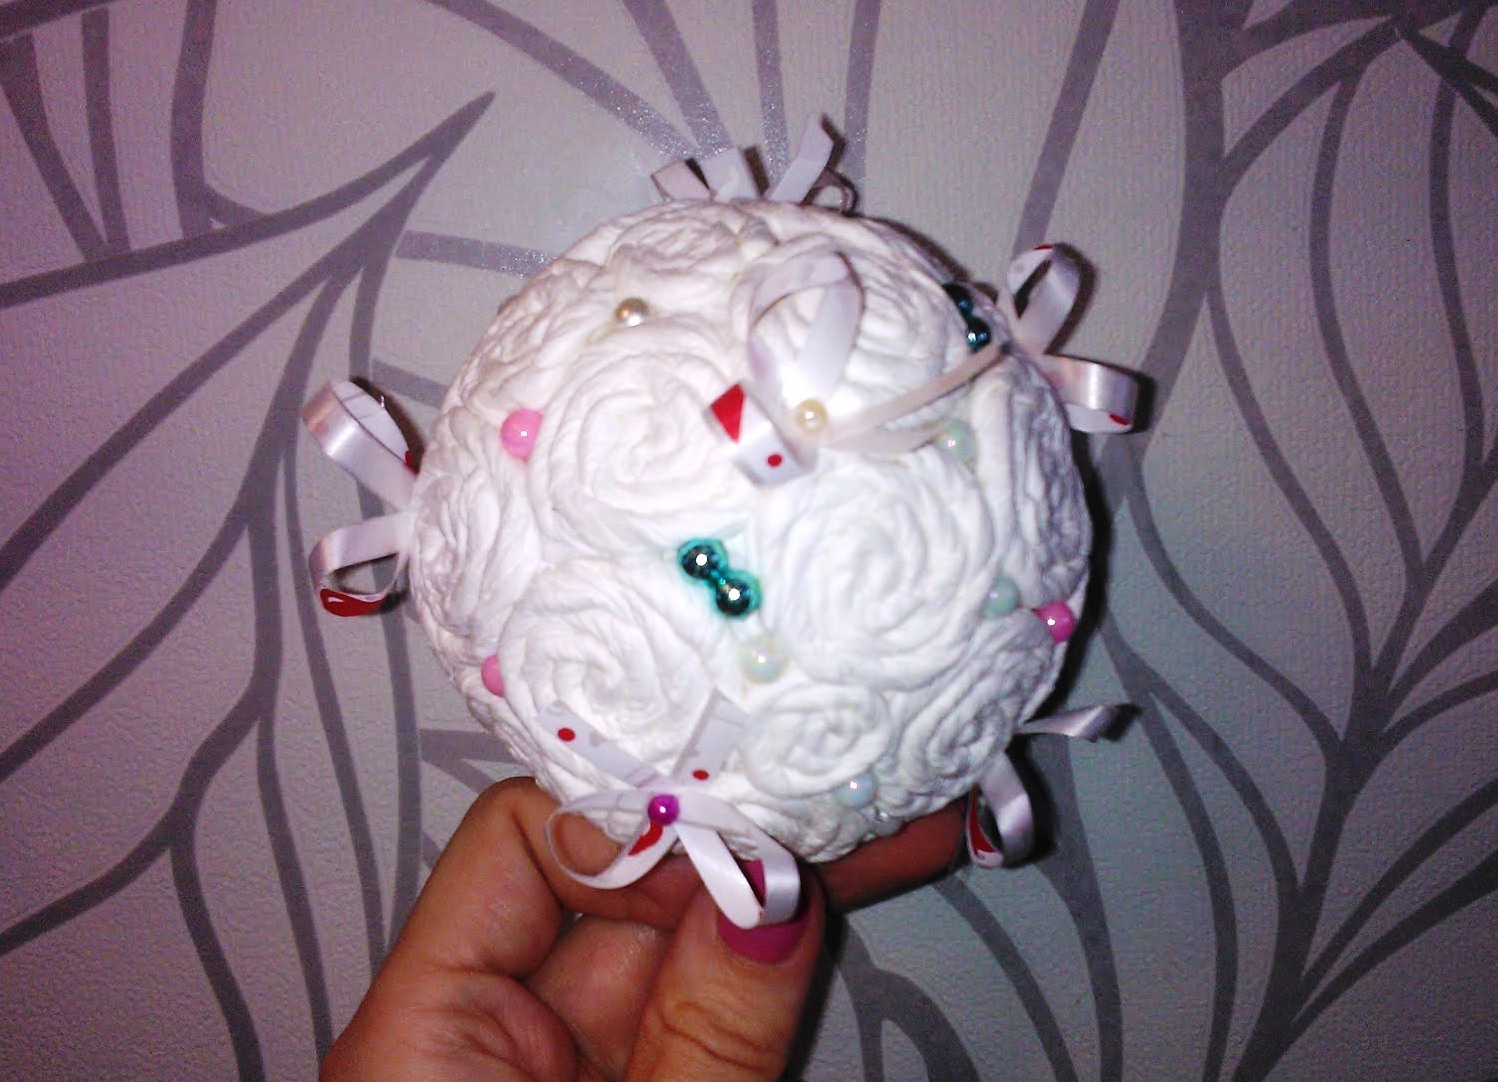
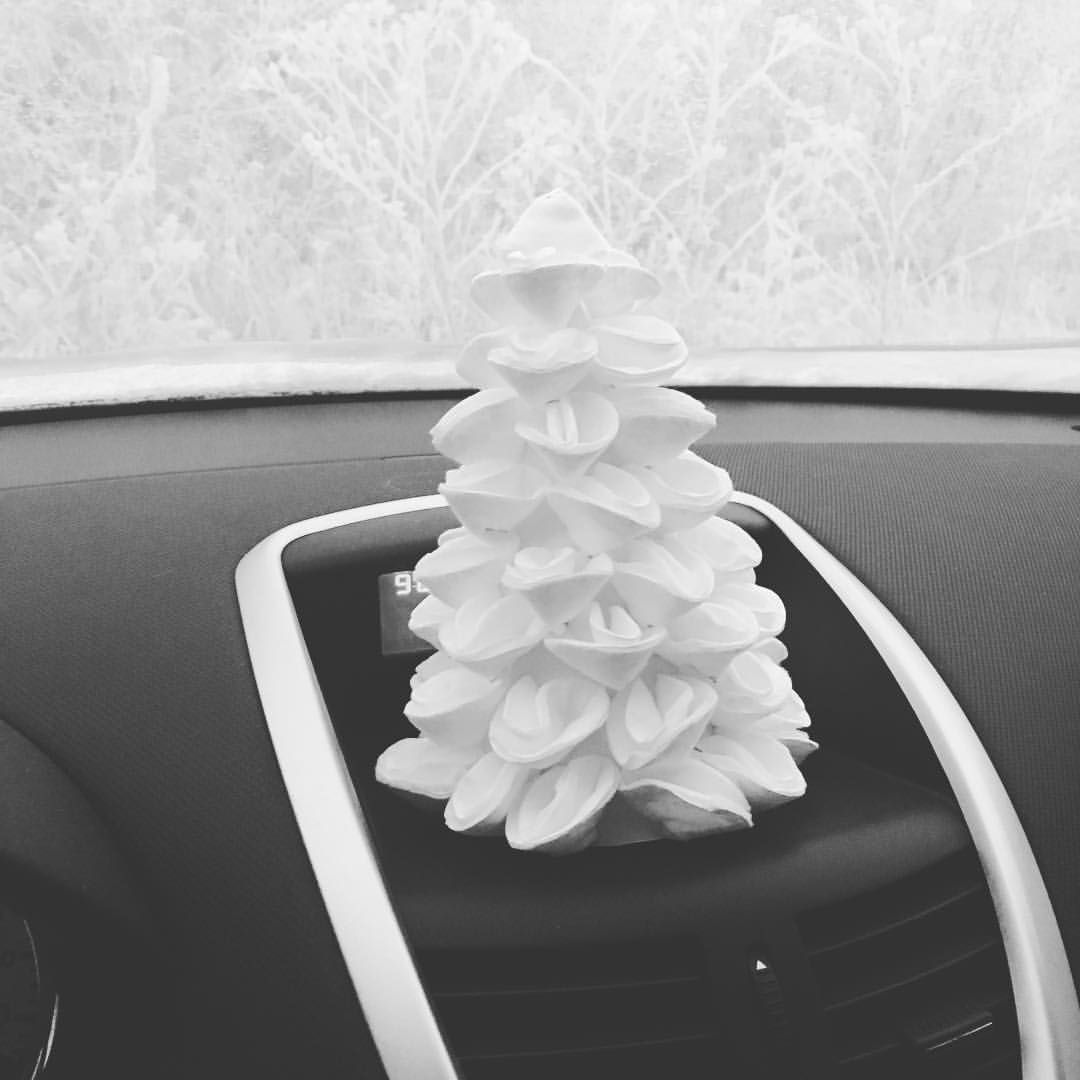
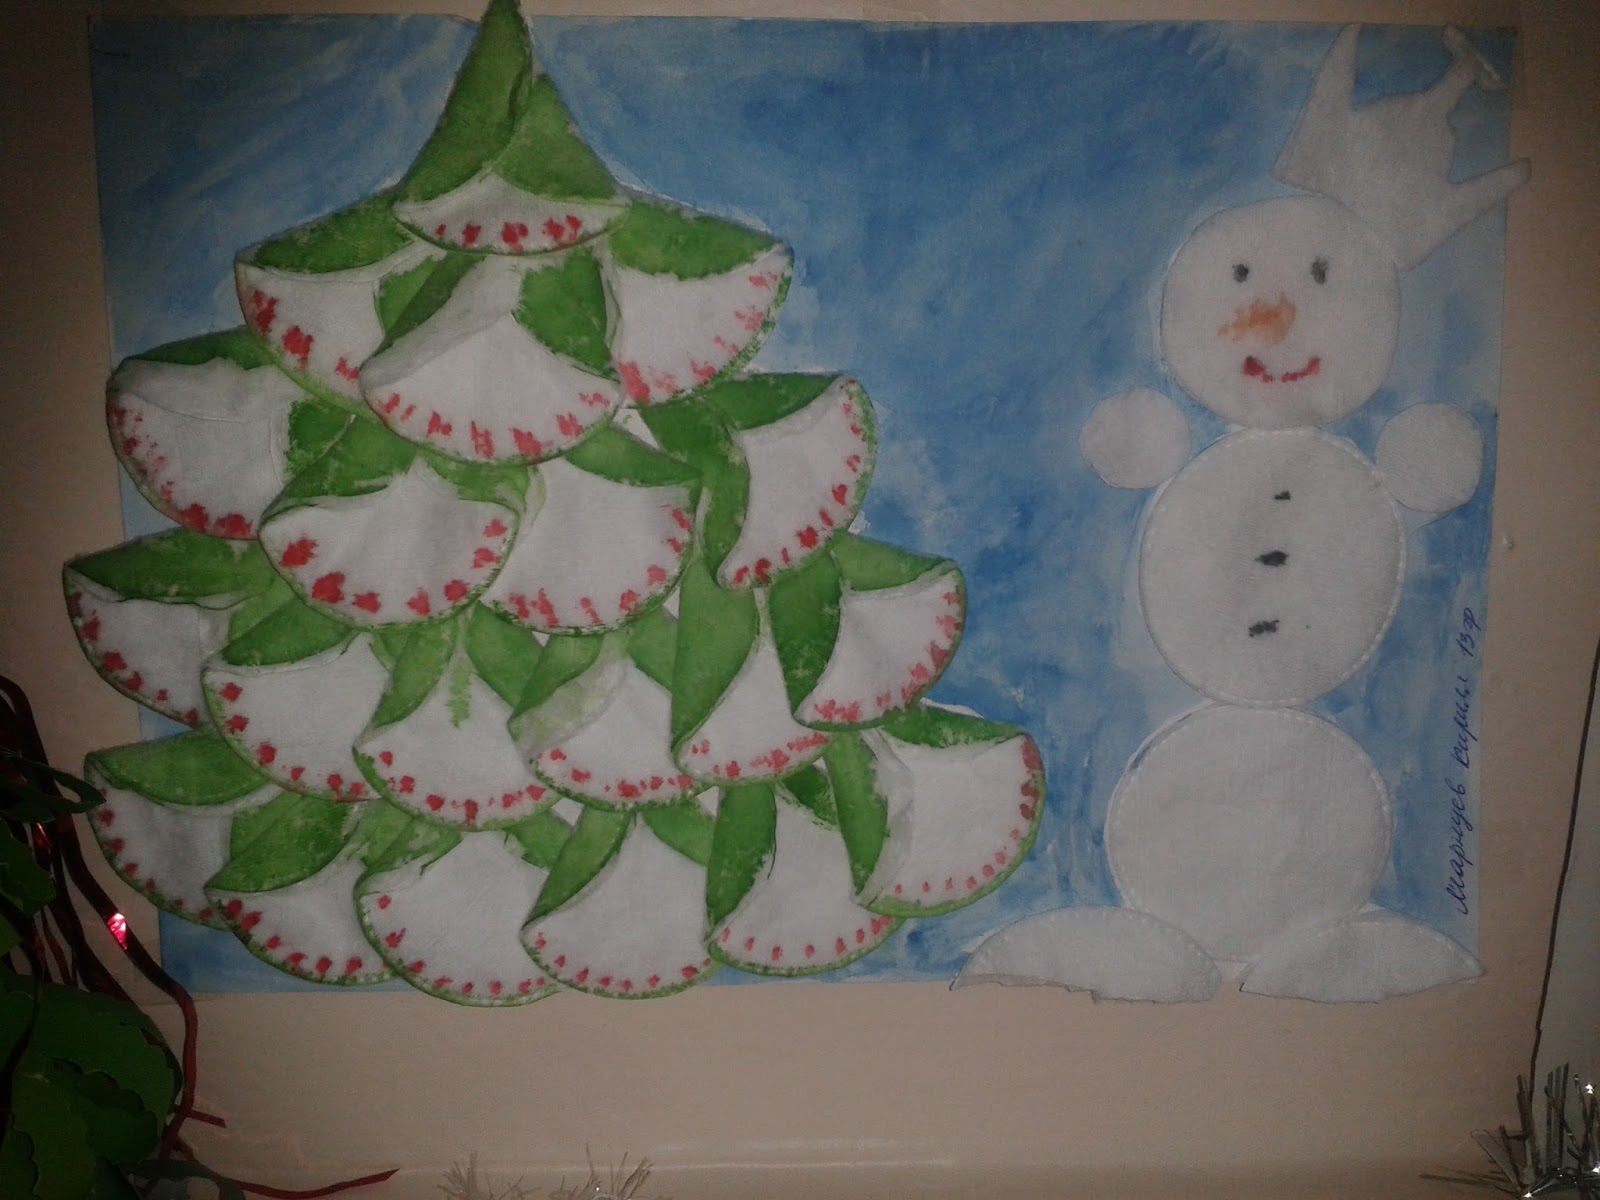
return to menu ↑ return to menu ↑Christmas tree of cotton pads
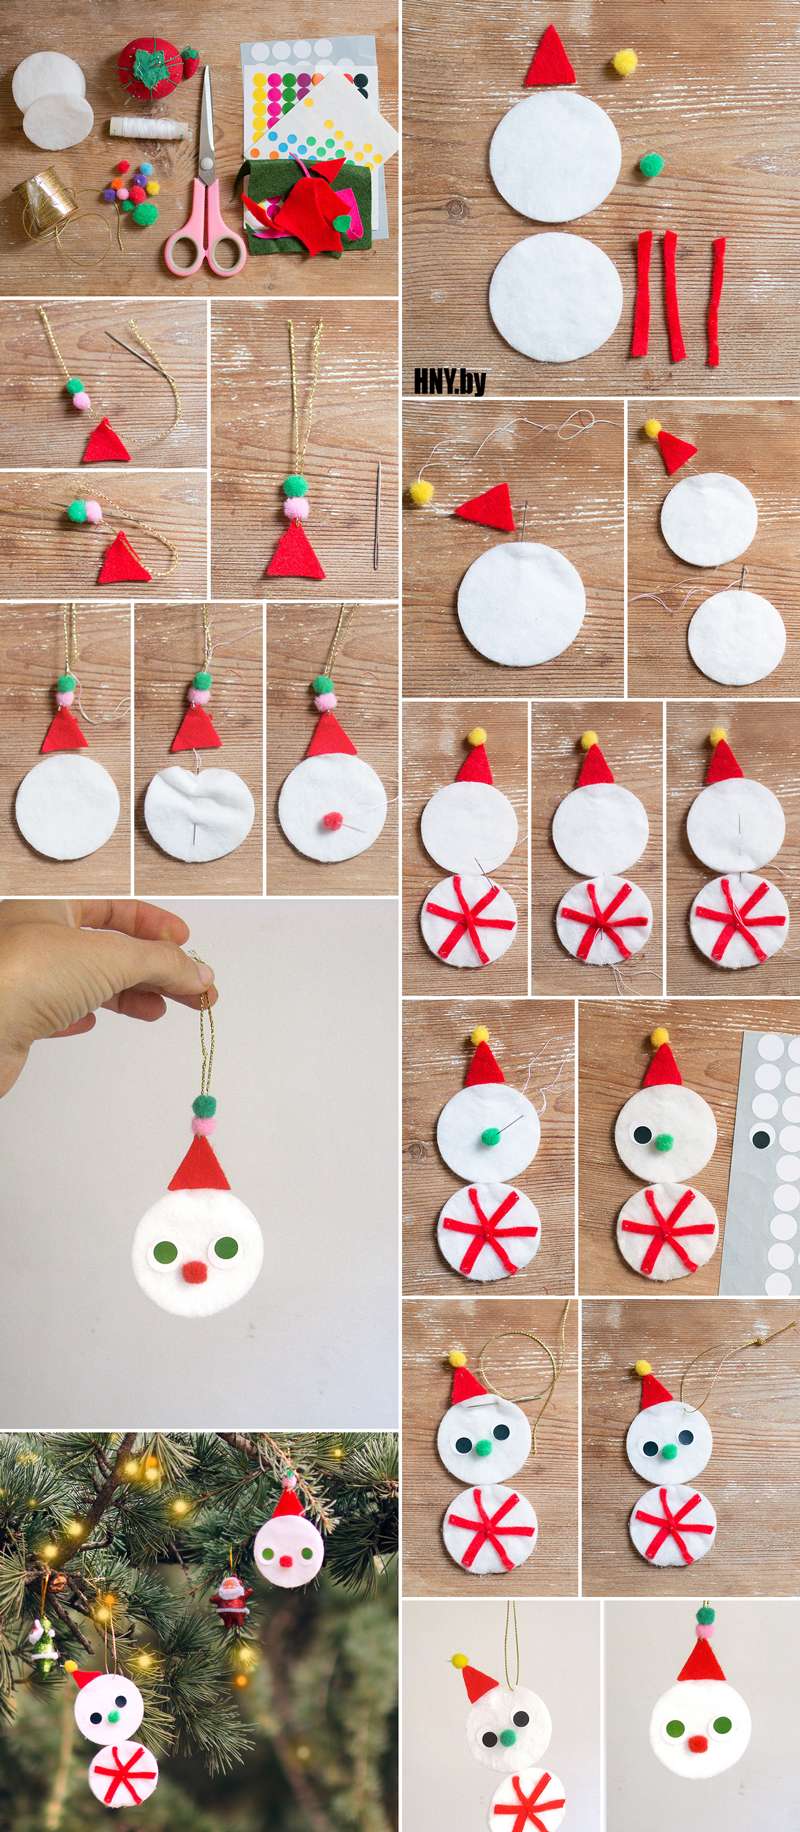
In order to give the children a real holiday, they don’t need much; parents simply need to take a pack of cotton pads, a sheet of white cardboard and be patient.
In addition, for crafts will need:
- Scissors.
- Rubber glue.
- Stapler.
- Large beads (preferably gold or silver).
- Compass.

New Year tree from wadded disks
The basis for the Christmas tree will serve as a cardboard cone. We will begin with it. Draw a compass in the center of the cardboard circle, cut it with scissors. Bend the circle into a cone, fix it with a stapler.
We install a cone in the center of the working space and begin to produce clothes for the Christmas tree. To do this, bend the cotton pad in half, then fold it in the shape of a cone, connecting the sharp ends with each other. We fasten the base of the cotton cone with a stapler.
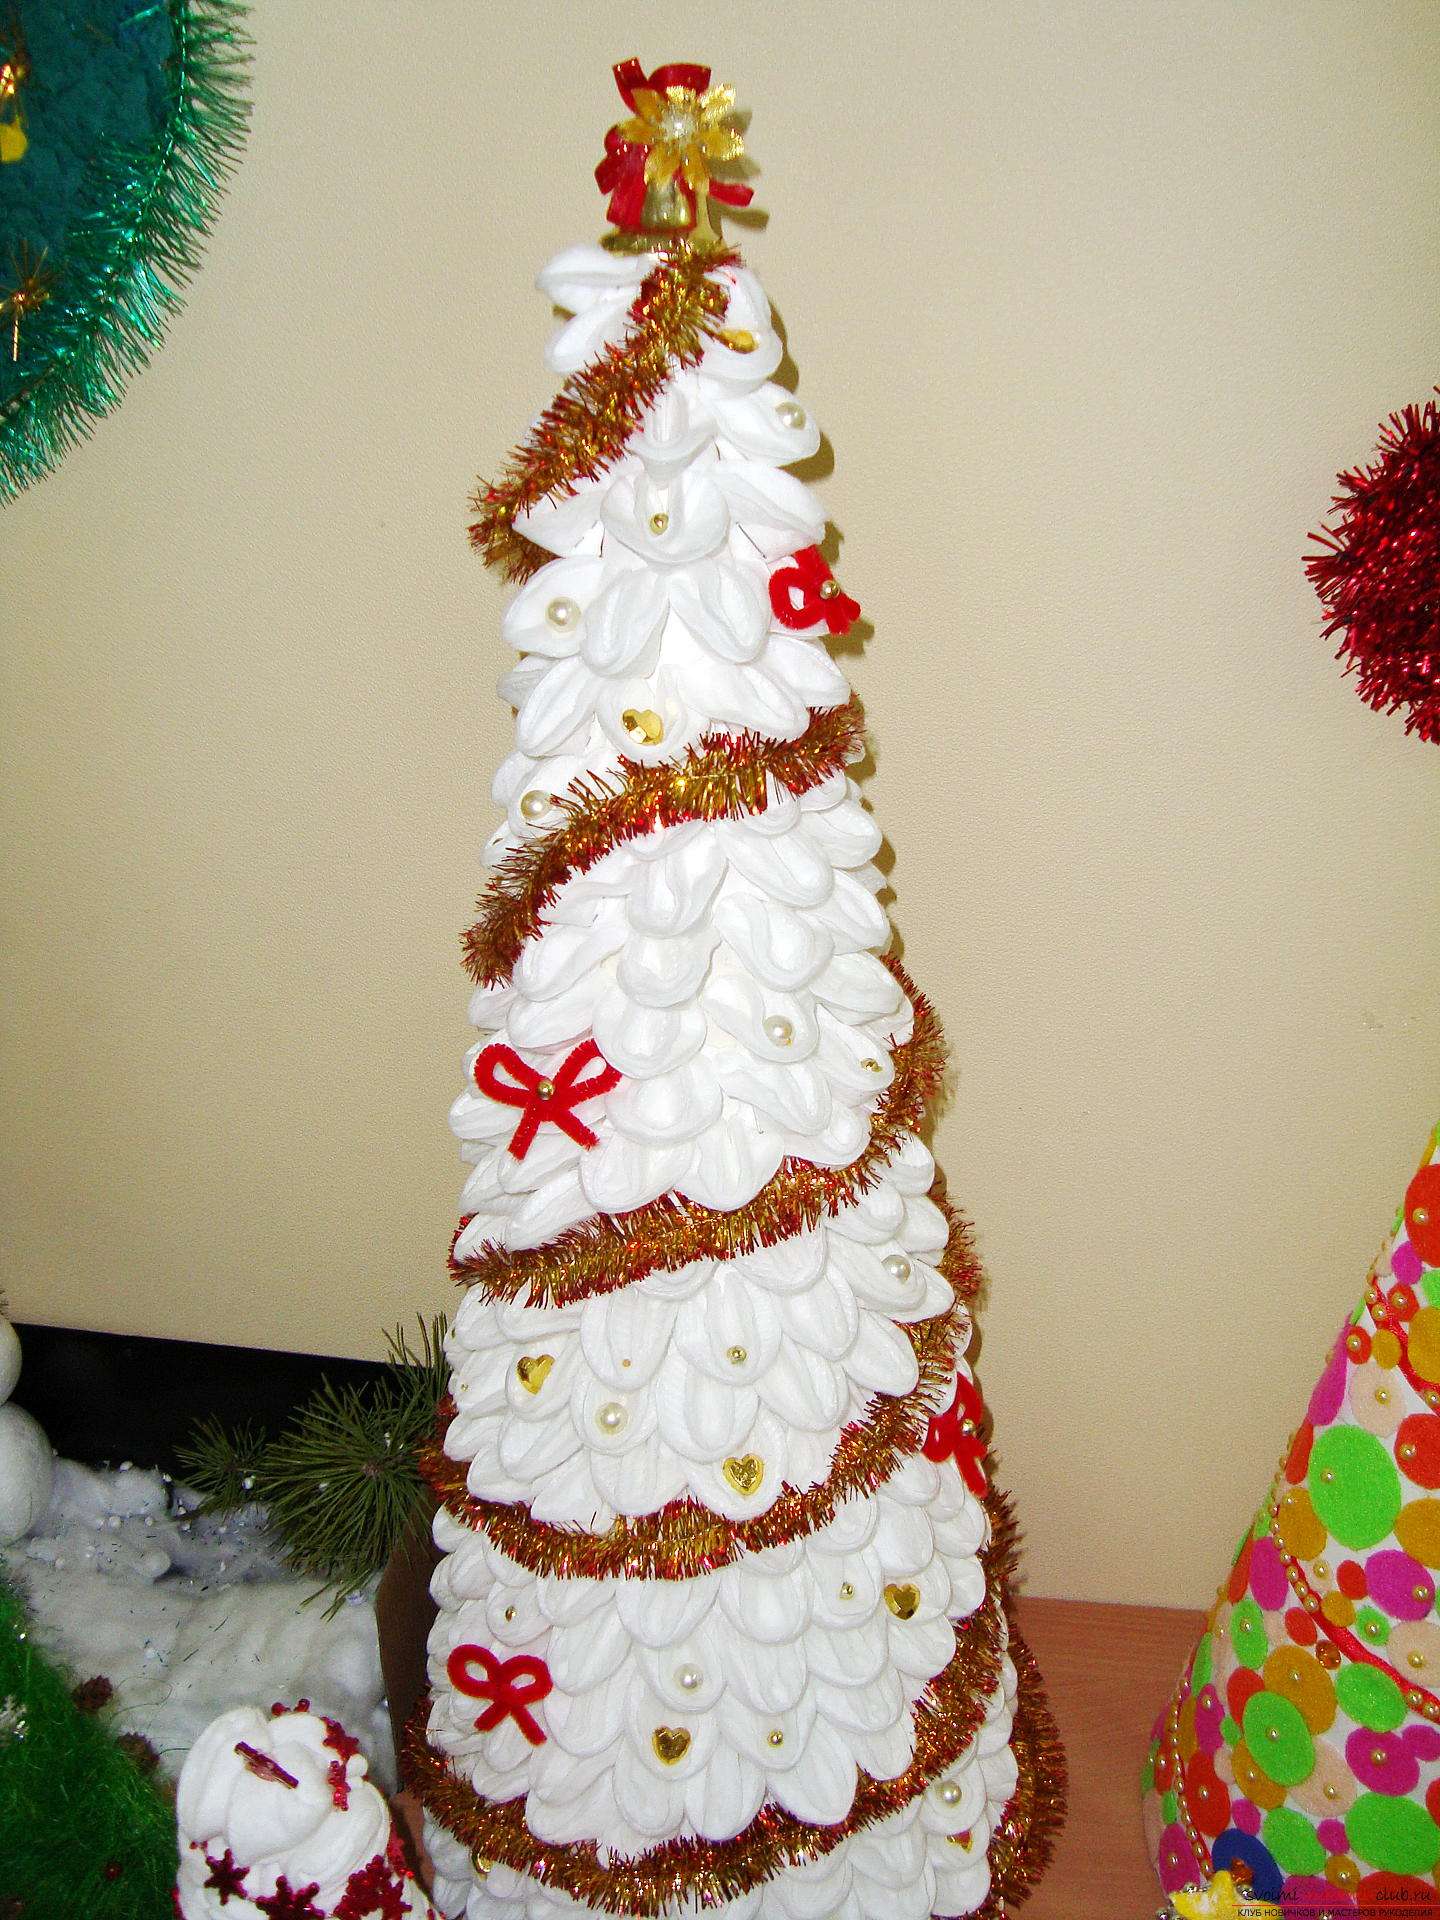
Surely all your guests will remember
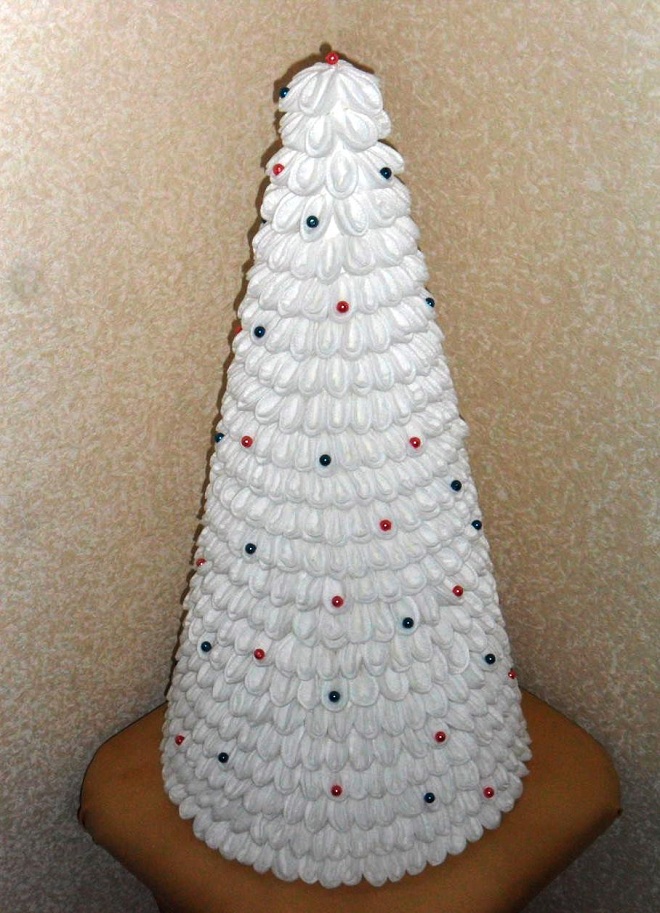
It looks like and just, but with taste
We glue the largest bead to the top of the resulting Christmas tree. The rest of the beads decorate all the Christmas tree.
It will be interesting to you:REVIEW: Crafts from plastic and cork stoppers (130+ Photos): Making unique objects with your own hands
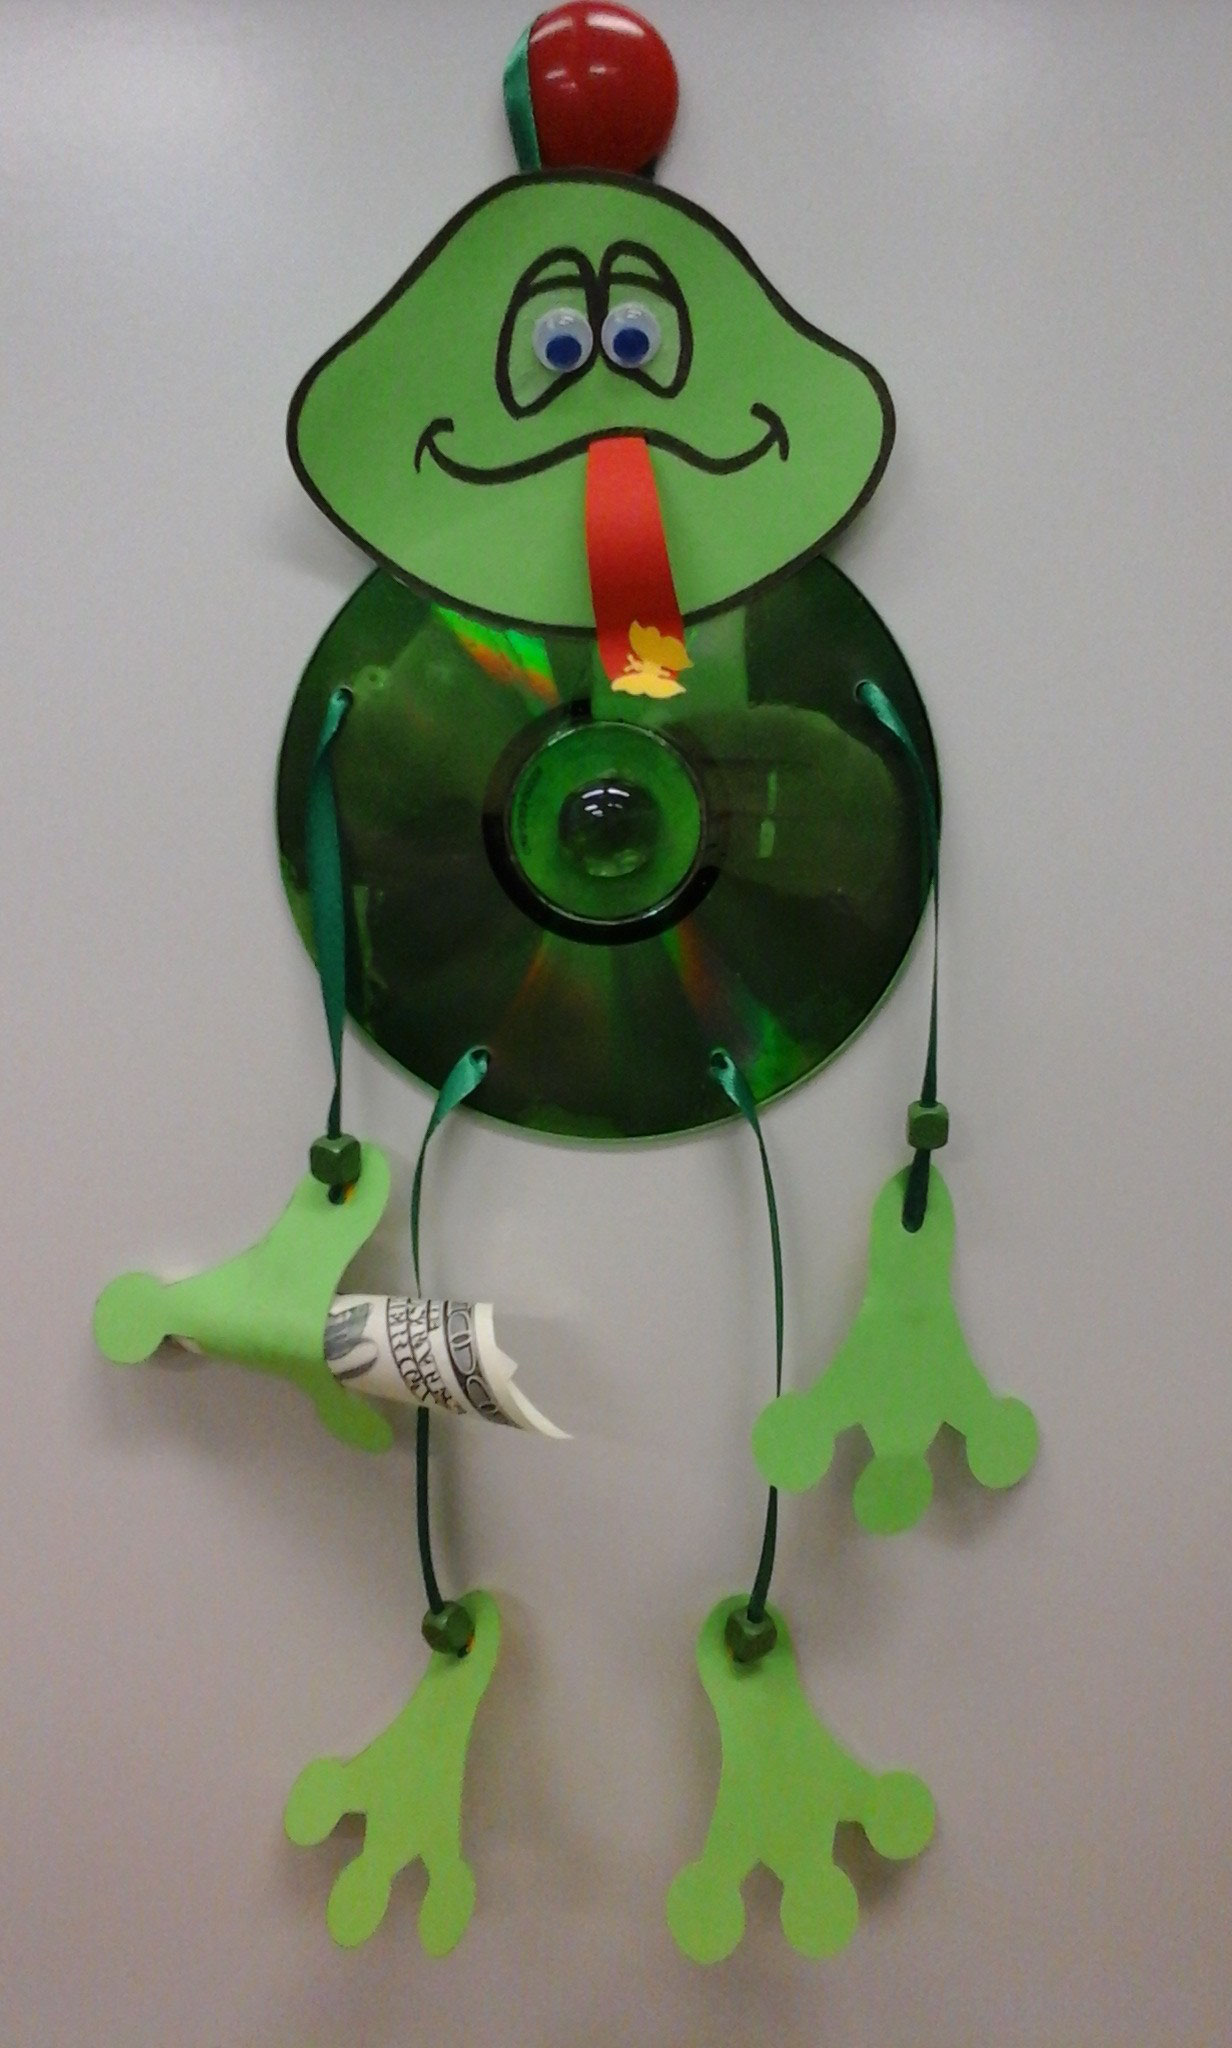
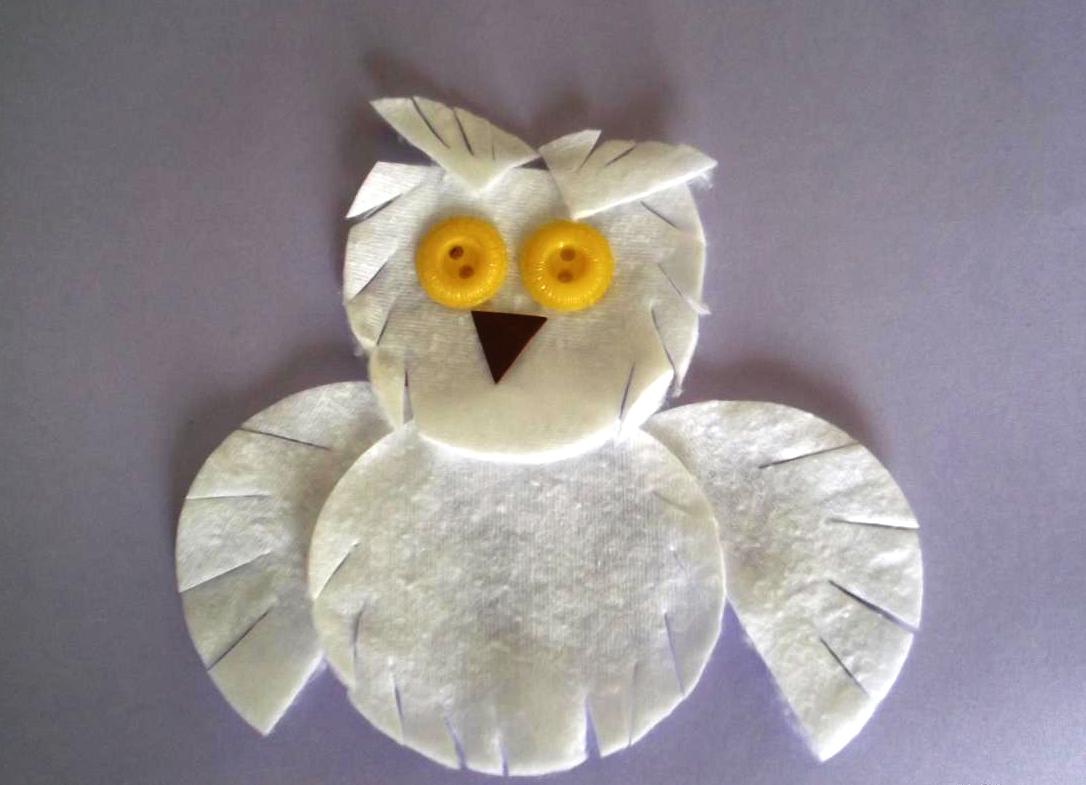
return to menu ↑ return to menu ↑Stand under the mug "Elephant" using a CD-ROM
Very often you have to get up from the computer desk and go to the kitchen to drink tea. But you can make a convenient stand for a mug from a usual CD that takes up extra space on the shelf of a CD. For this you will need:
- Glue gun.
- Thick sheet of cardboard.
- Color felt.
- Scissors.
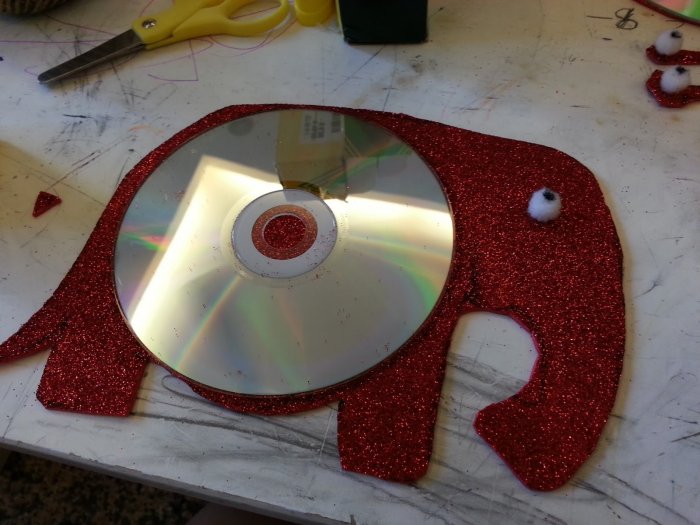
Cute little elephant from the disk
To begin with, we draw on the cardboard the silhouette of the future elephant stand, a little larger than a computer disk. Cut it out of cardboard, apply it to the felt and draw around the contour with a pencil. Cut out an identical elephant from felt, glue them together with the help of a glue-gun.
Cut a small circle out of felt, paint it with a black marker - this will be an elephant's eye. Fasten the eye with a glue gun to the silhouette of an elephant. To the center of the elephant glue the CD. Stand ready.
return to menu ↑VIDEO: Original crafts from disks
Handicrafts from CDs
New life of handmade discs
Conclusion
Thus, computer disks can be an excellent material for creativity, both for children and for adults.
return to menu ↑ return to menu ↑


 for the New Year (175+ Photos) Beautiful toys for the holiday!")
")