
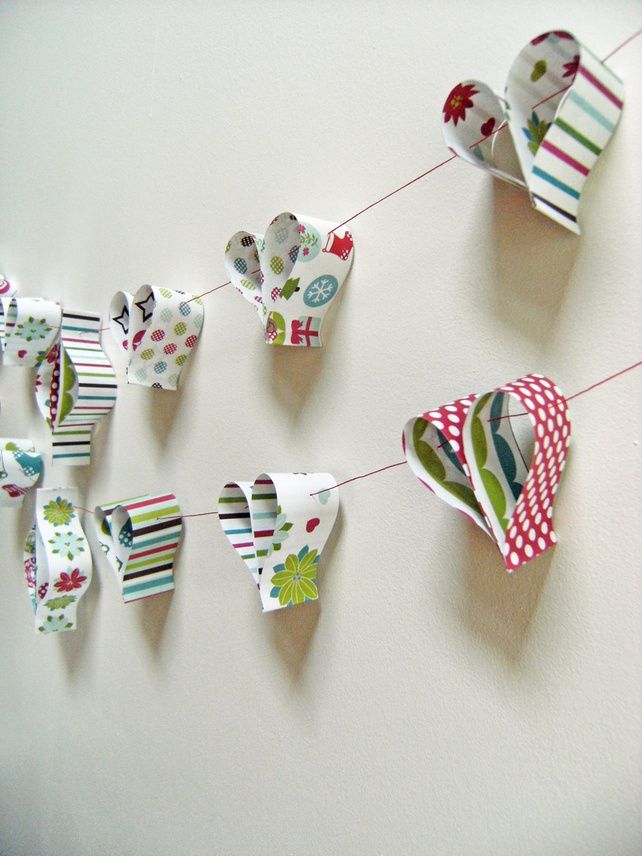
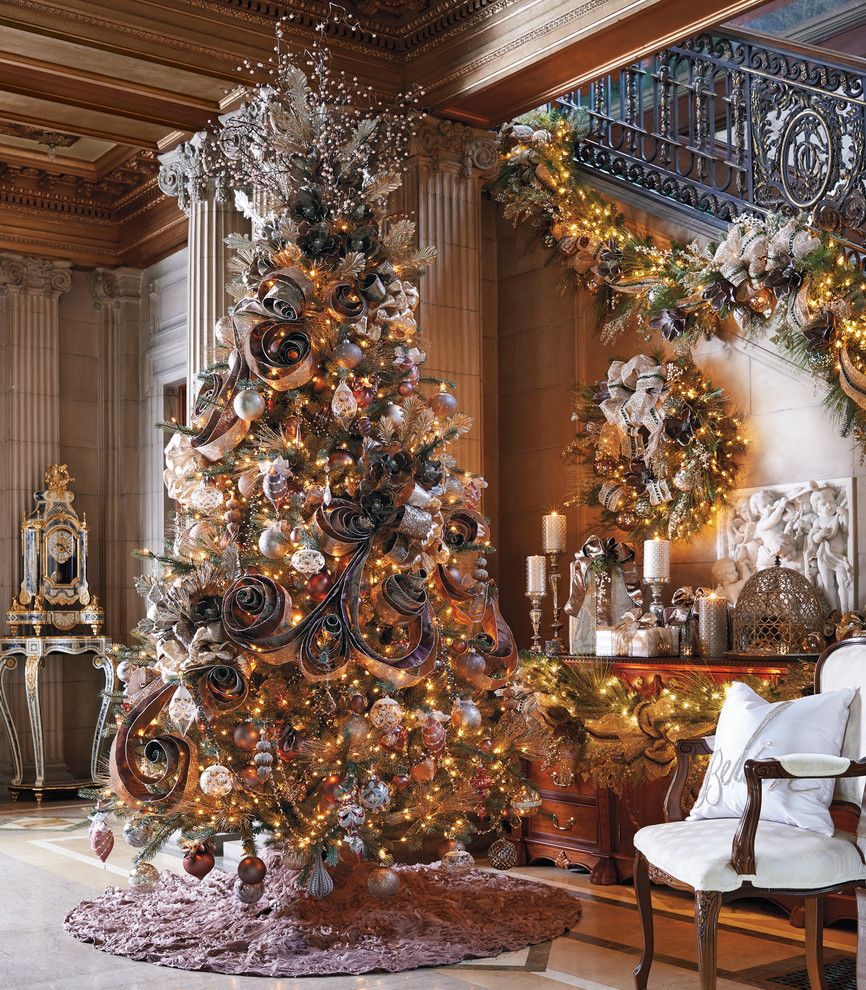
Of course, the best gift - a gift made by yourself. But this is not only true for gifts, but also for decorations on the Christmas tree, on the wall, wardrobe, etc.
Content:
Snowflakes
The first and most probably simple is snowflakes, a symbol of frost. They are different. I'll start with the simplest option.
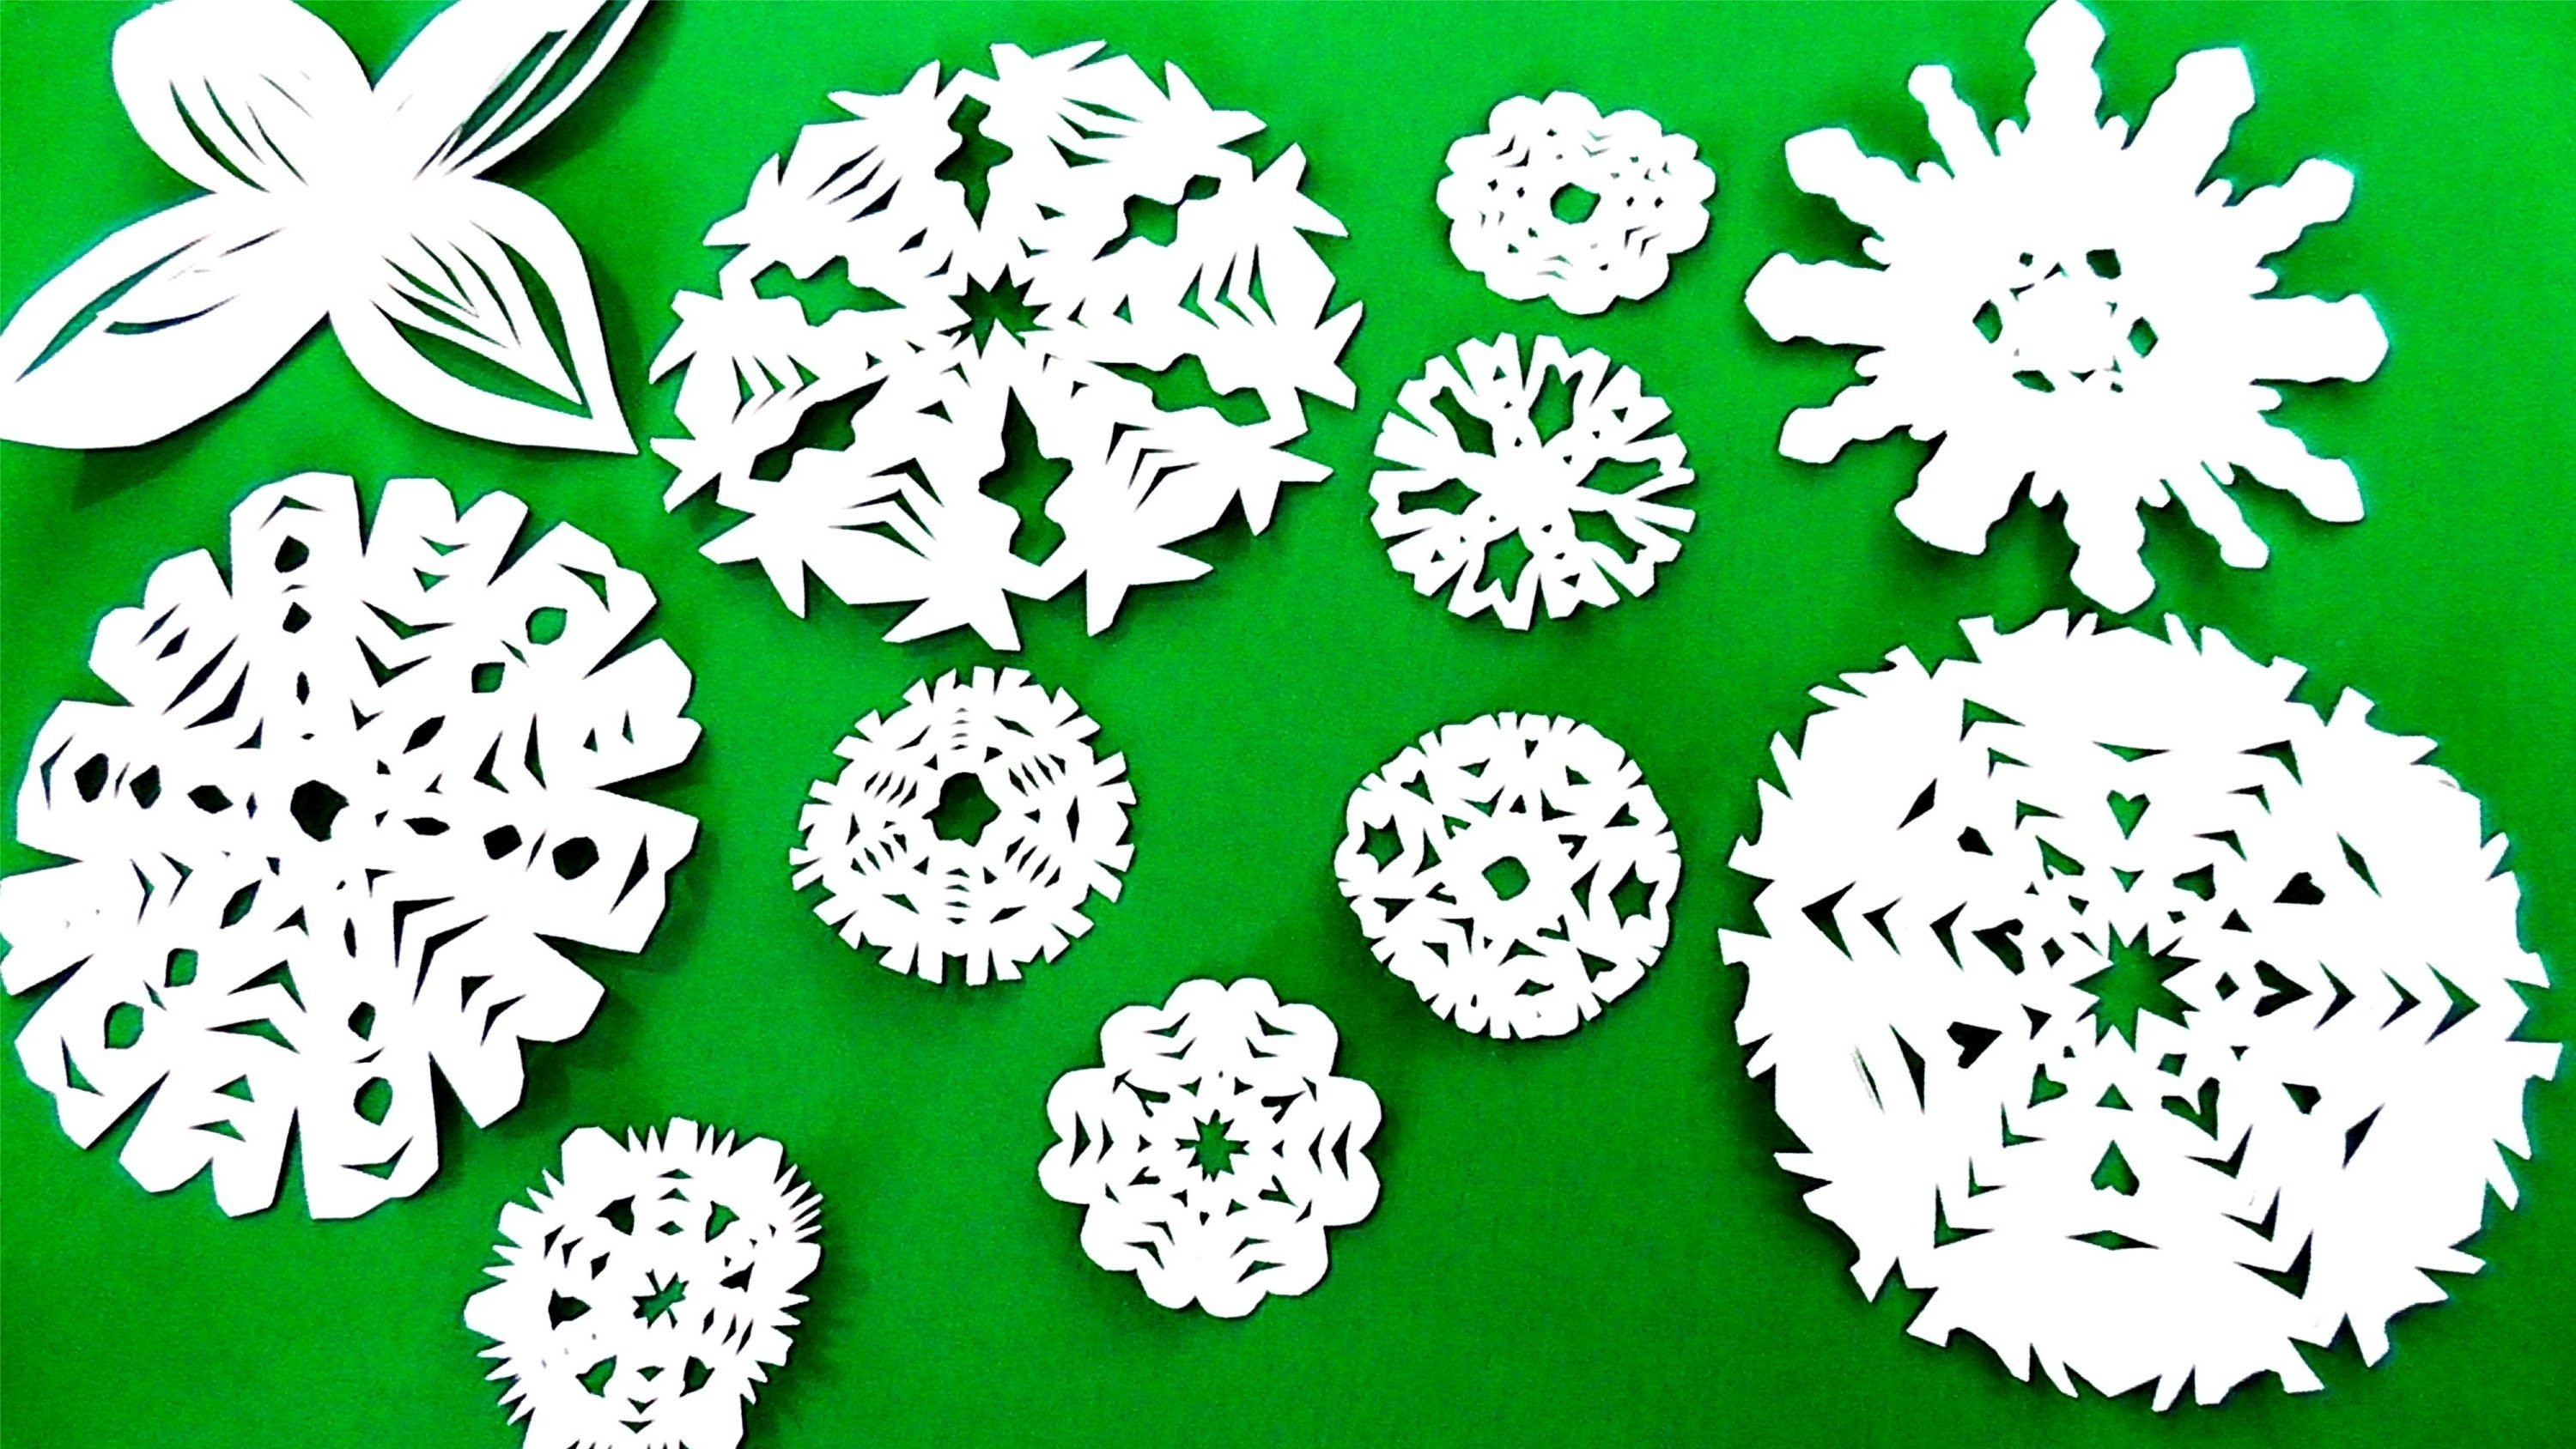
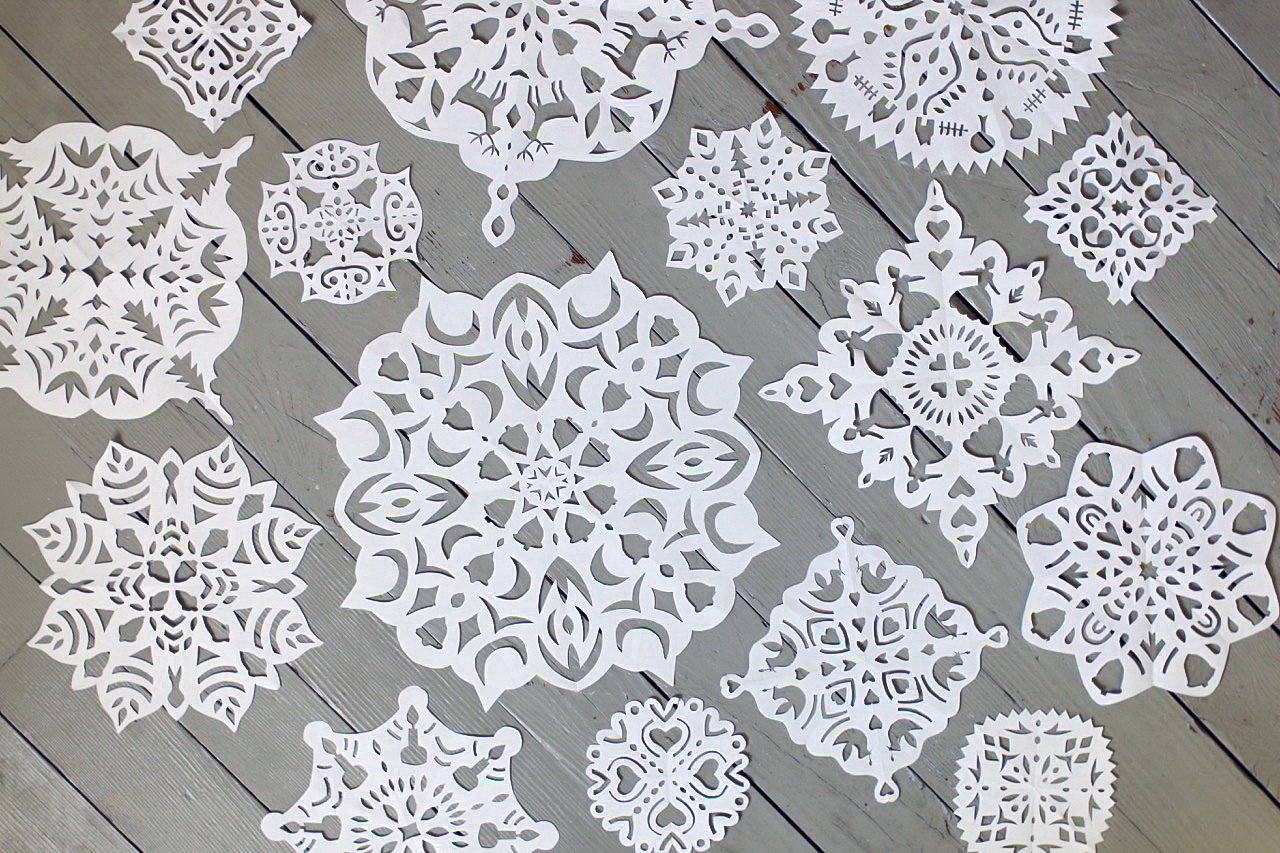
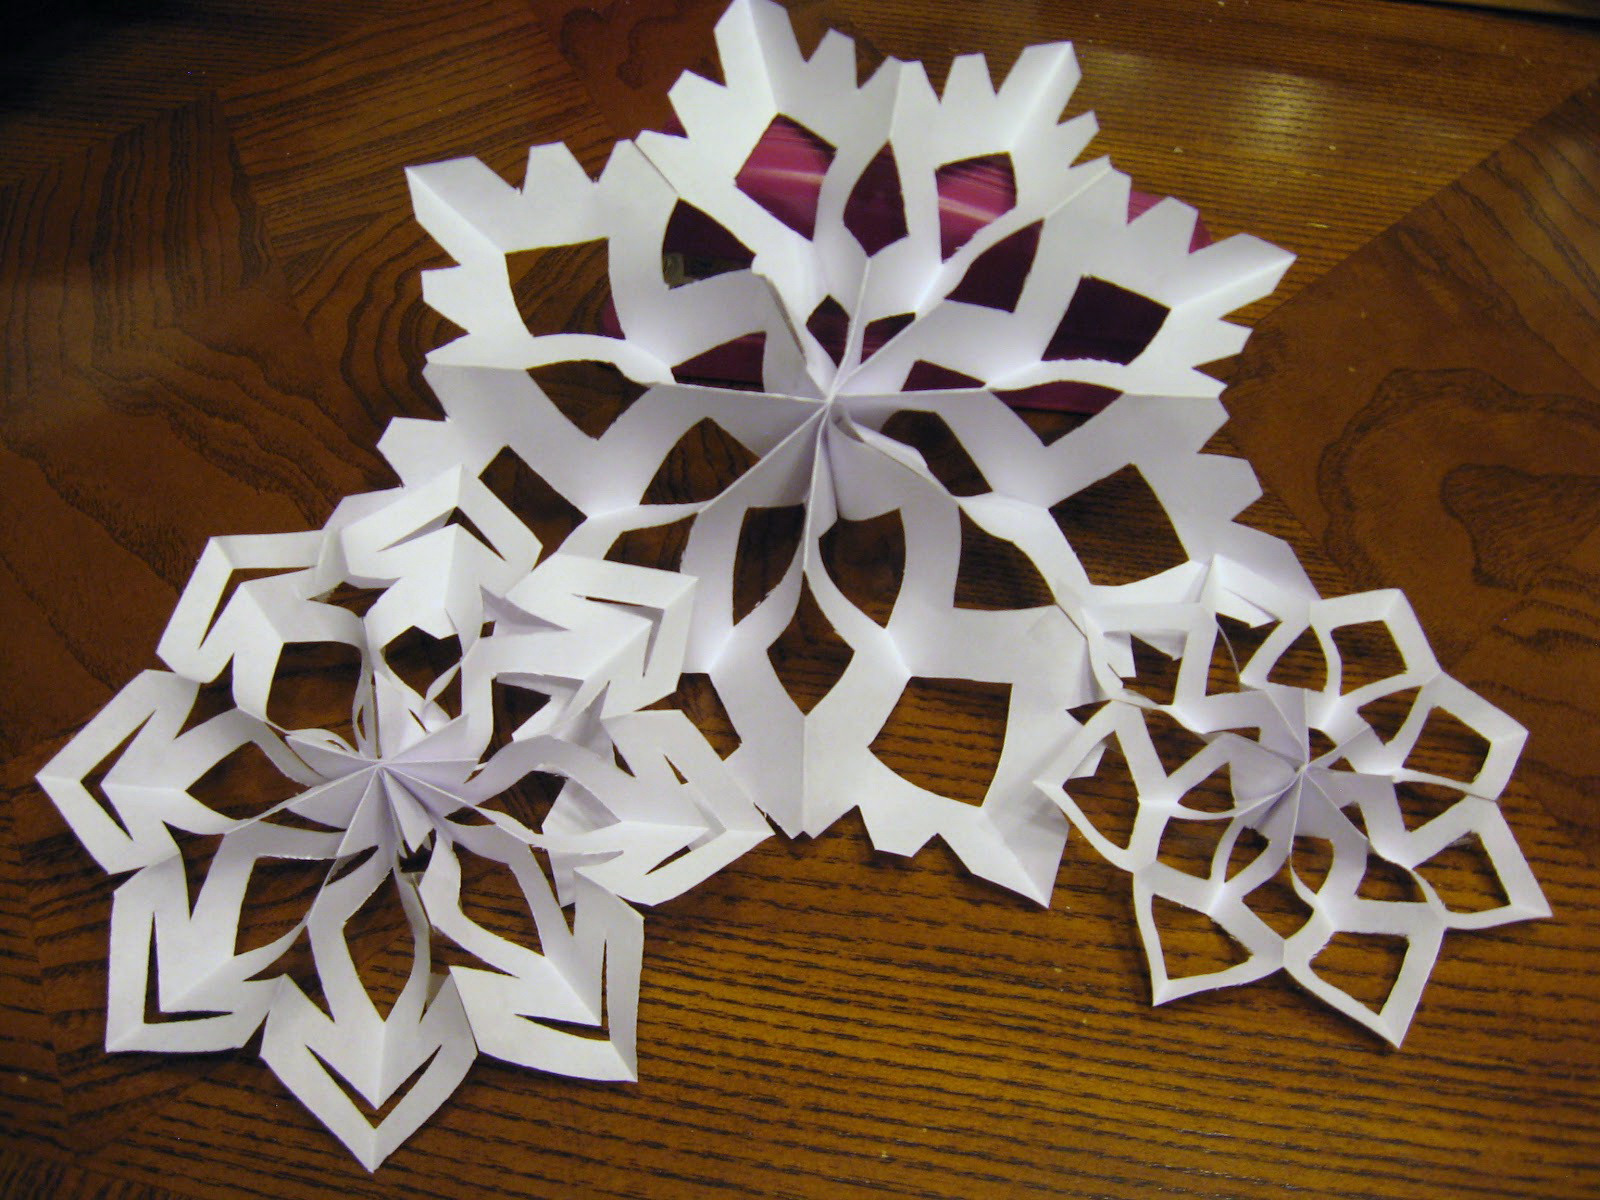
A variety of snowflakes to create a festive atmosphere
So, I will prepare:
- Scissors.
- Paper (a4 format).
- A simple pencil.
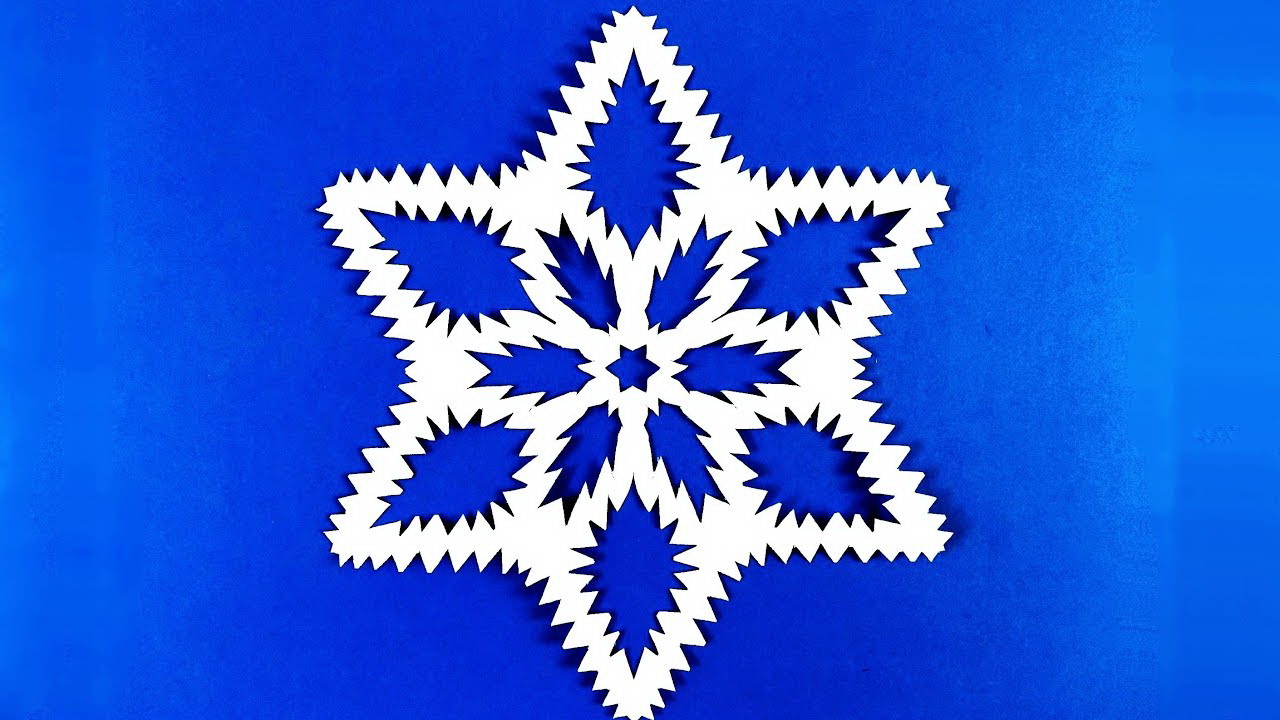
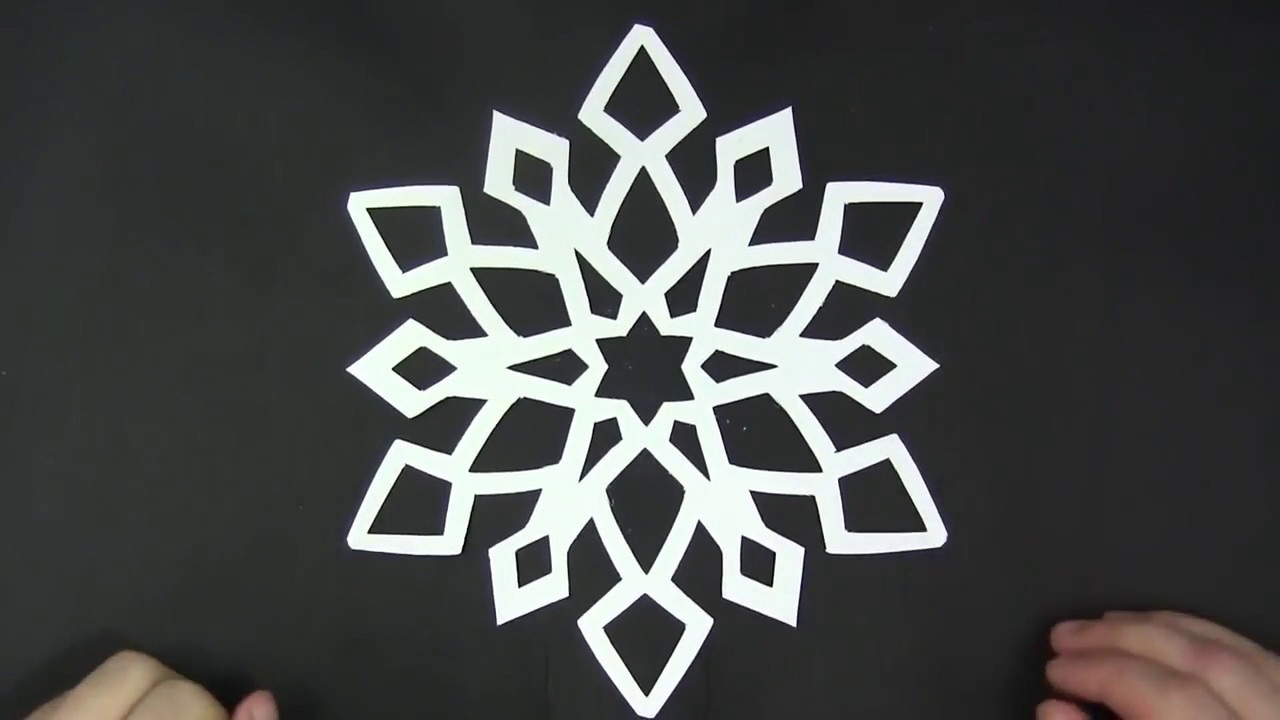
- Eight-pointed snowflake
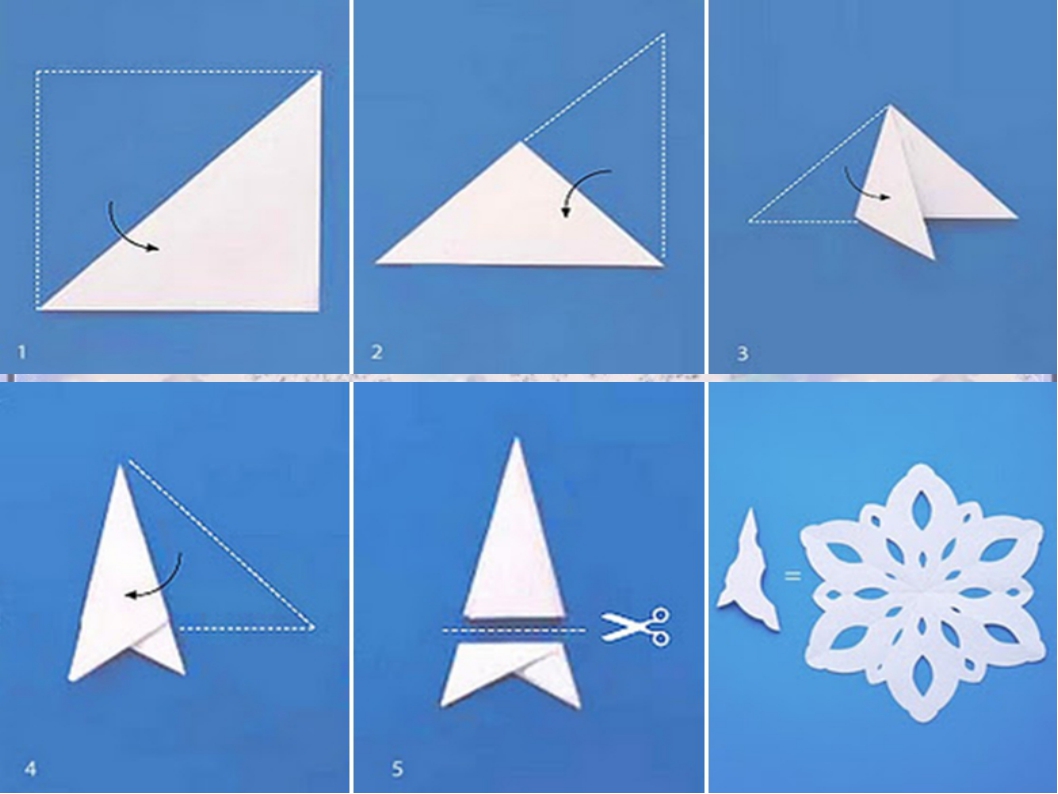
The blank is folded from a square sheet of paper, so I cut off the extra part.
Since the square is folded in half, we should have a triangle. The resulting triangle we fold in half perpendicular to the base. Then I fold in half again.
Make blanks and cut the snowflakes
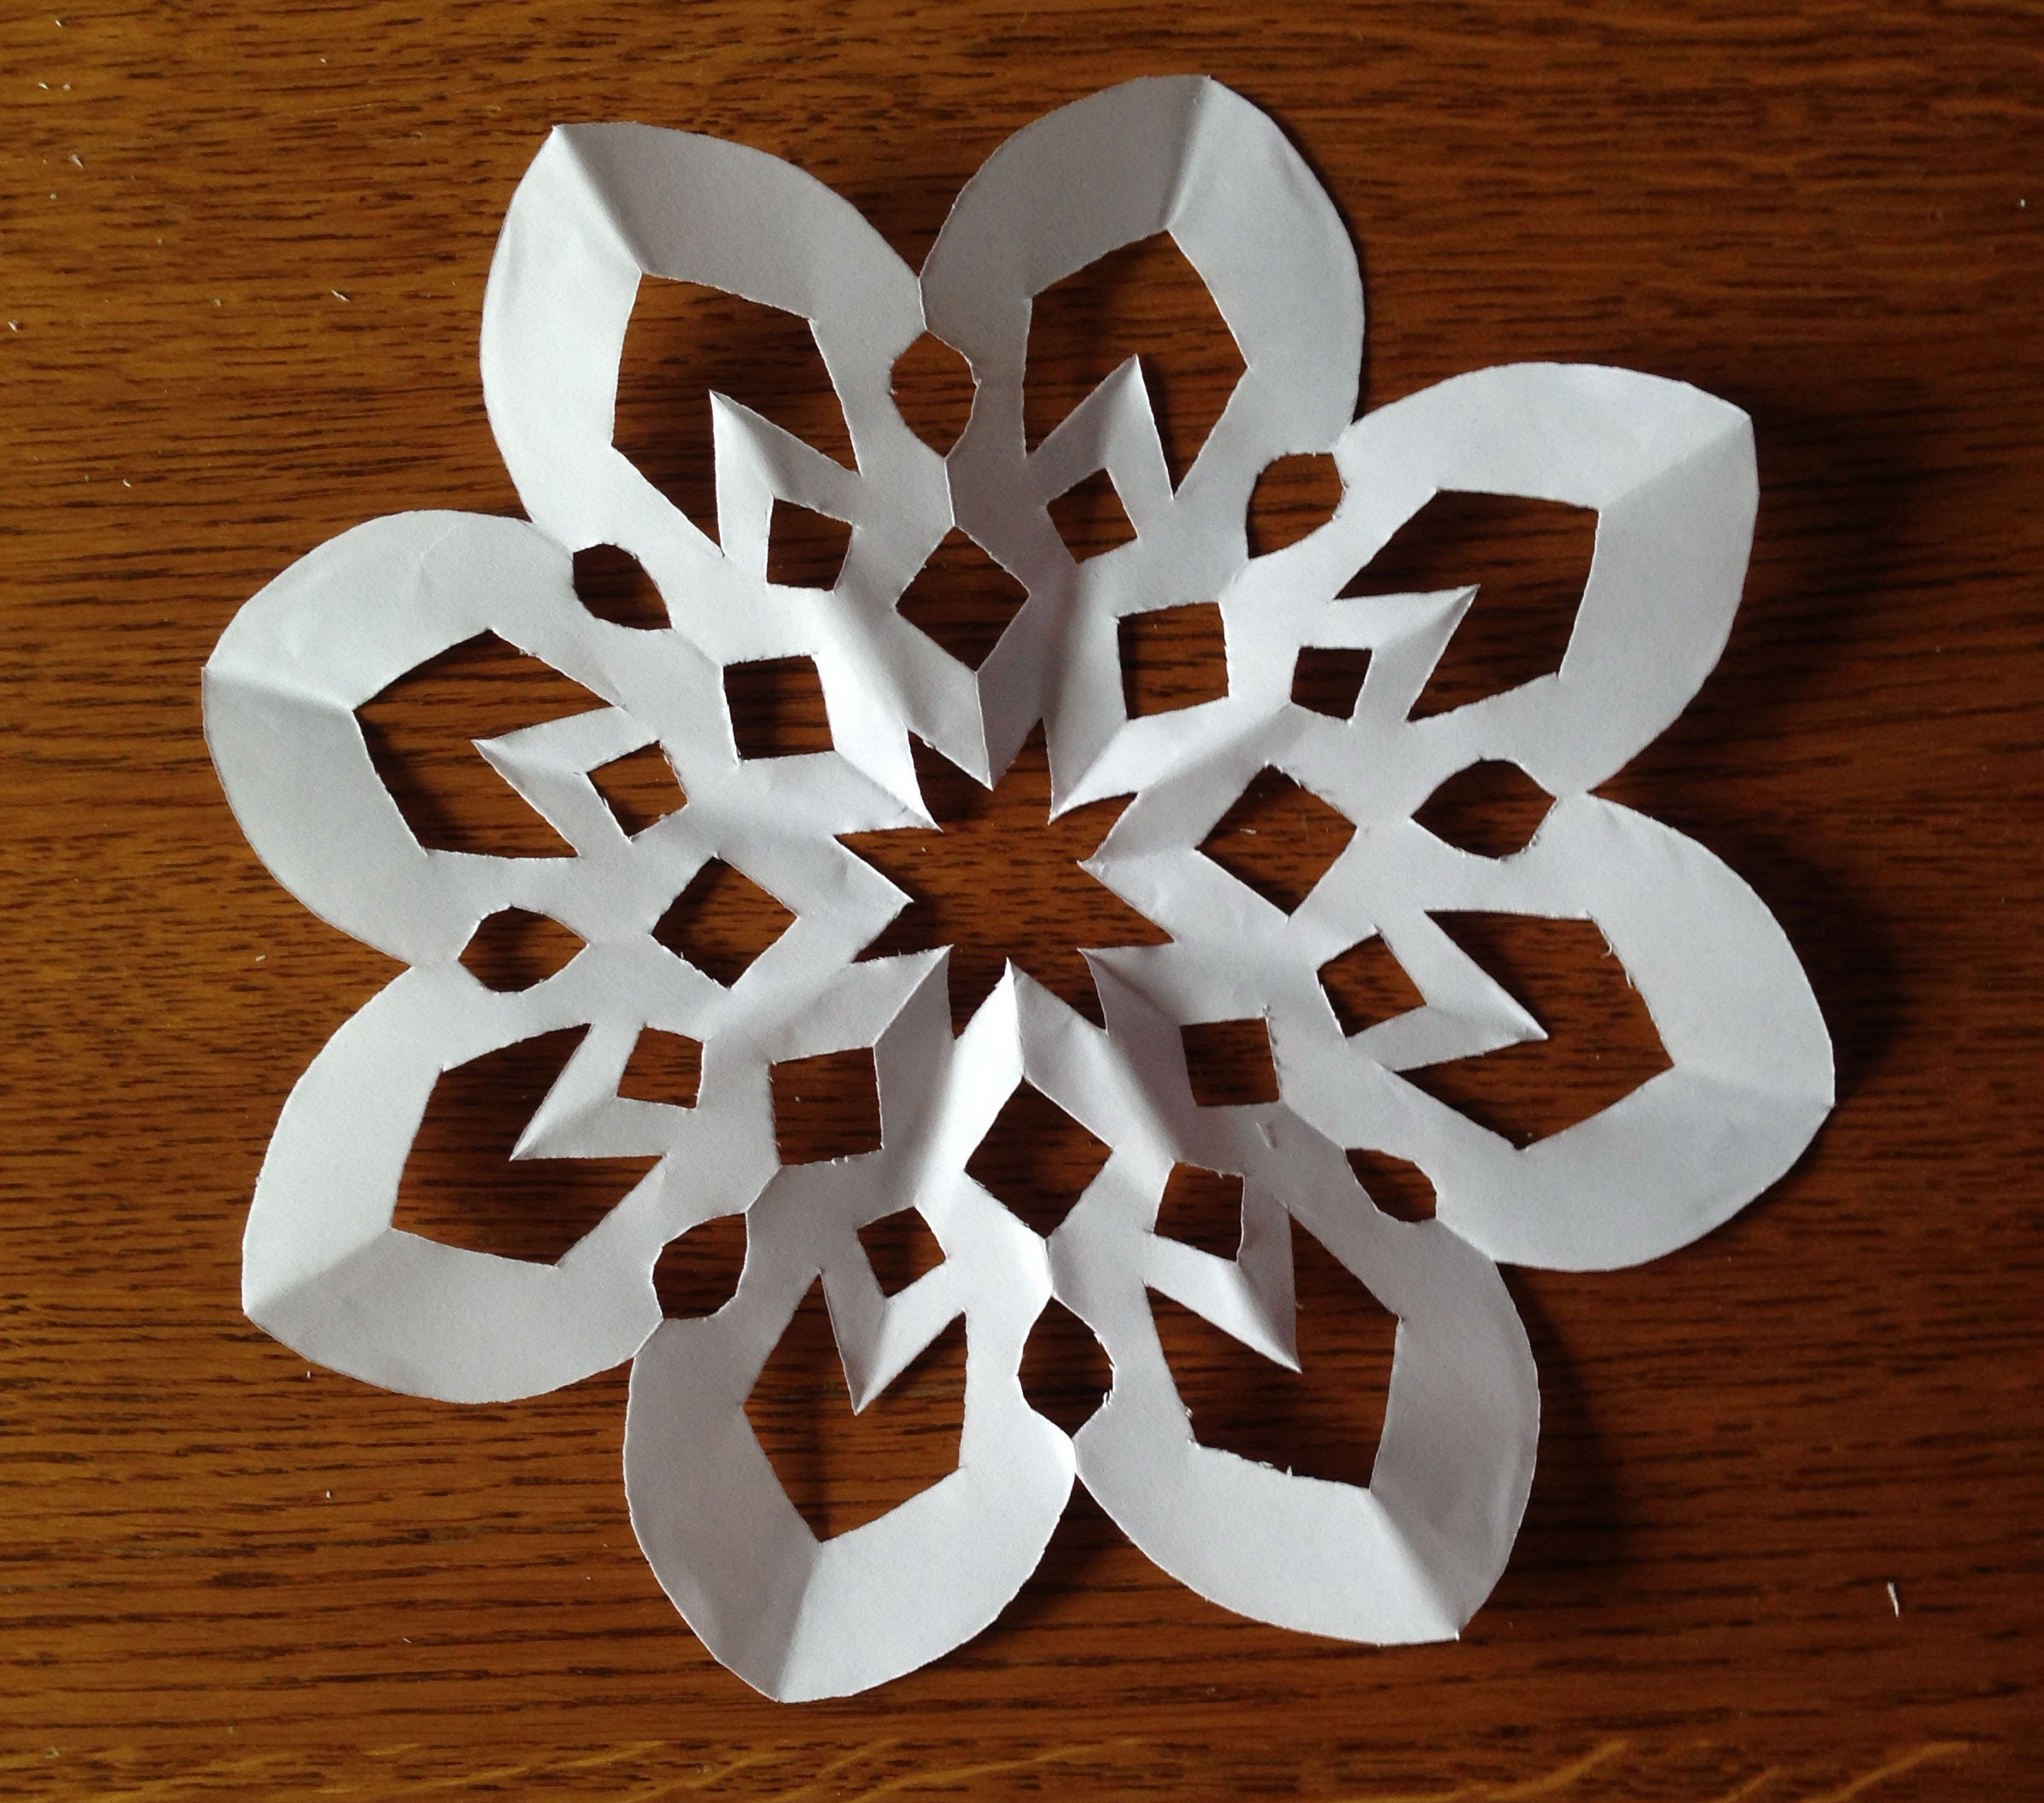
After that, I fold again, and cut off the extra part. Outline contour snowflakes. I lay out the cut - I should get a snowflake. And now we will be engaged in manufacturing of a six-ray snowflake.
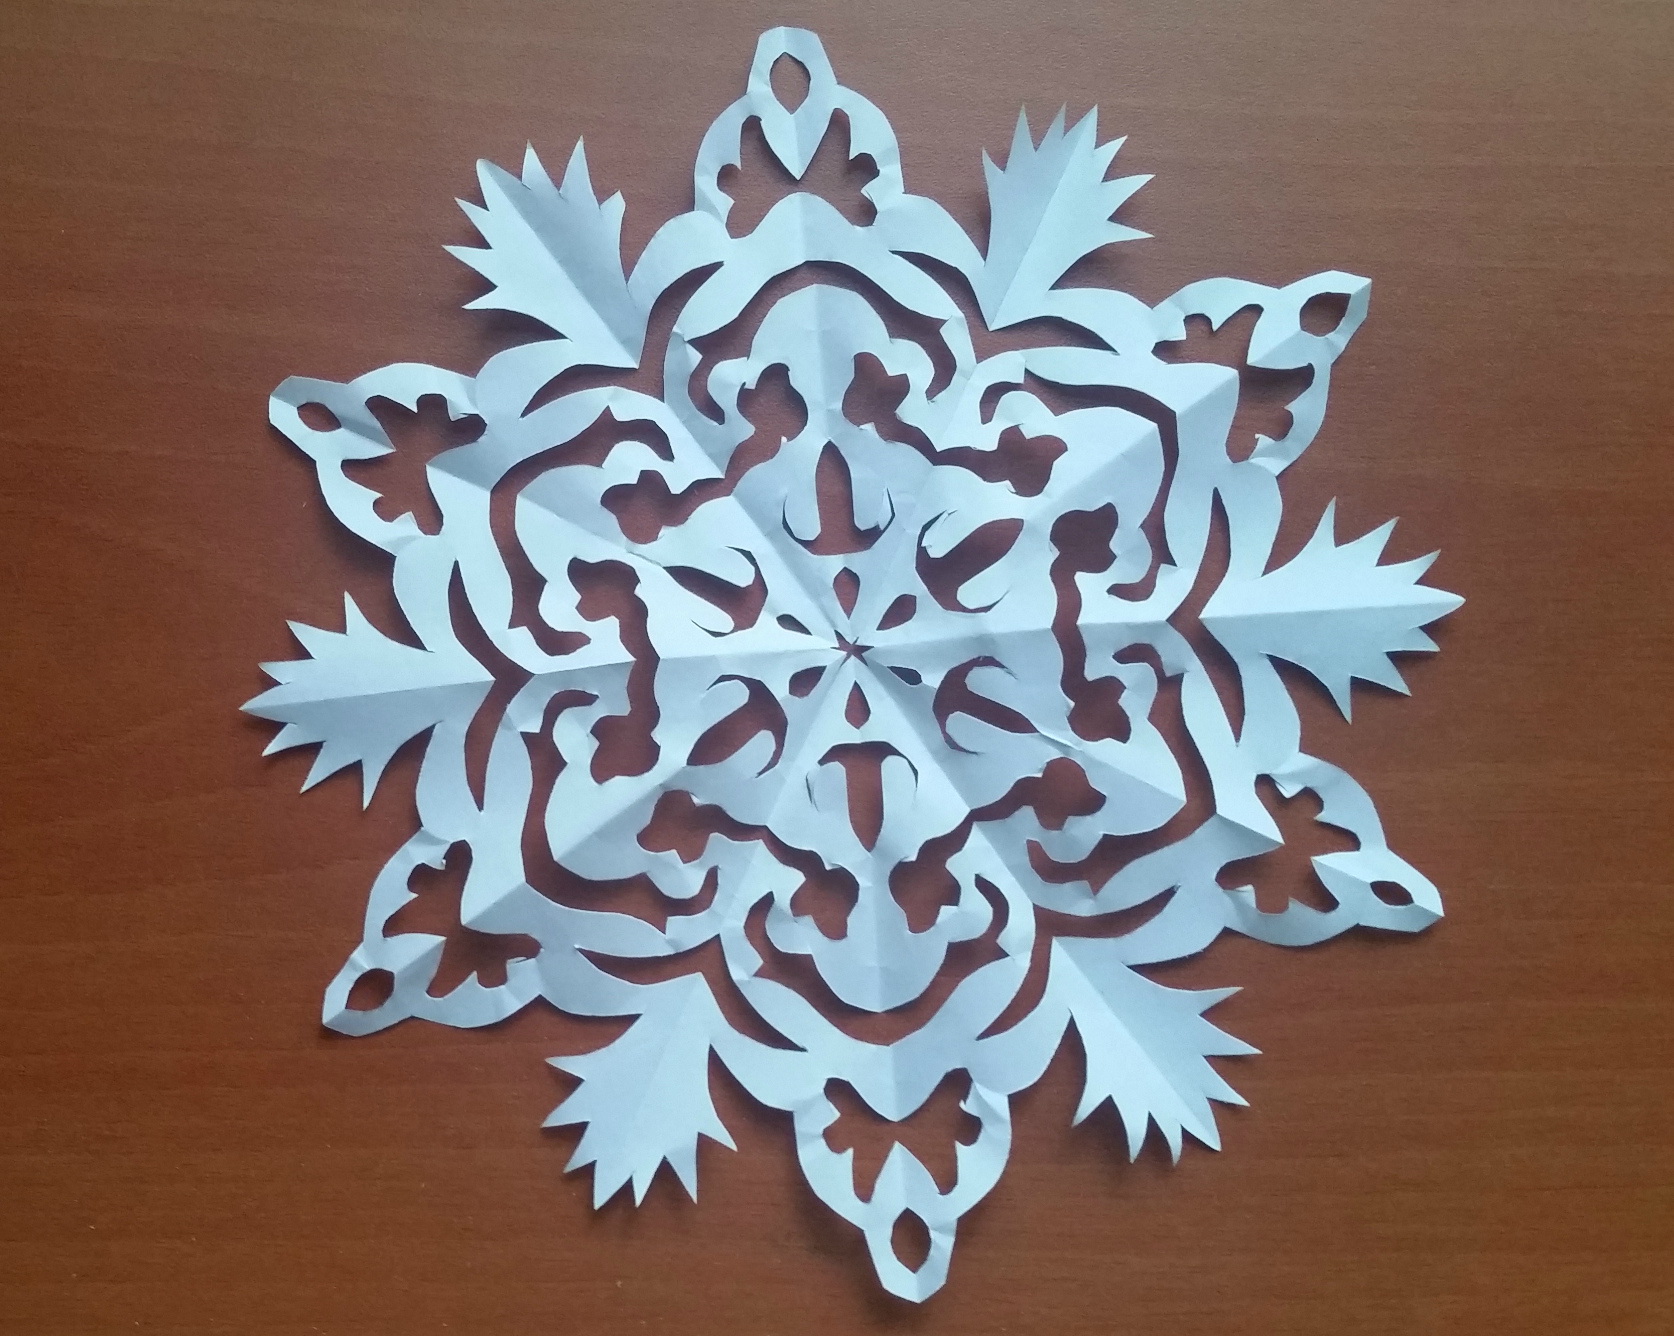
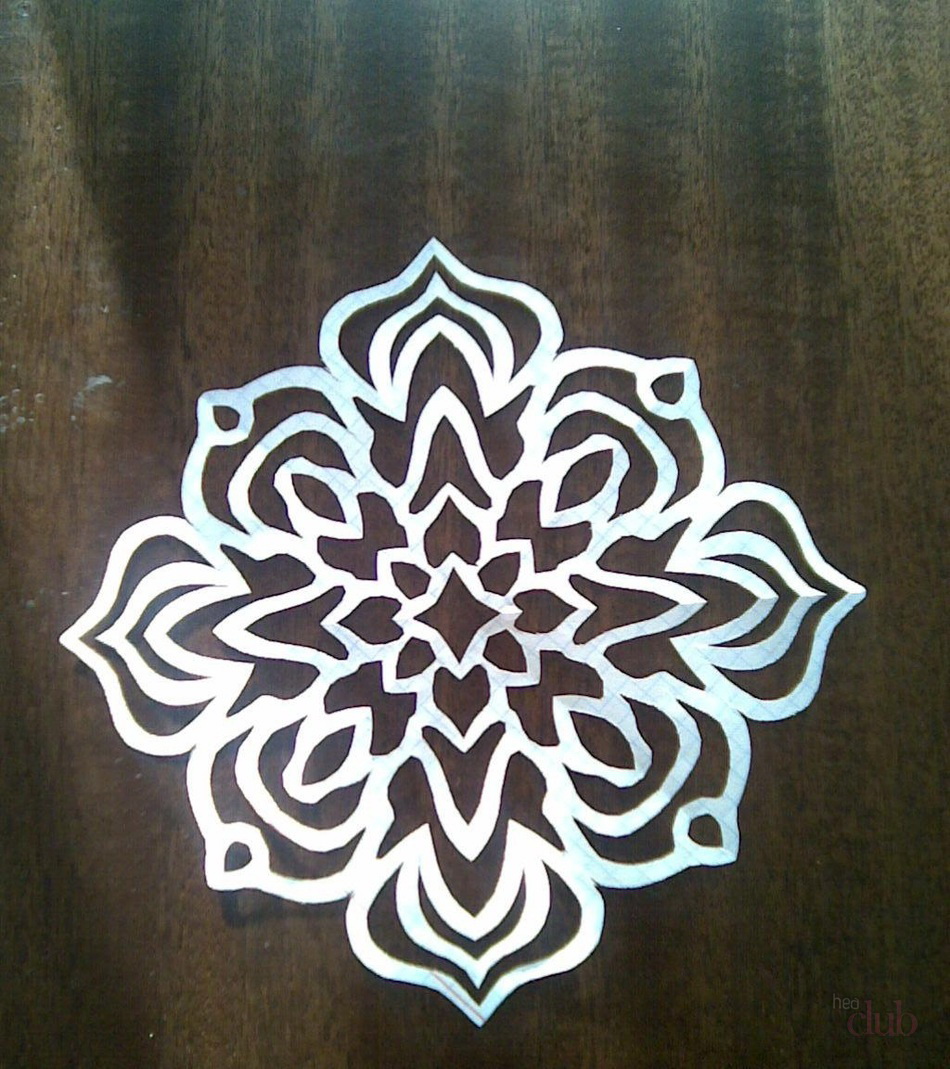
For this snowflake, I need a square sheet of paper. A square sheet of paper is folded in half. Then I bend the resulting billet, but do not fold, but only squeeze on the first fold, thus forming a notch in the center of the folded sheet.
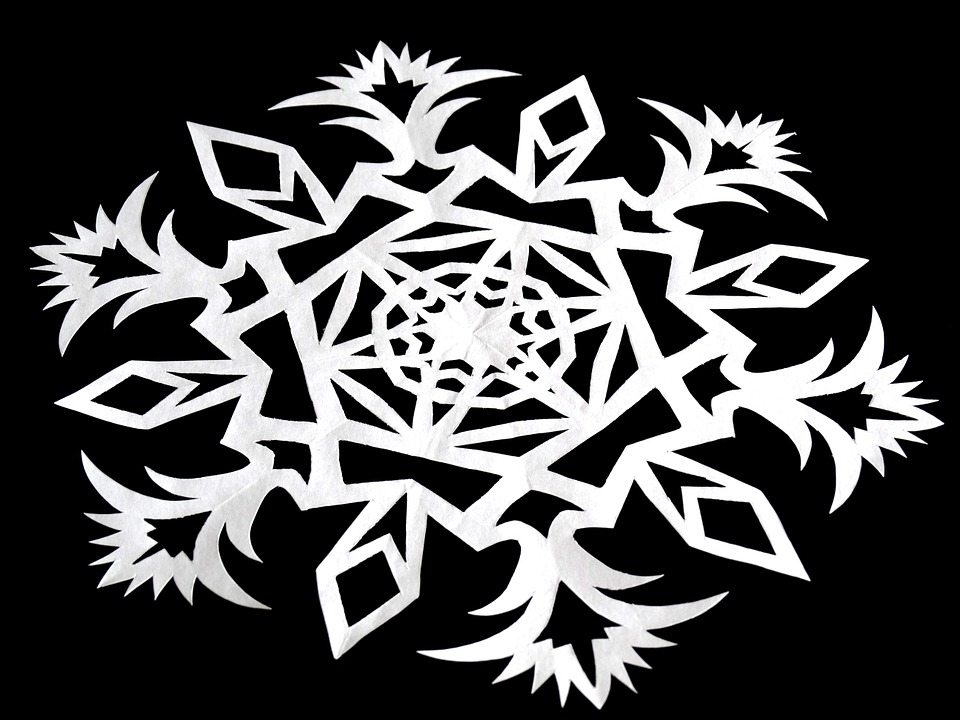
The pattern depends on your imagination
Next, take one of the corners of the workpiece, where the first fold is located and fold the sheet to the center from the notch so that the edge of the folded part of the sheet divides the remaining area of the workpiece in half.
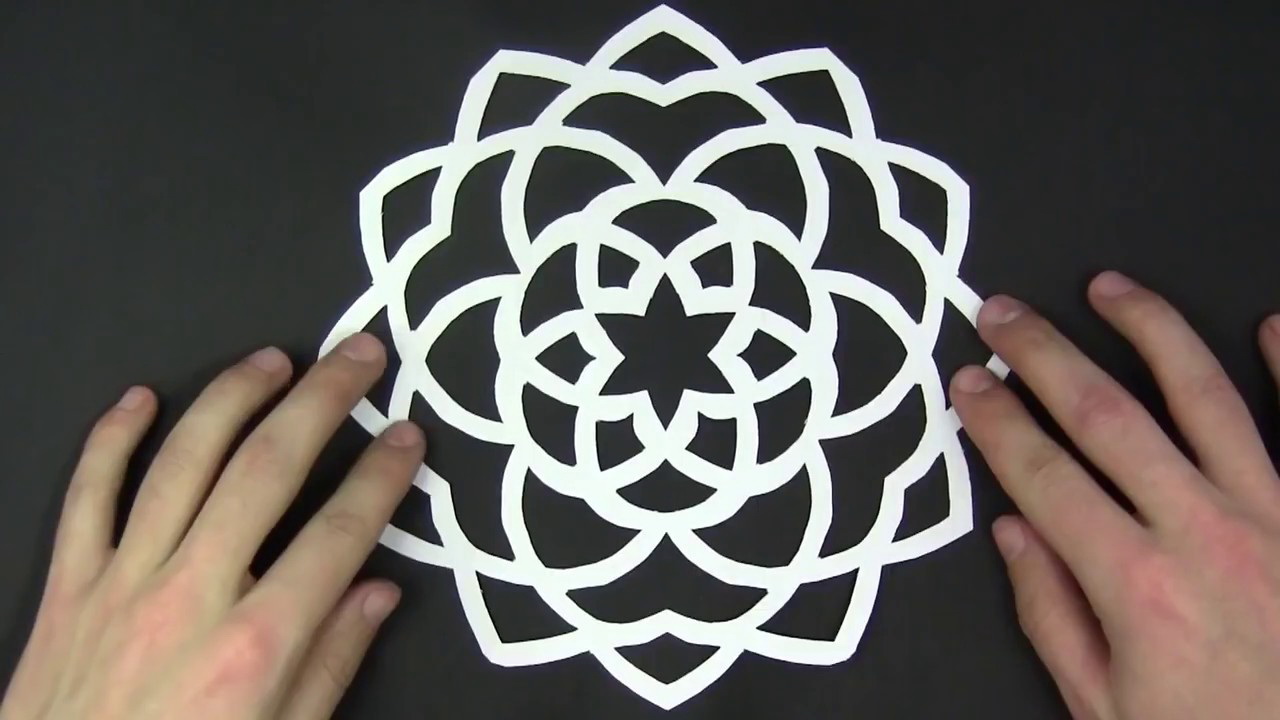
Decorate your home with gentle beauties
I also bend the second corner in the same way, just watching that the second corner overlaps the first one. Next, fold on the vertical axis in half, held from the serif. After that, I take a pencil and draw the outline of a snowflake. Then cut along the contour.
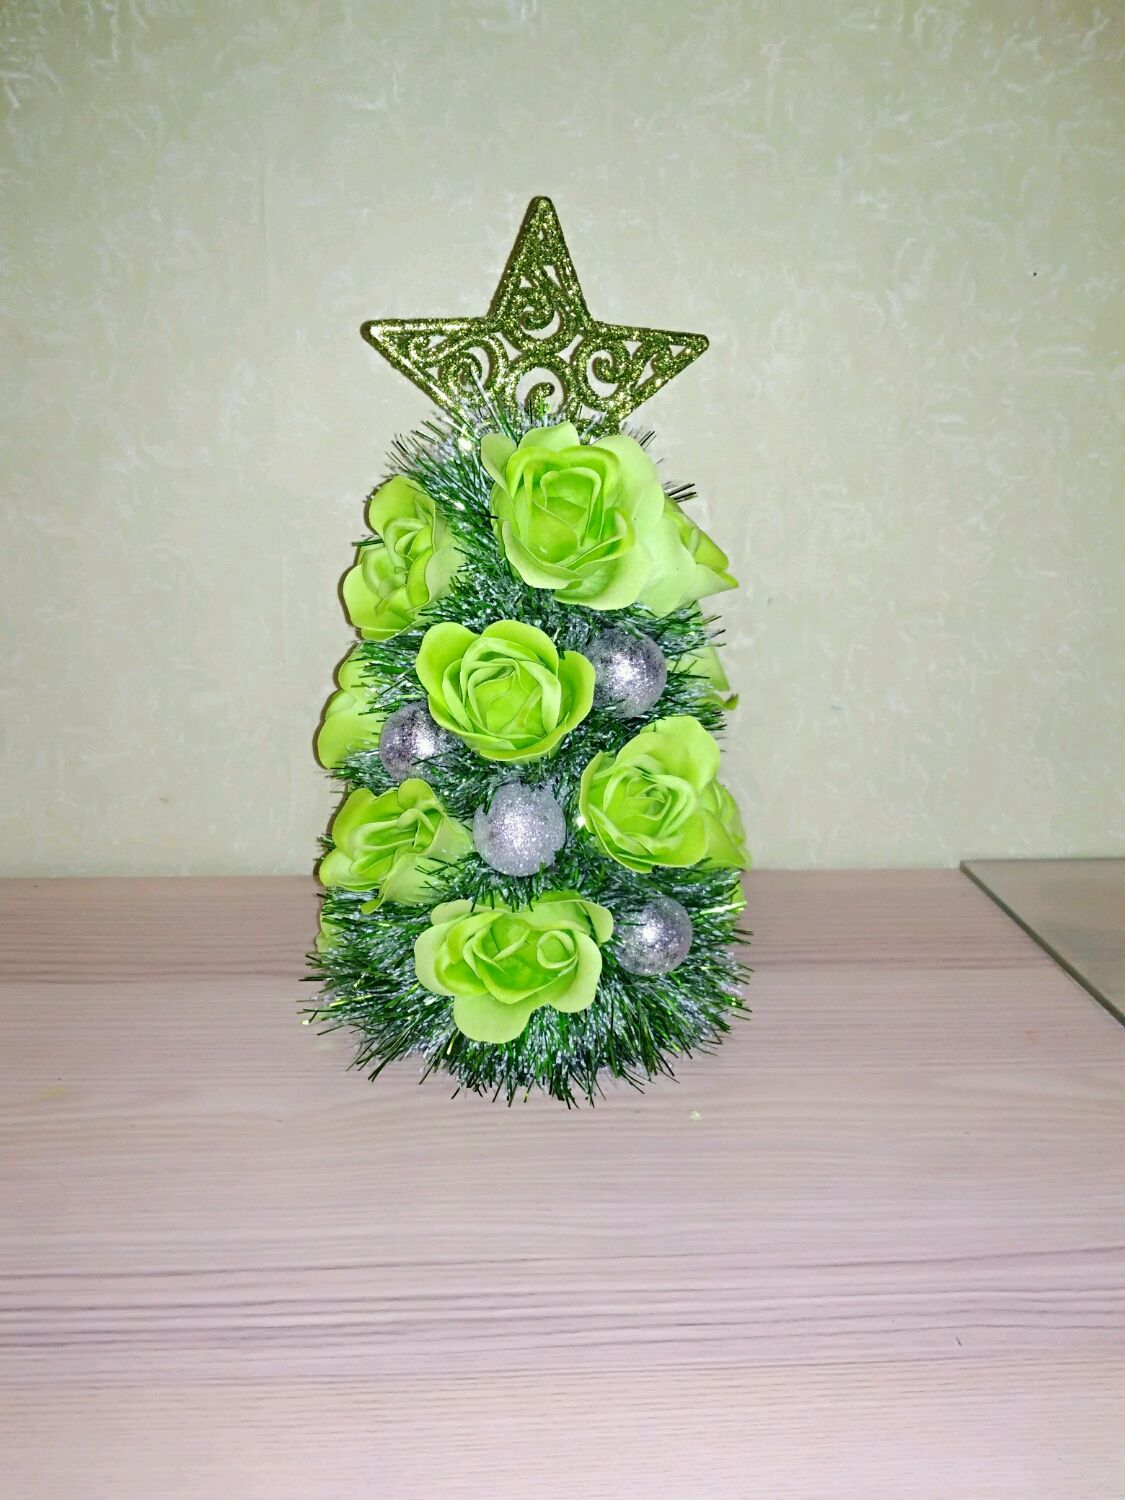
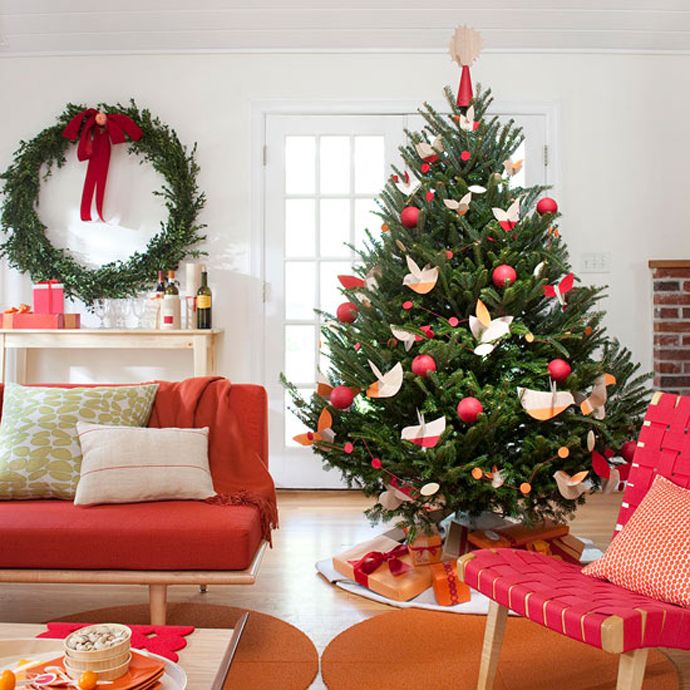
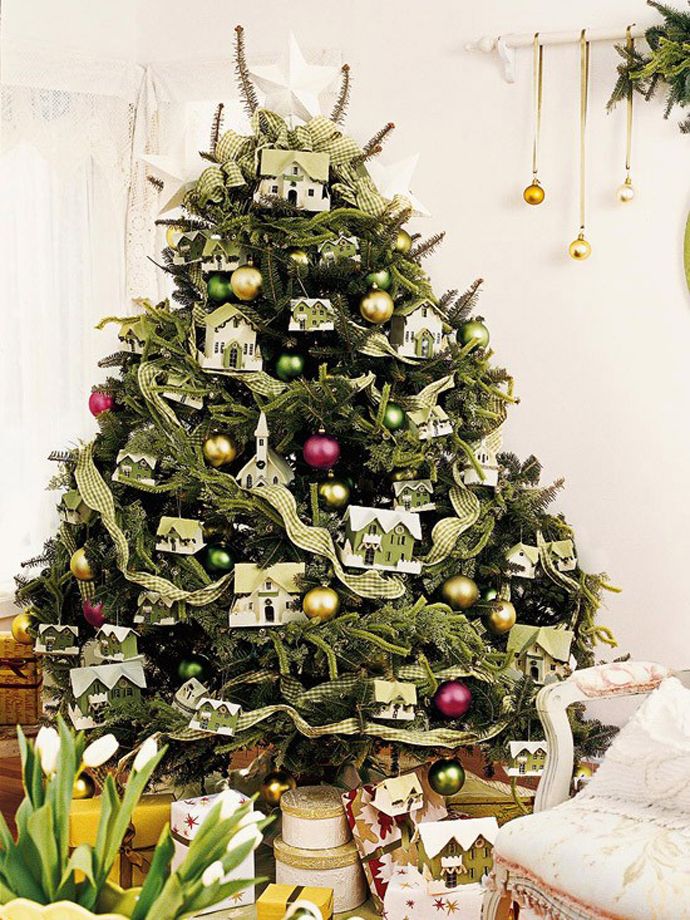
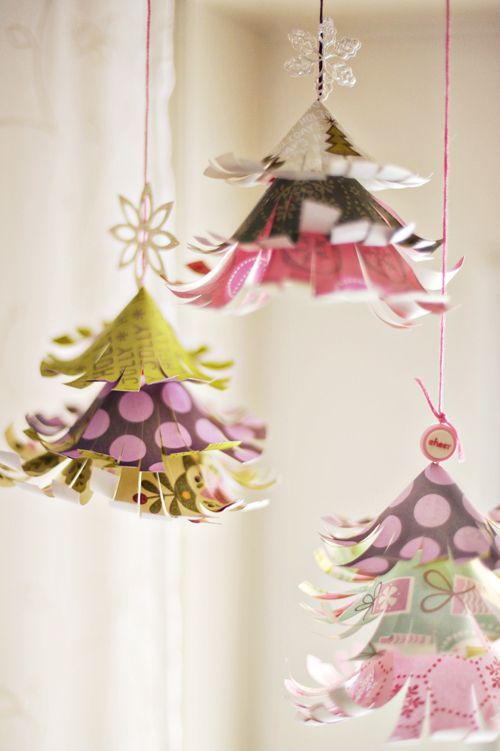
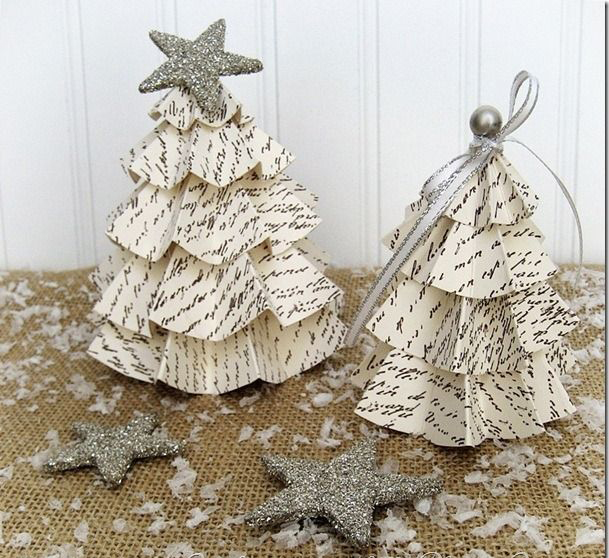
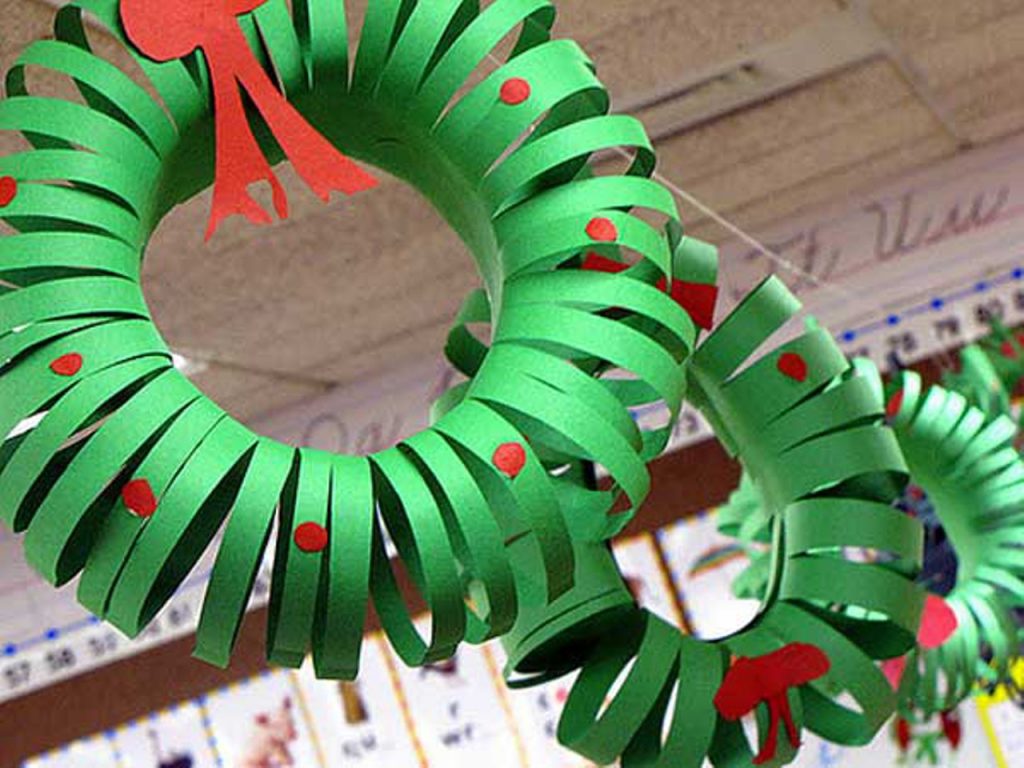
return to menu ↑Christmas tree
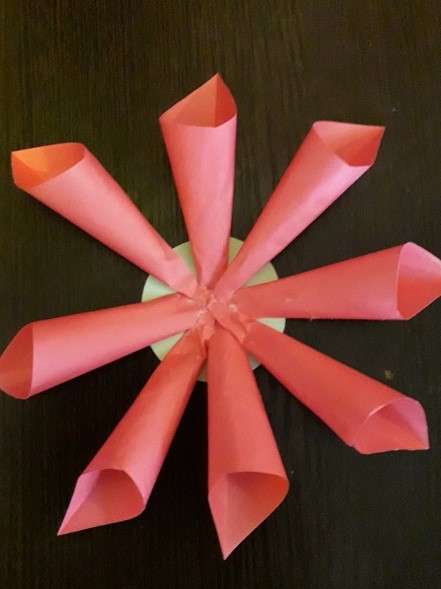
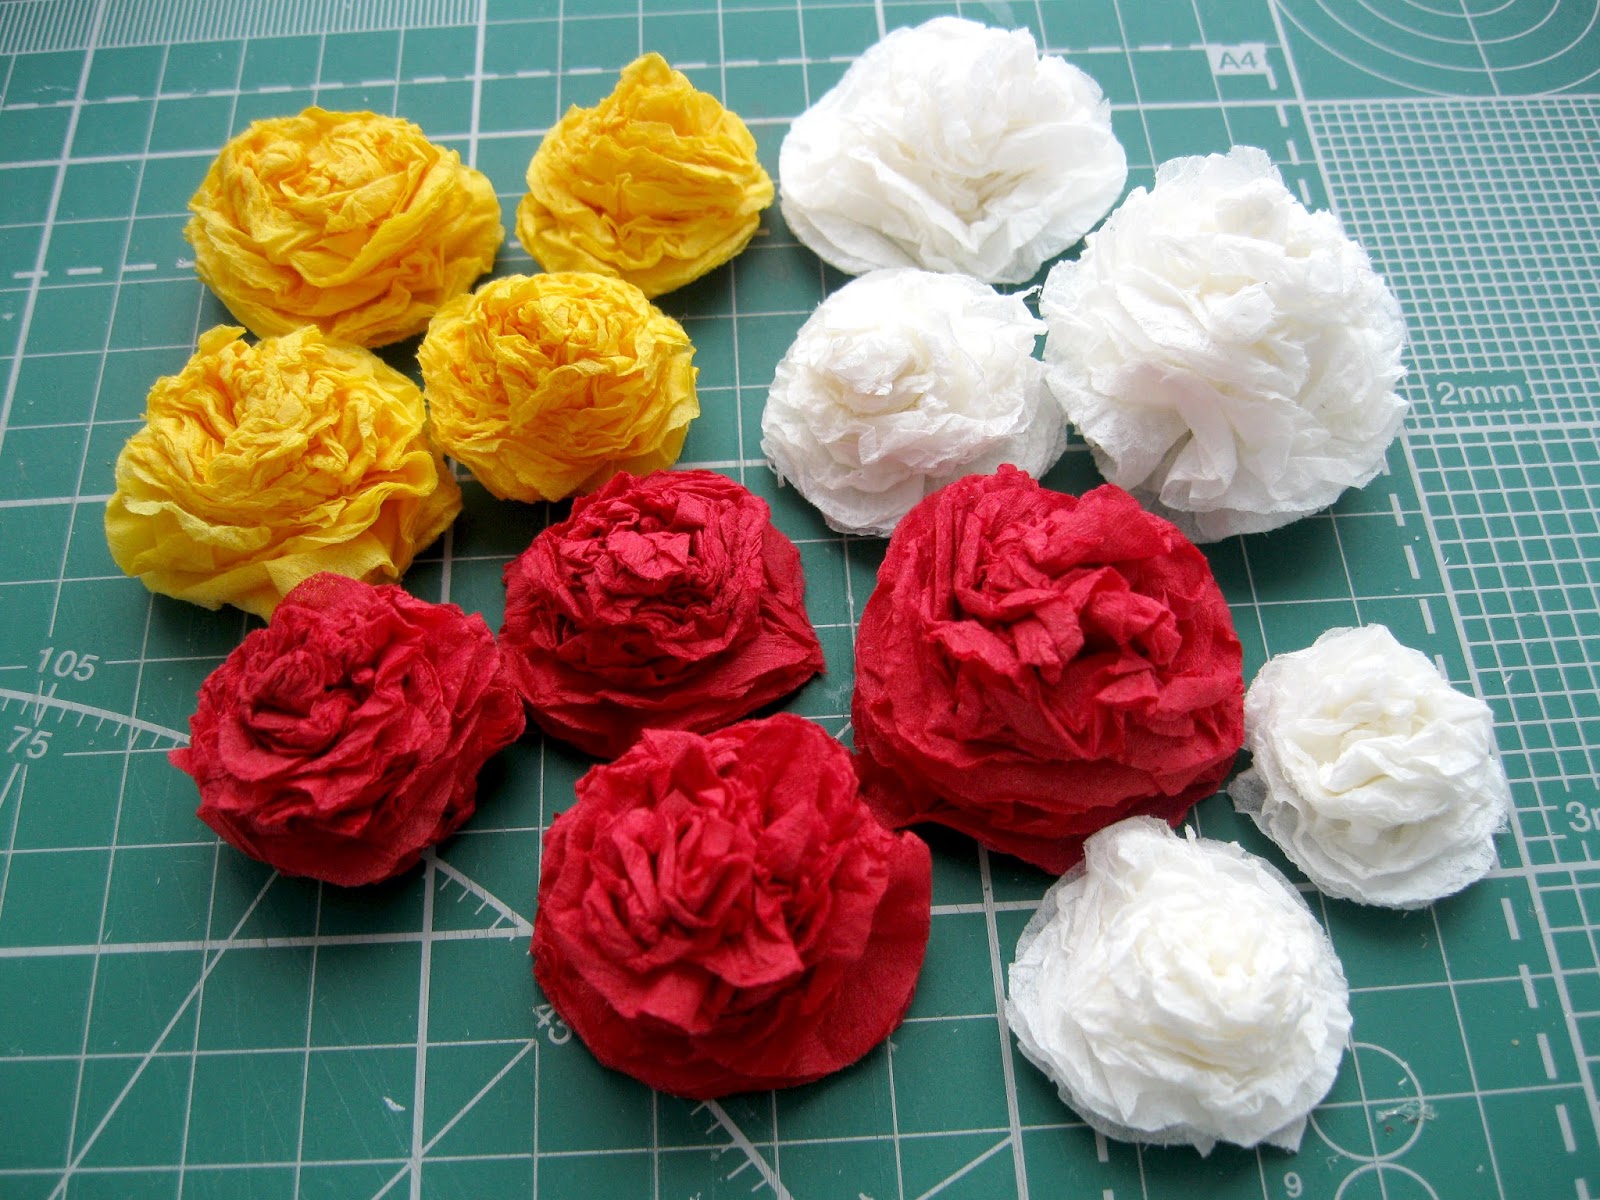
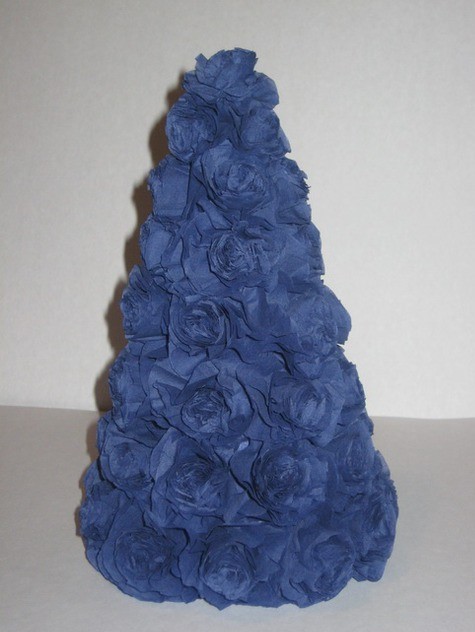
What a New Year without green beauty? For our first idea, we need to make a cone of paper. "Sprigs" for our Christmas tree will be roses, made from napkins.
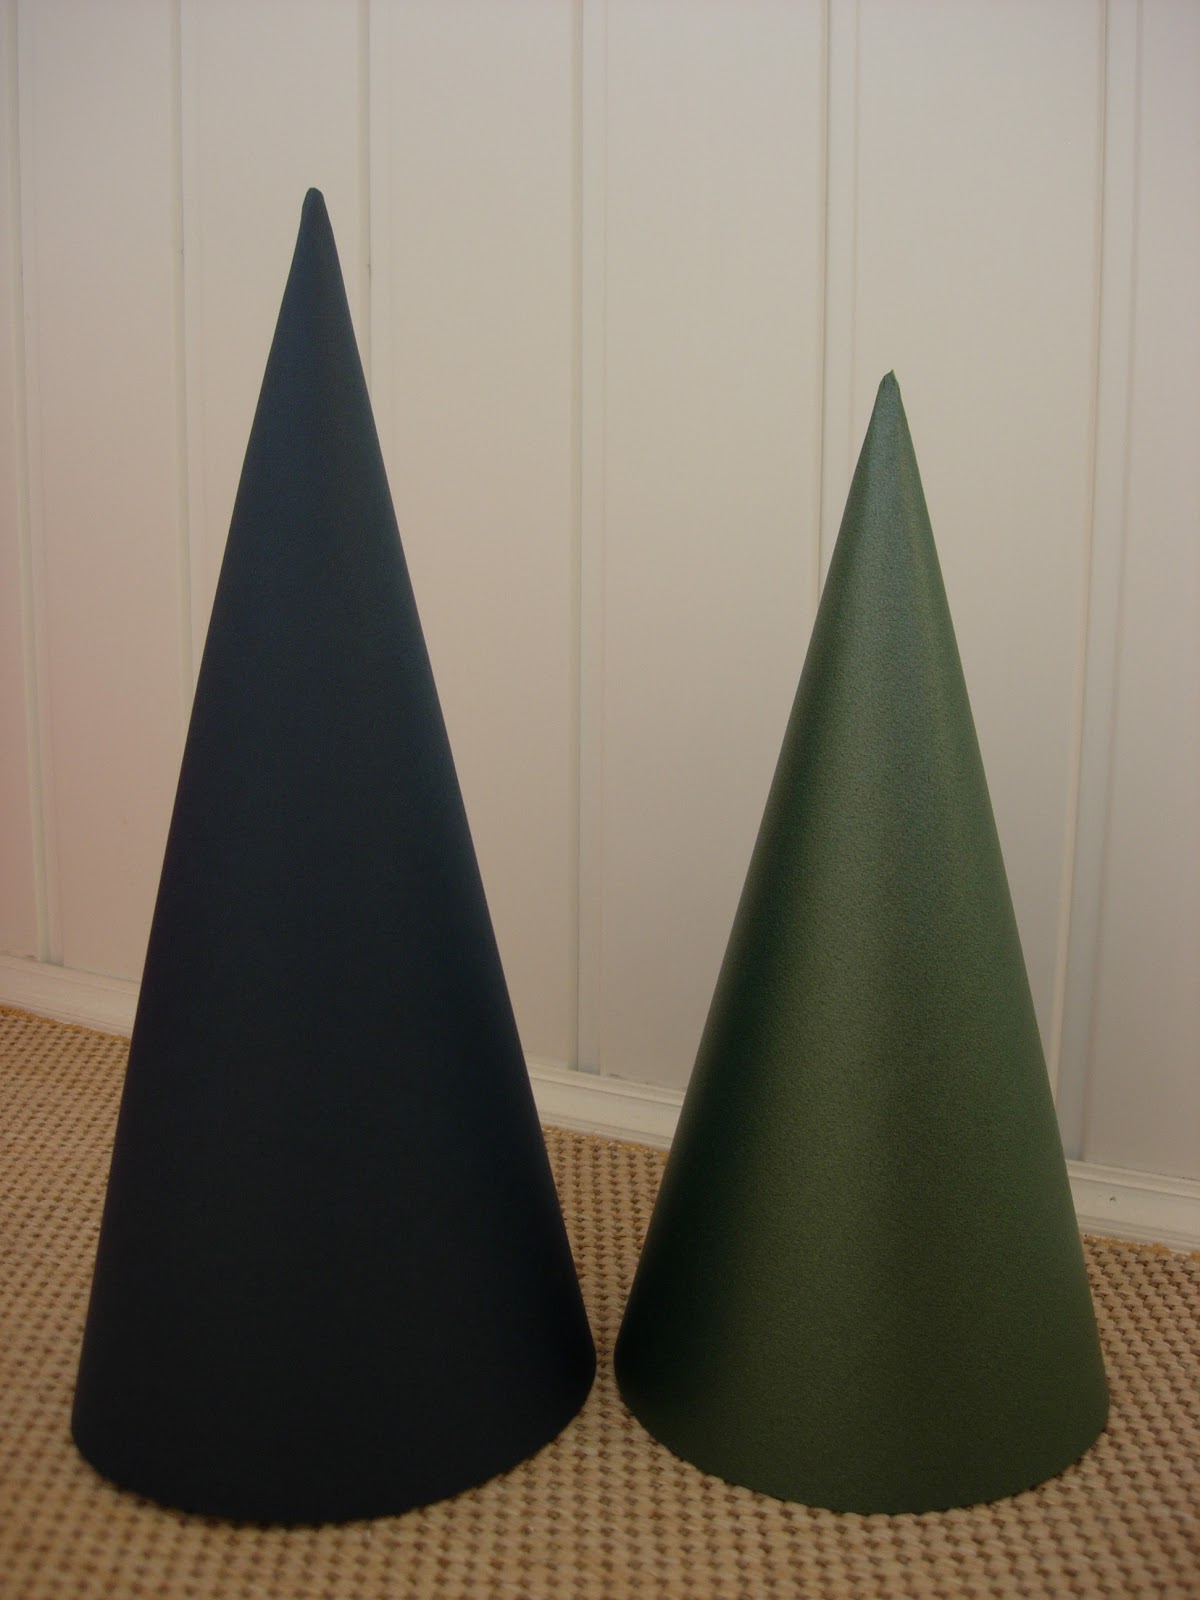
Cone for green paper crafts
I fold each napkin in half, and then again in half. After that, I fasten all this with a stapler in the middle. After I fastened, I cut a circle out of the napkin. I should get it multi-layered.
Cut out a circle from multilayer napkins
I take the topmost layer and twist. So I do with all layers. When I did everything, I spread a little rose. Now you need to glue the cone with roses so that there are no gaps and bald spots.

Tightly glue all the roses to the cone
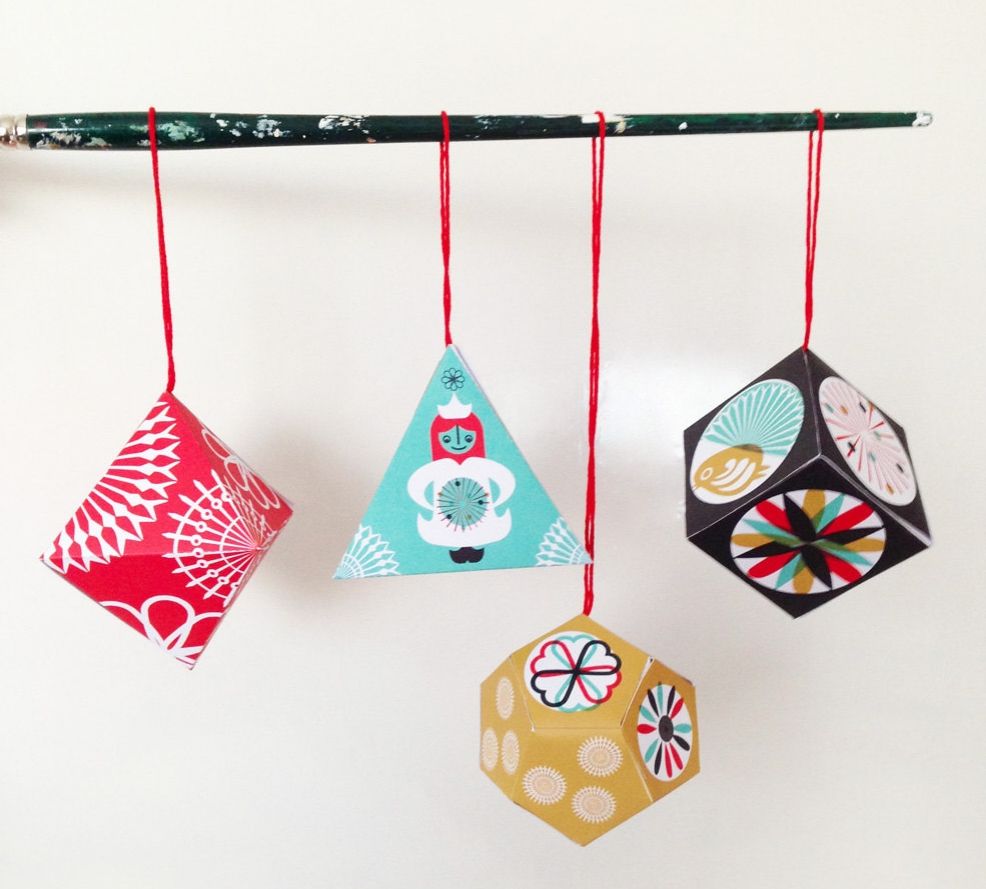
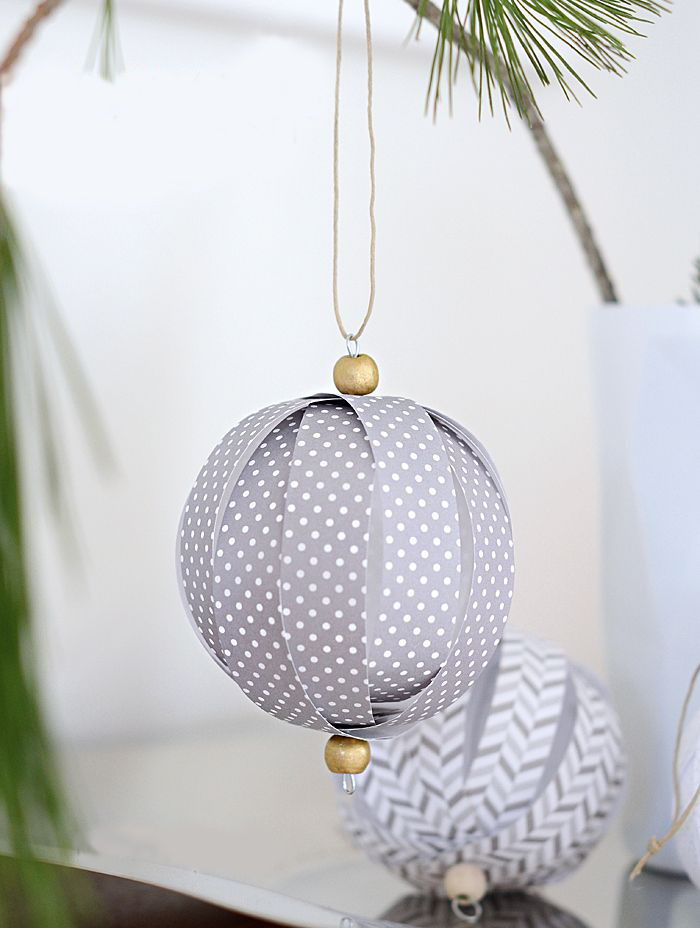
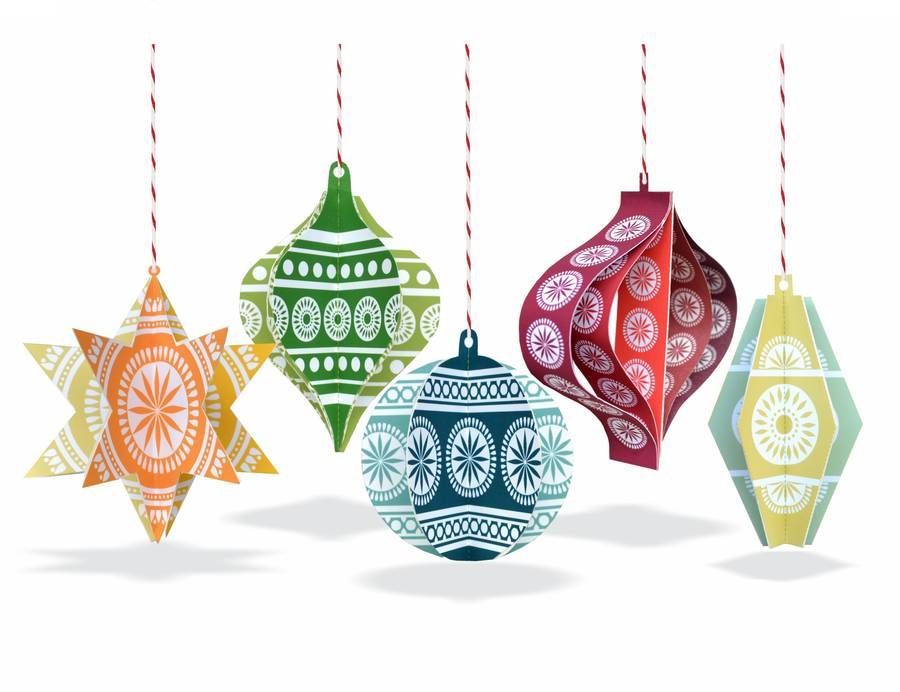
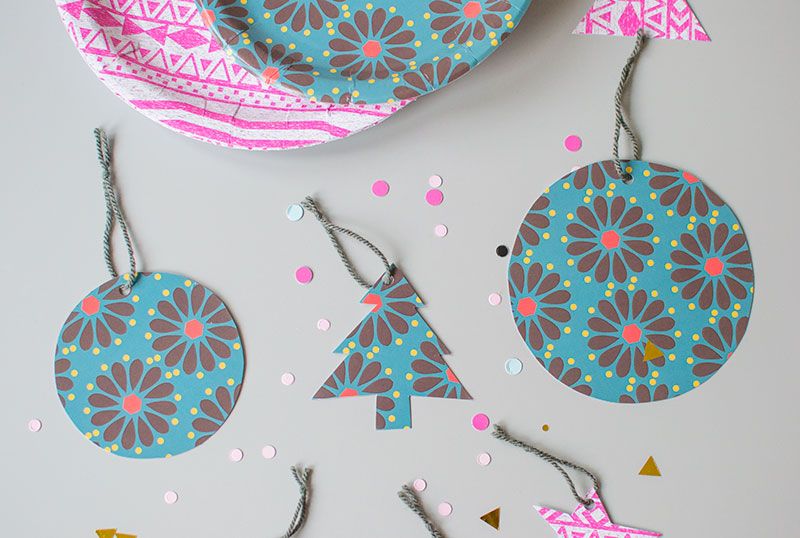
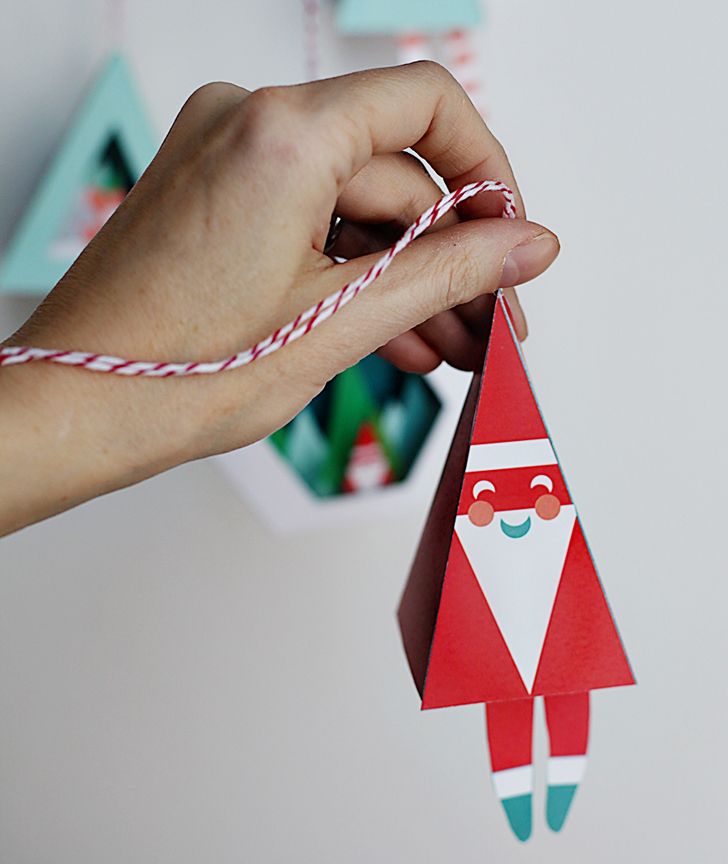
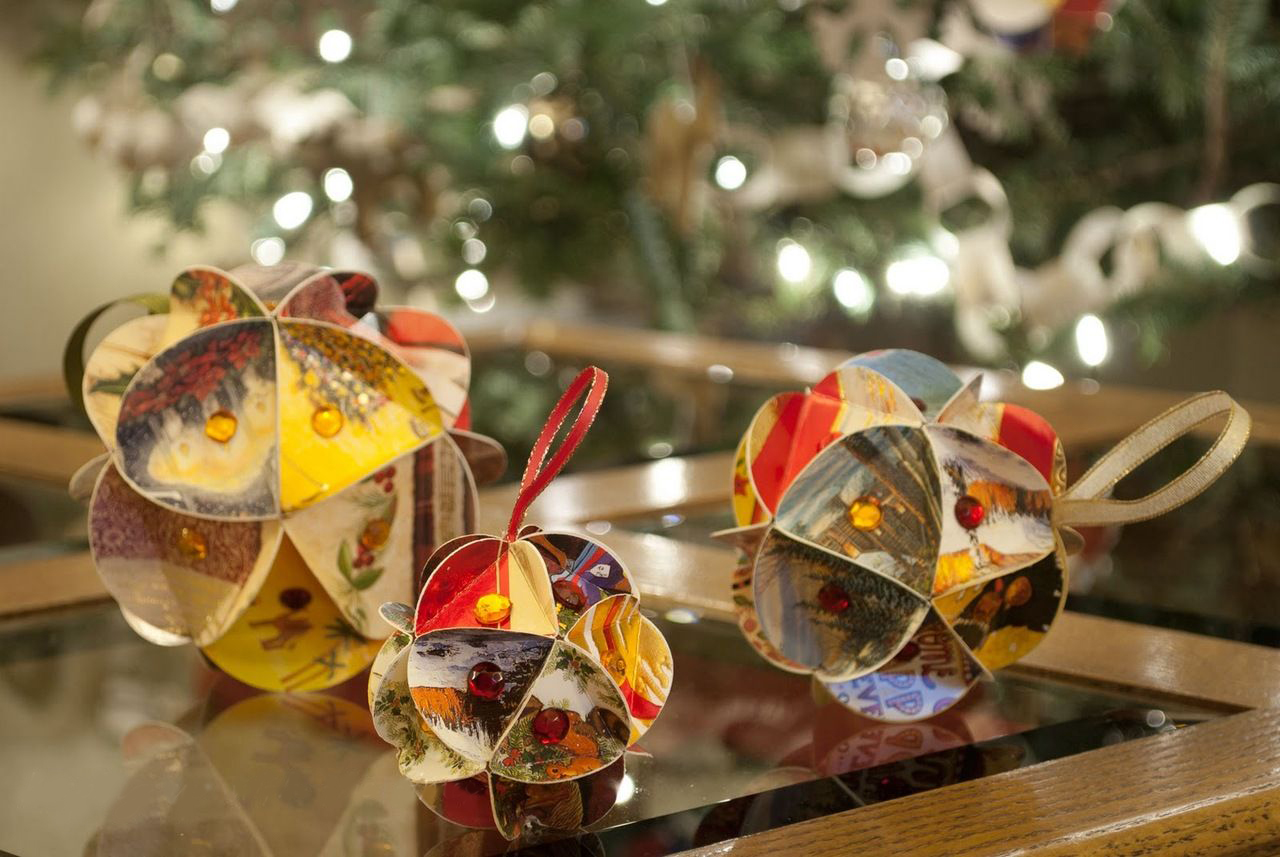
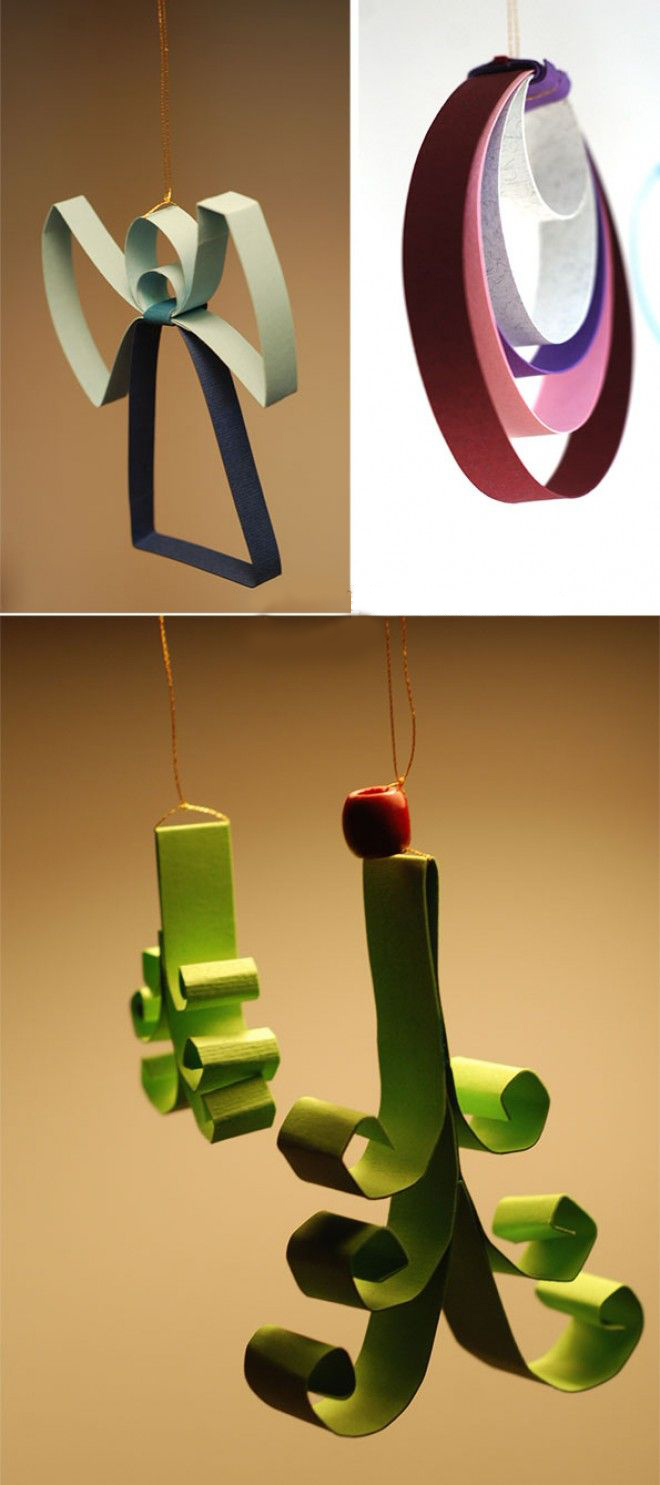
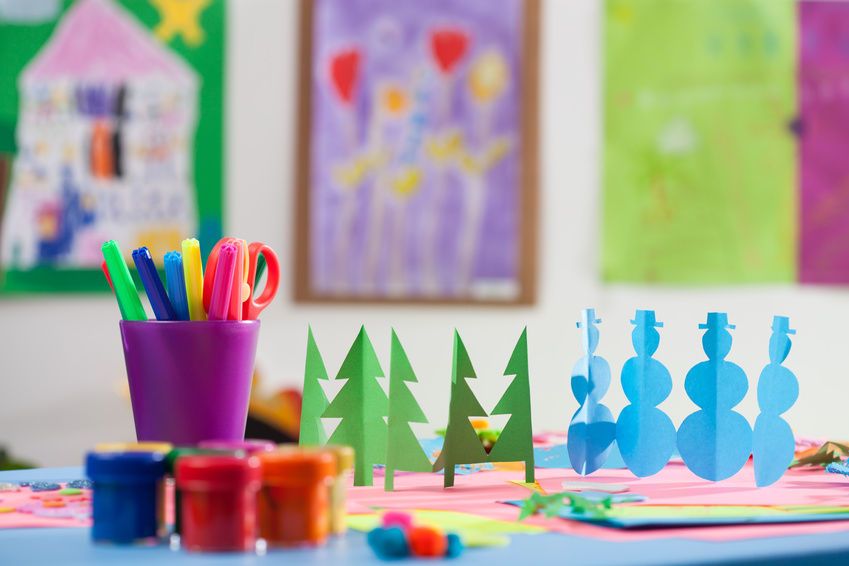
Christmas decorations made of paper
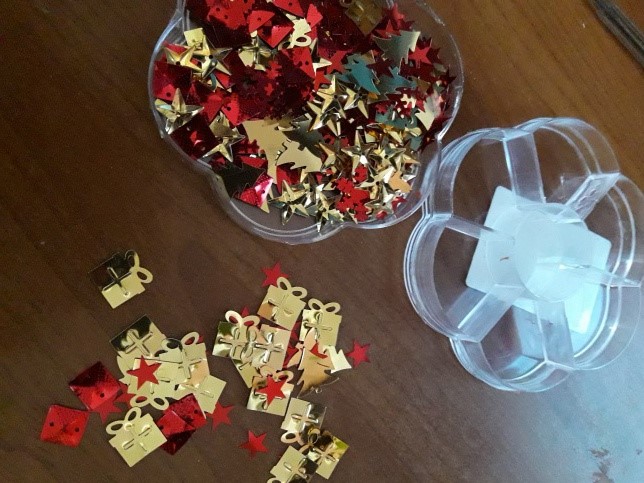
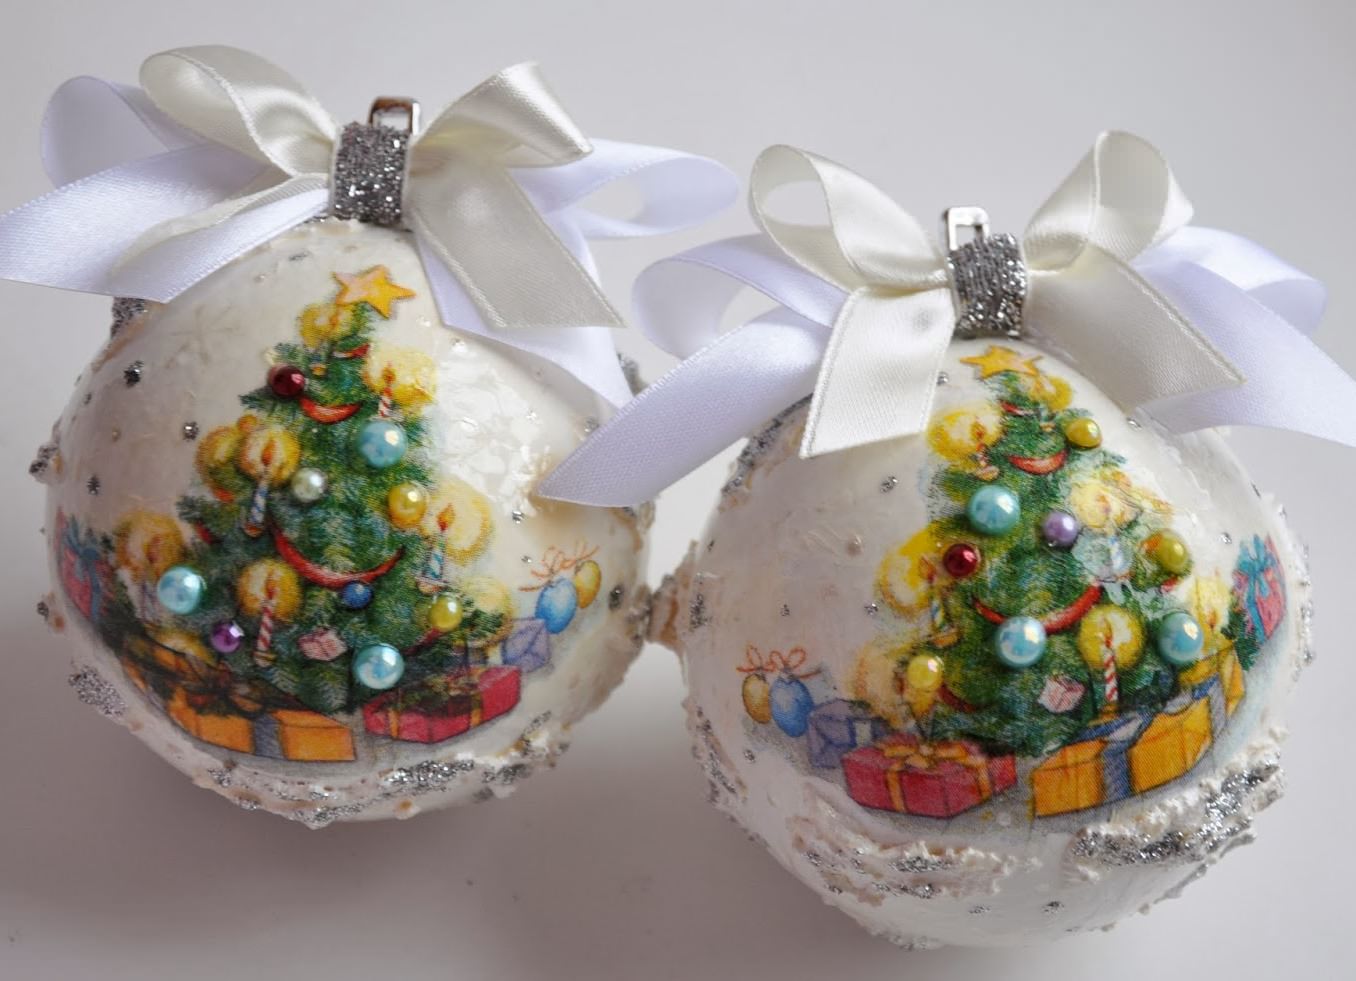
We turn to the Christmas decorations from paper. What is the Christmas tree without balls, icicles, cones and other decorations?
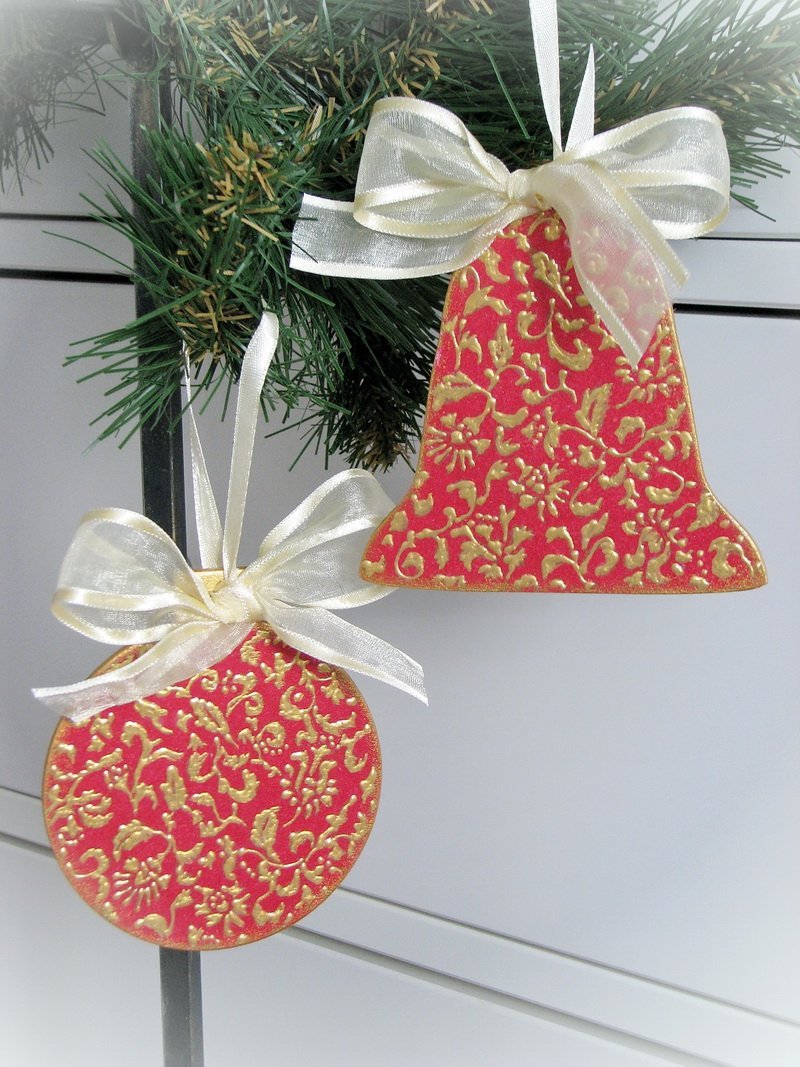
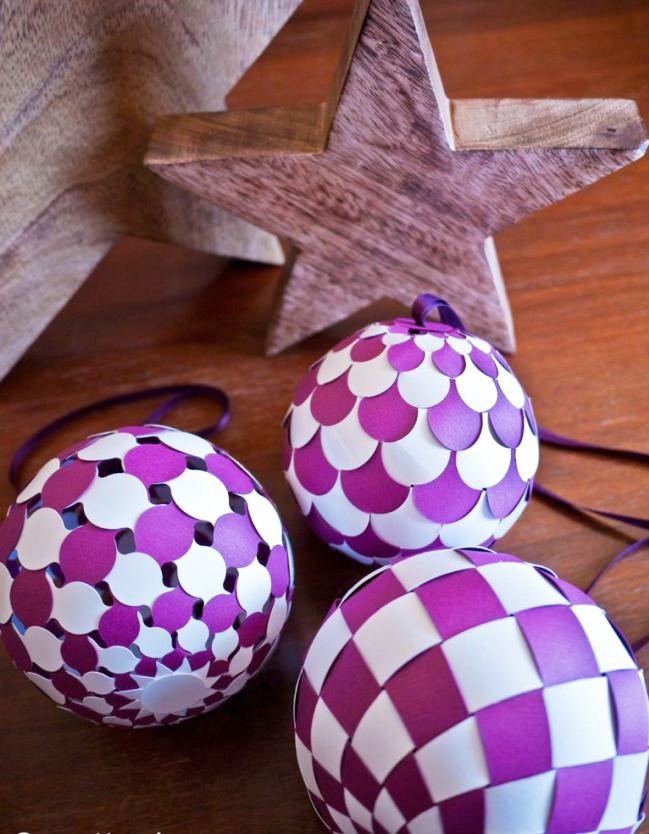
Balls and bells for a holiday Christmas tree
So let us make Christmas decorations for our forest beauty? For this, I will need:
- Thick paper.
- Old magazines, cardboard boxes and candy boxes.
- Scissors.
- Glue.
- Compass.
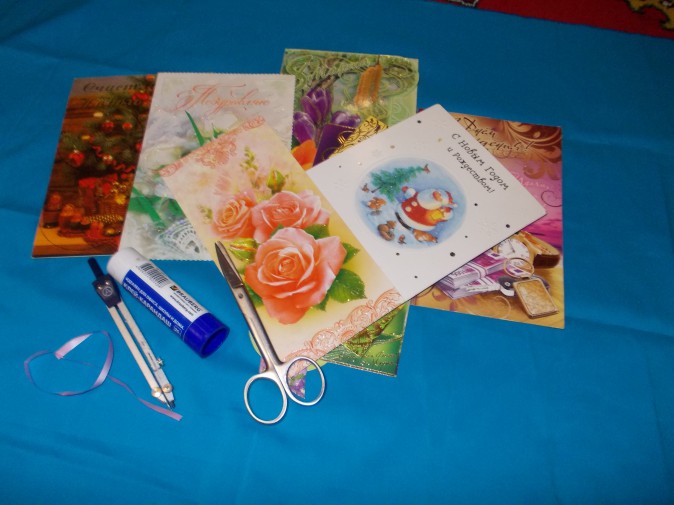
We prepare the necessary materials for toys
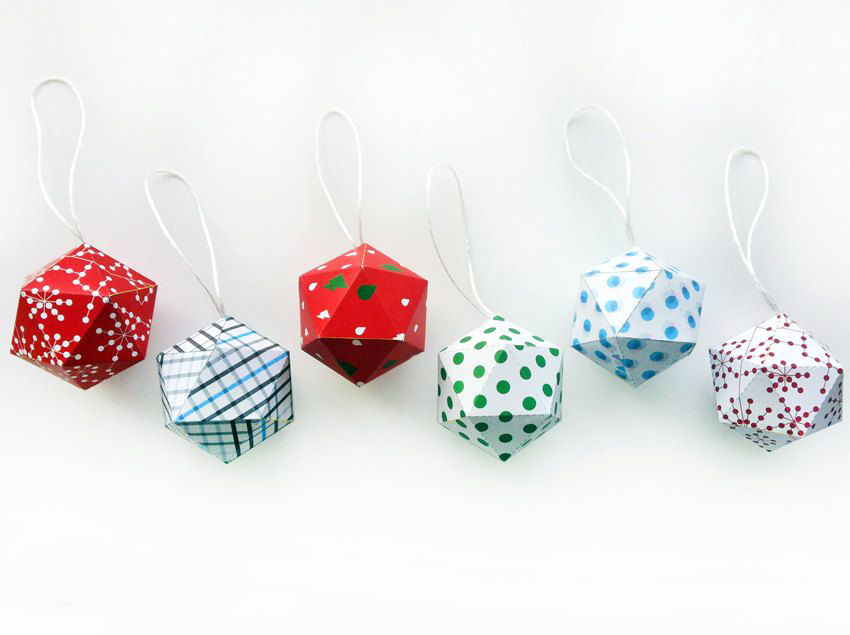
To begin with, I take a cardboard and circle twenty-one identical circles and cut out the circles obtained with scissors.
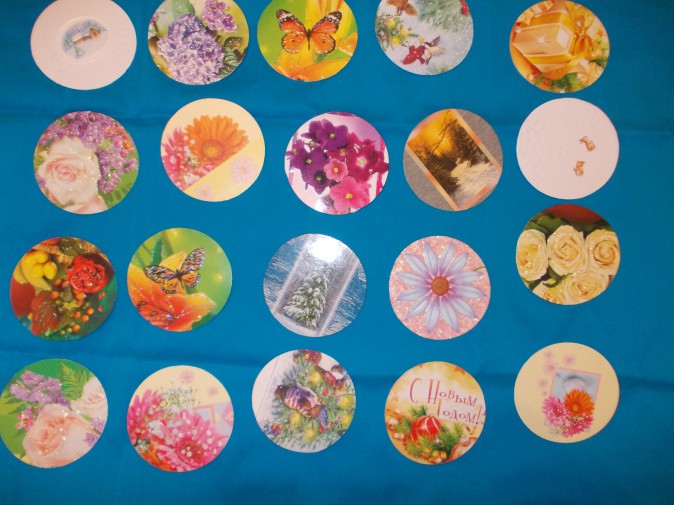
Cut out circles from beautiful cardboard cards
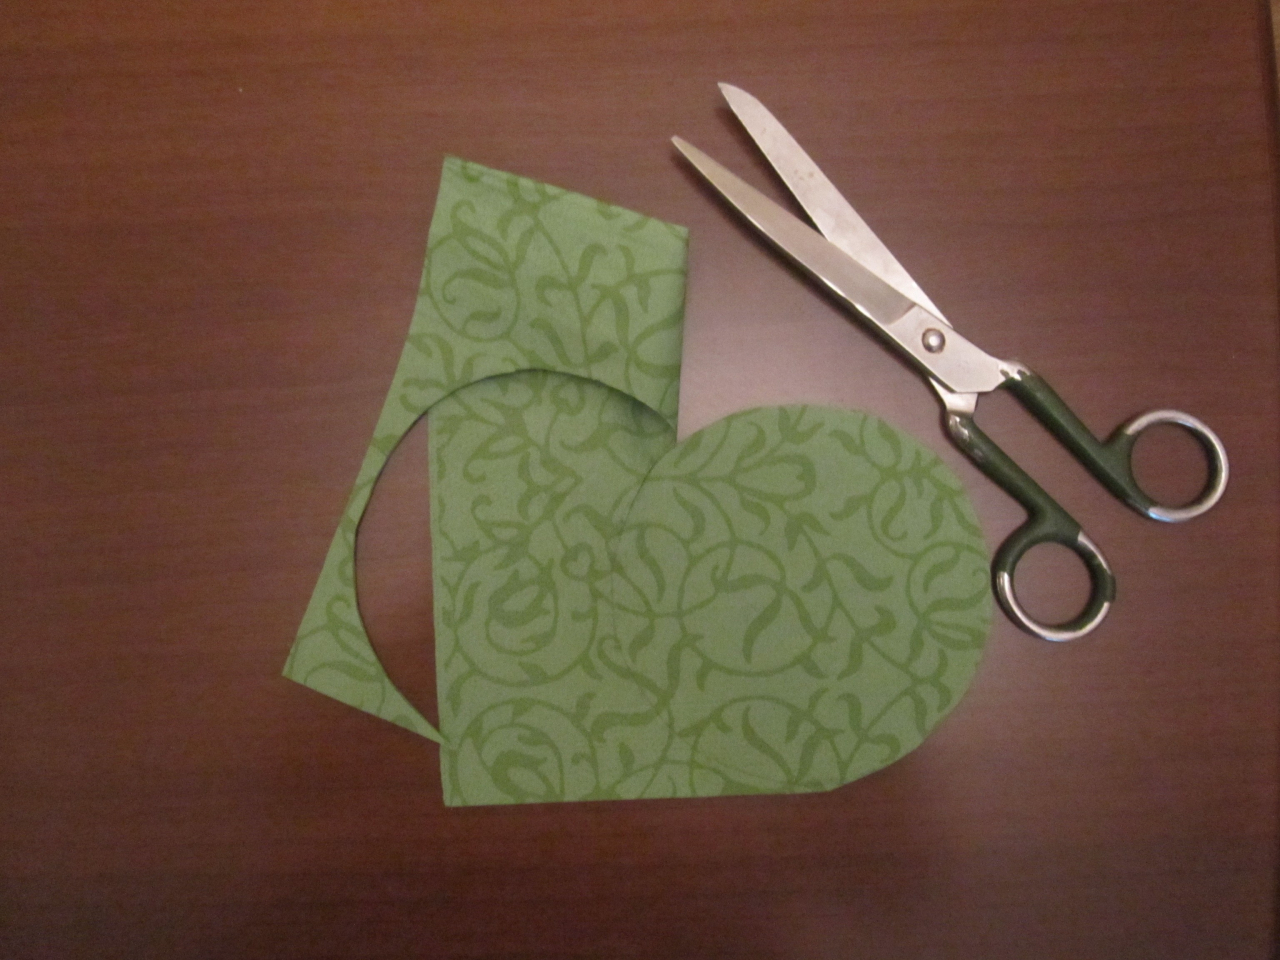
Each circle needs to be folded to me as follows: I bend the circle in half twice, on one side and, on the other. After that I unbend and outline the center of the circle. Then I bend again, but only one side, so that the edge of my circle was exactly along the intended center. Bend again so on two sides. I should make a triangle.
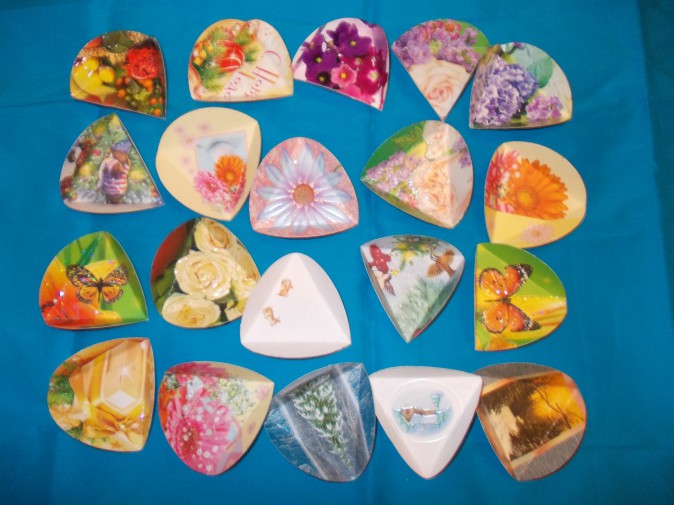
Bend the three edges towards the center.
In one of the twenty circles I need to cut this triangle, which will serve as a kind of stencil. Then all we need to do is to put a triangle on the other circles, circling it and bending the edges of the circles outwards along the contour.
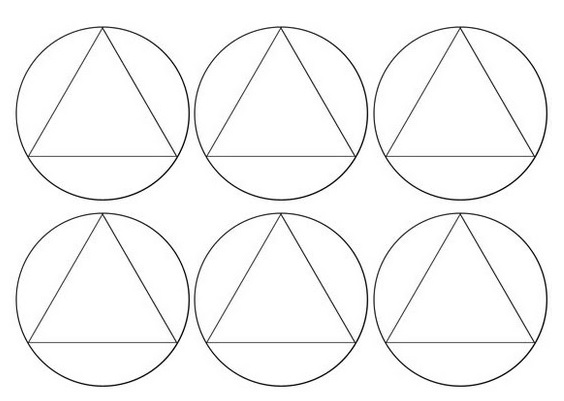
Use a pattern for identical symmetric circles.
Now I need to take the first ten circles and glue them in striped, alternating: five down, five up. The strip now I need to glue in the ring, which serve as the basis of our toys.
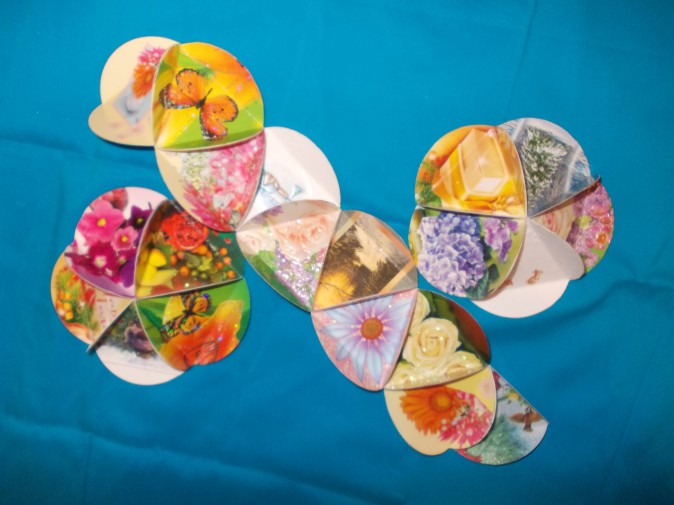
We connect the received circles among themselves
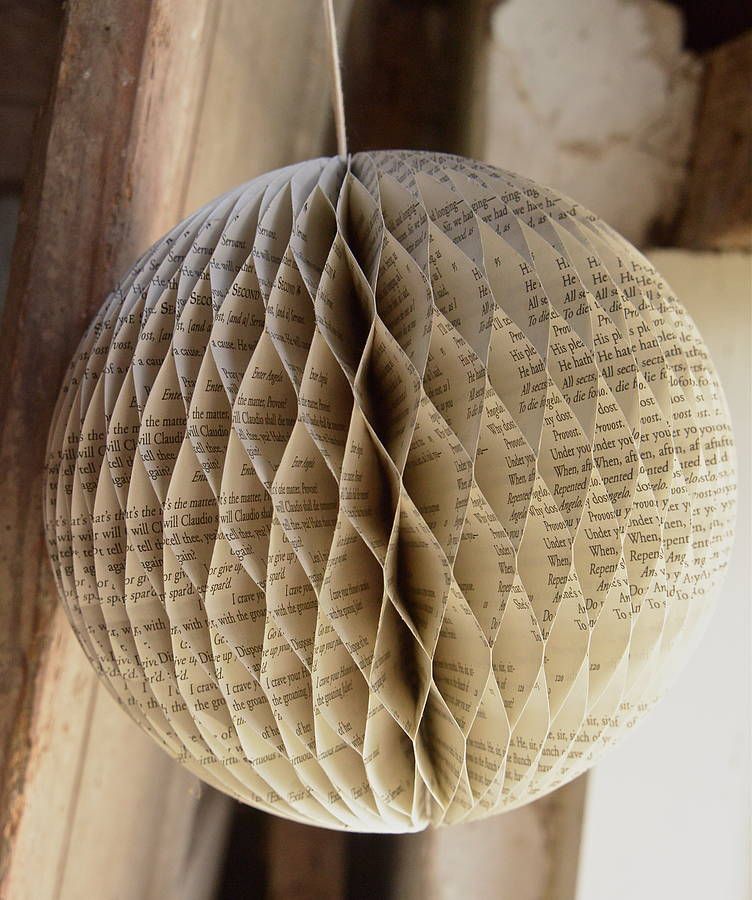
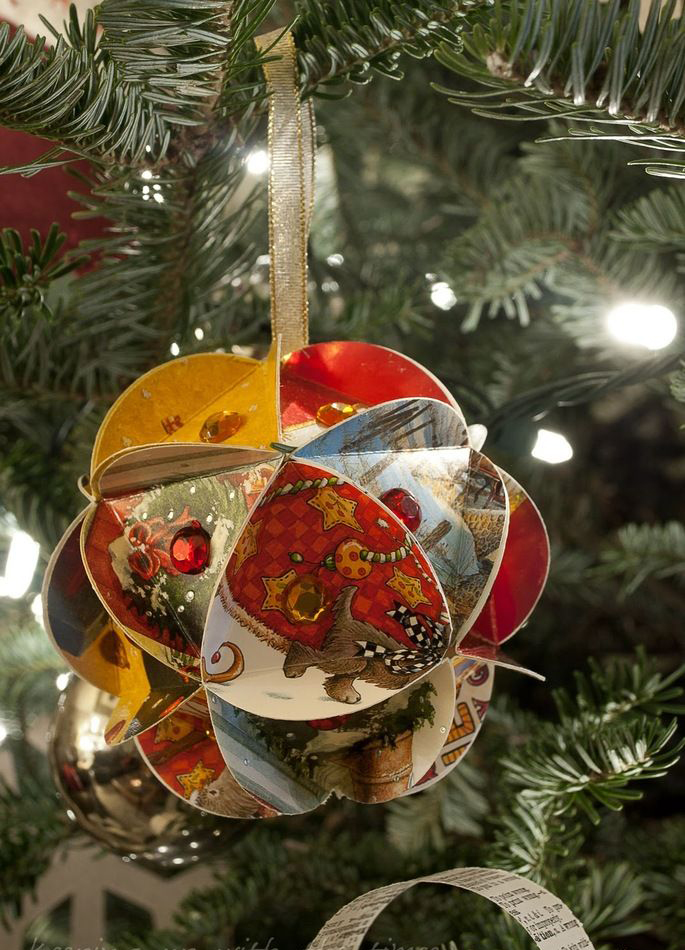
Now I will do the top and bottom cover. I need to glue them to the base in the same way. And now it is time to loop, for which the toy will be suspended.
We get a wonderful ball on the Christmas tree
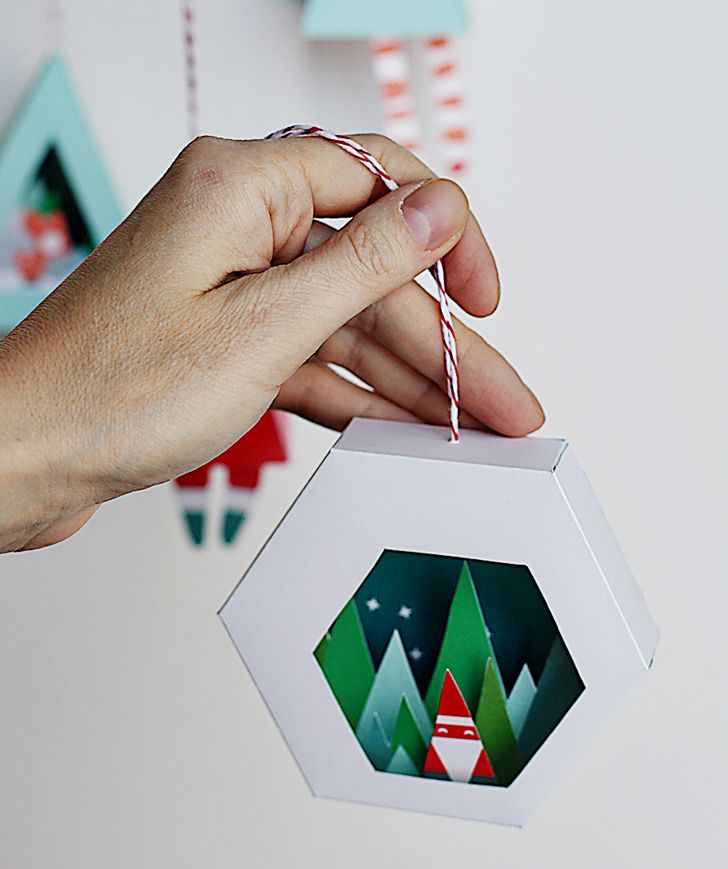
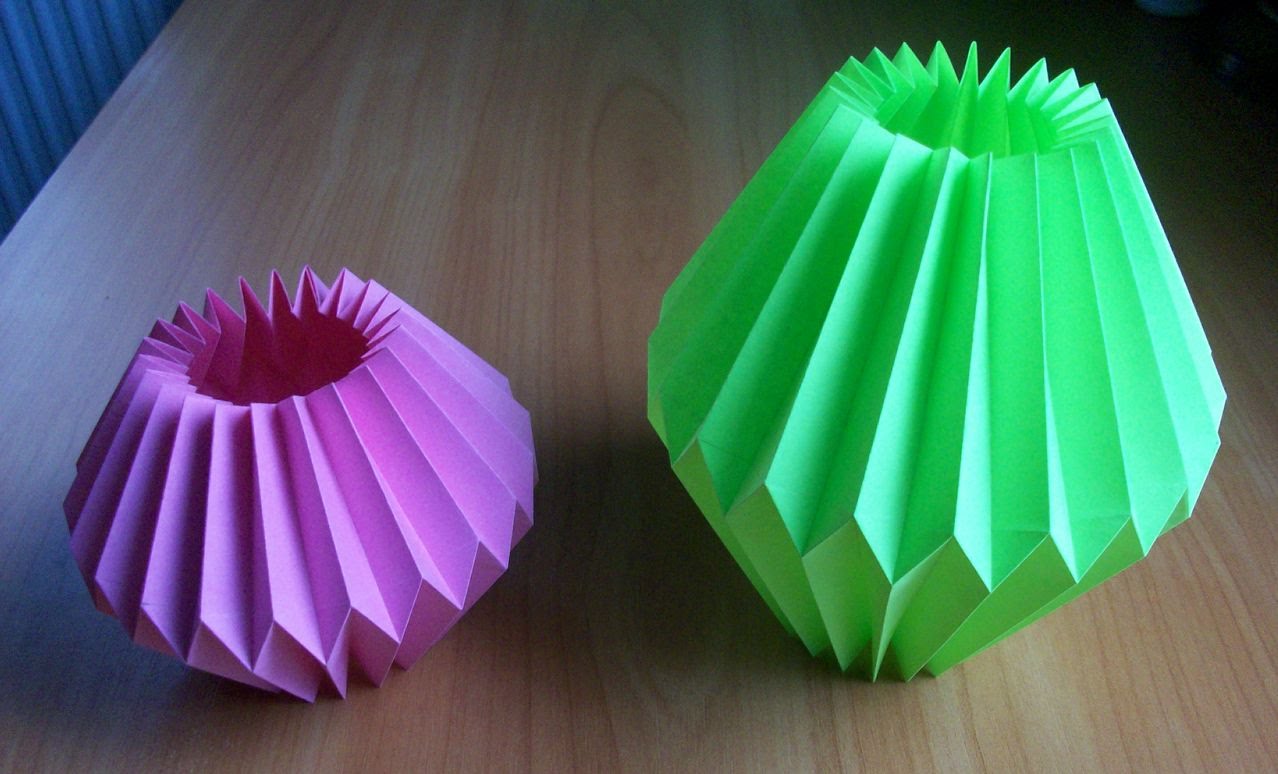
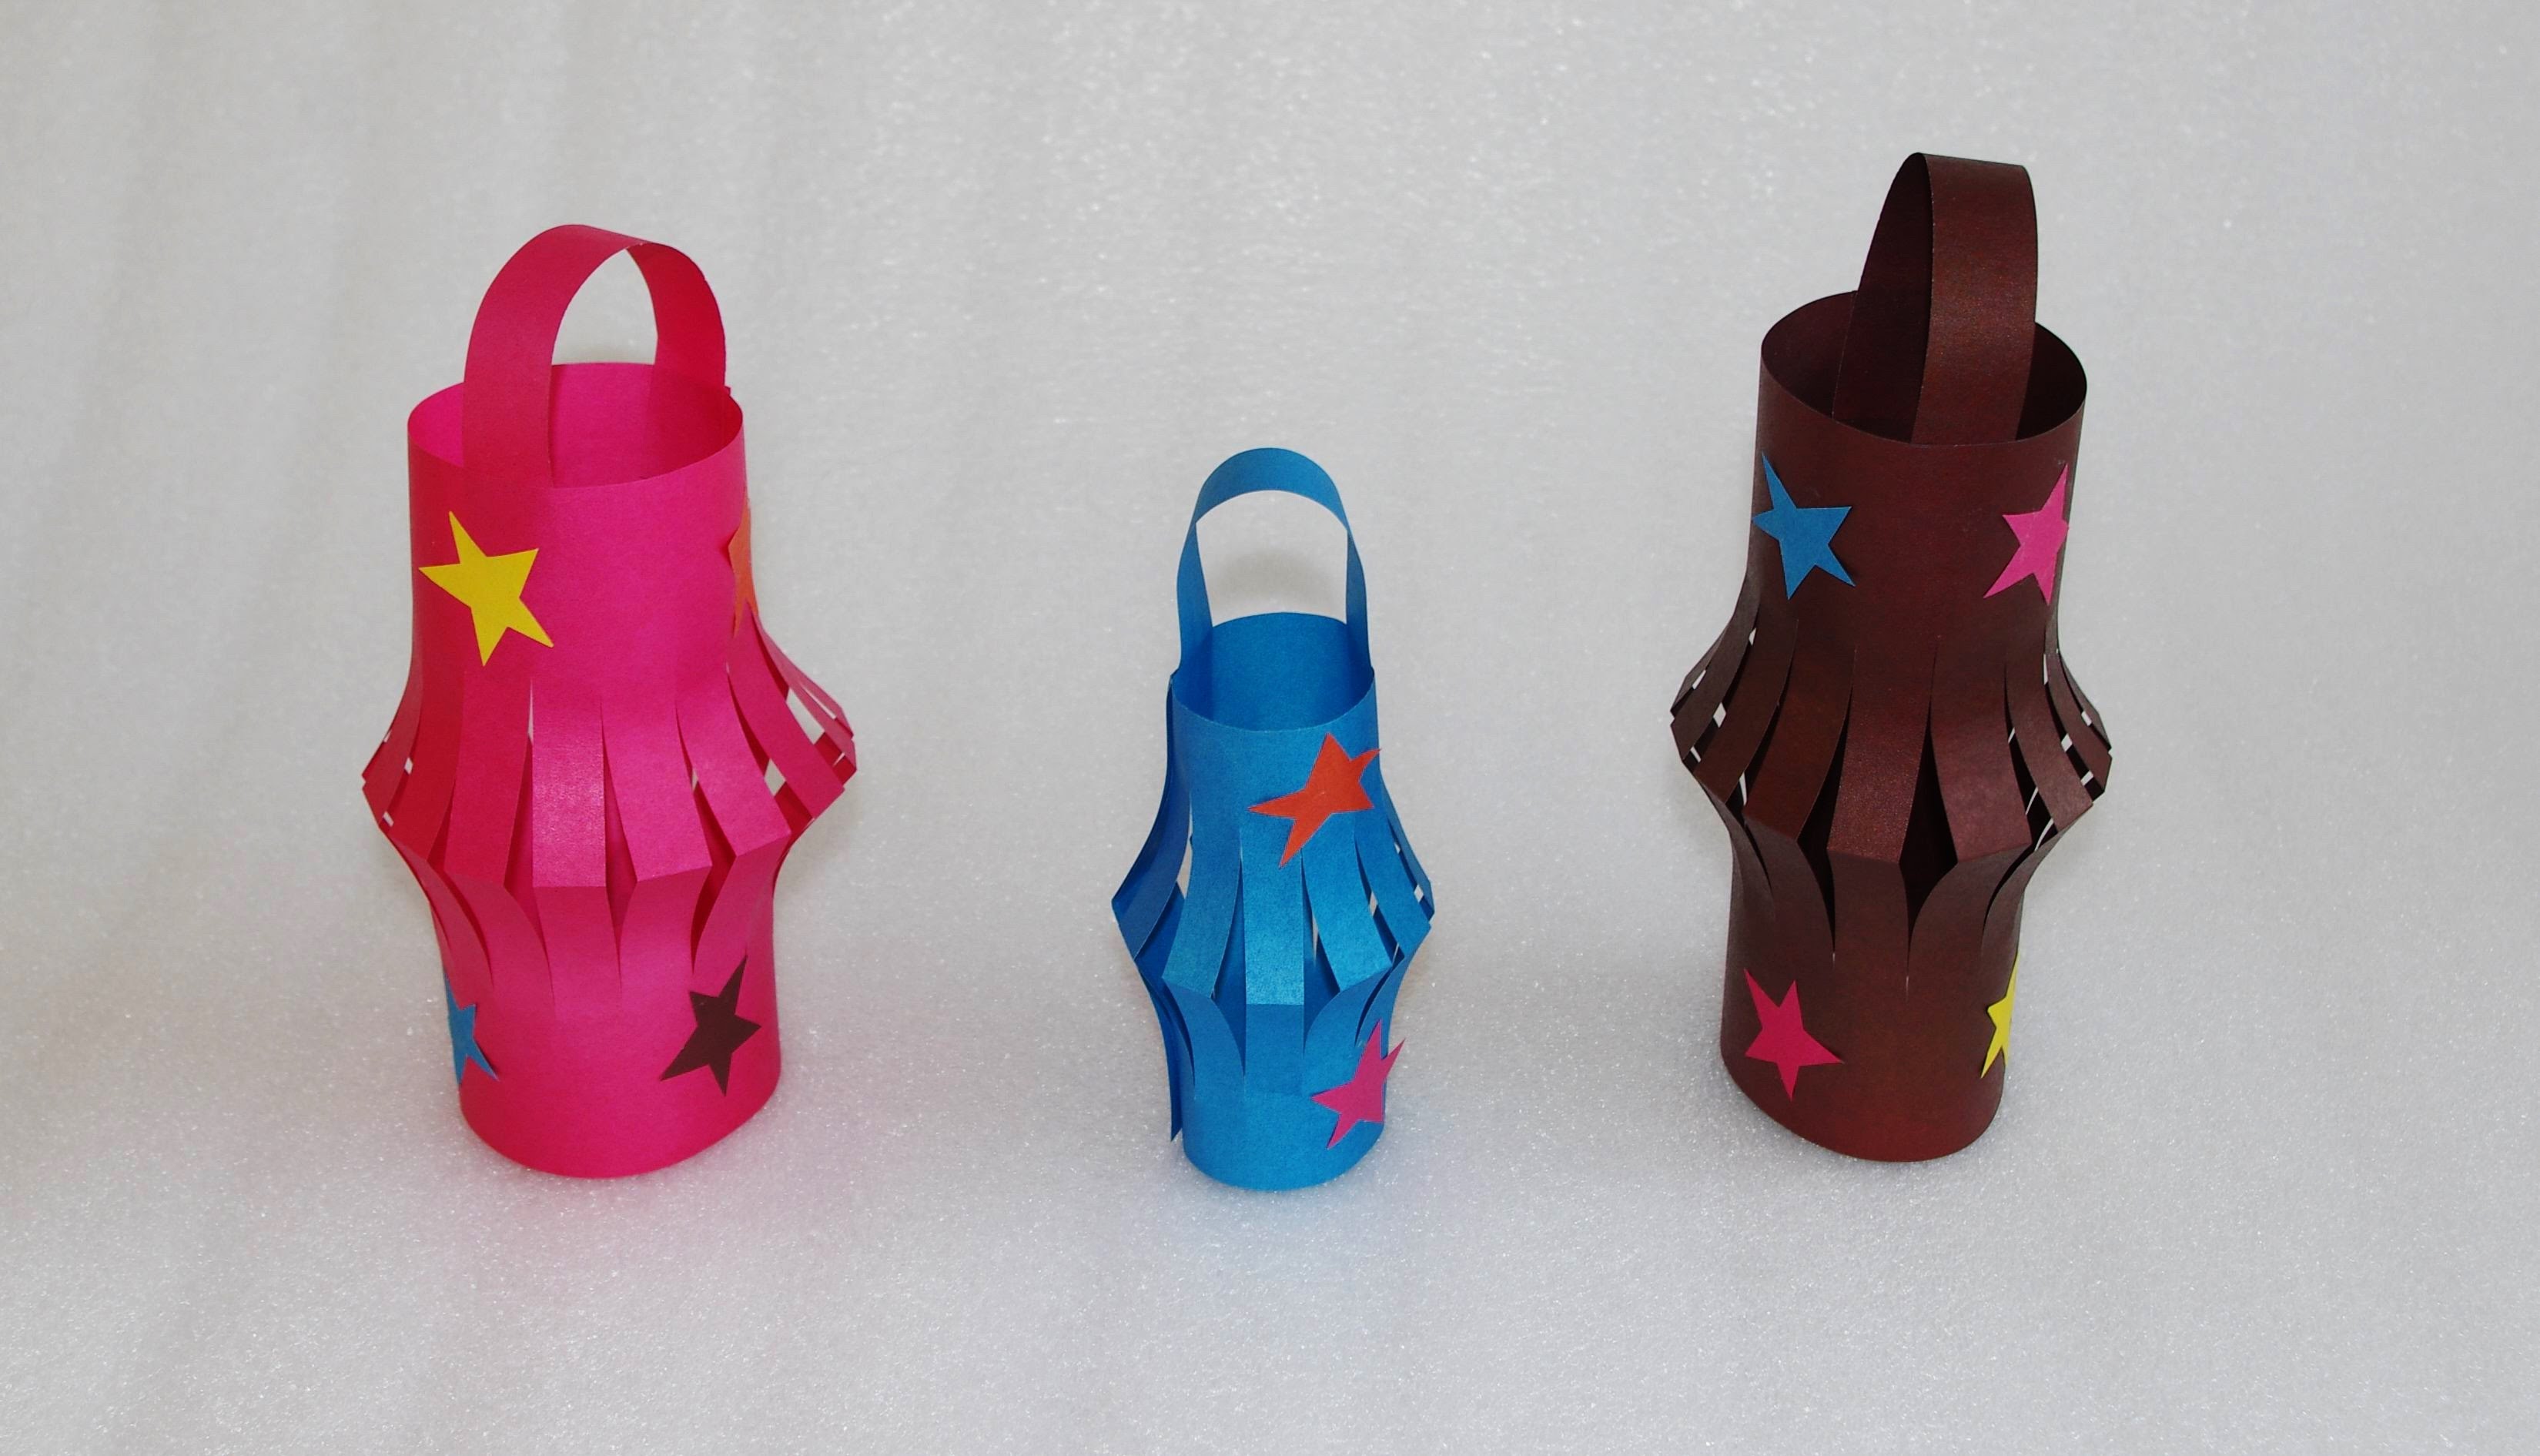
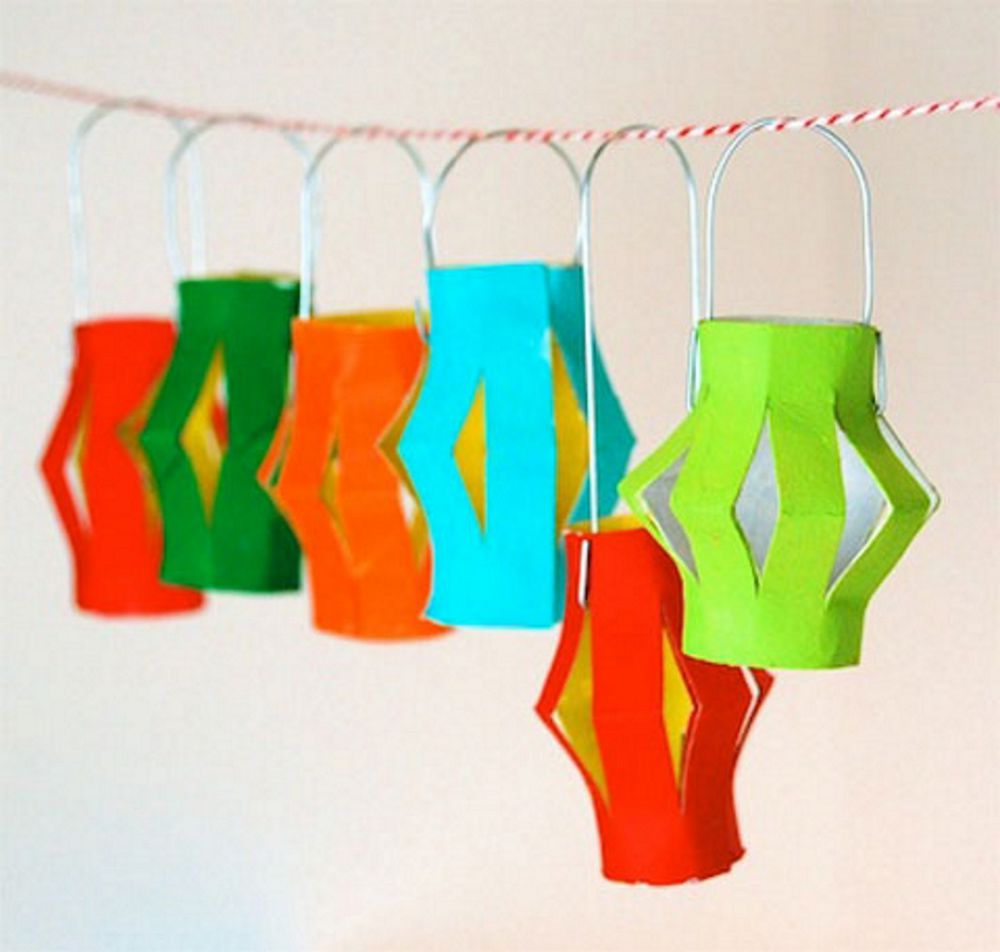
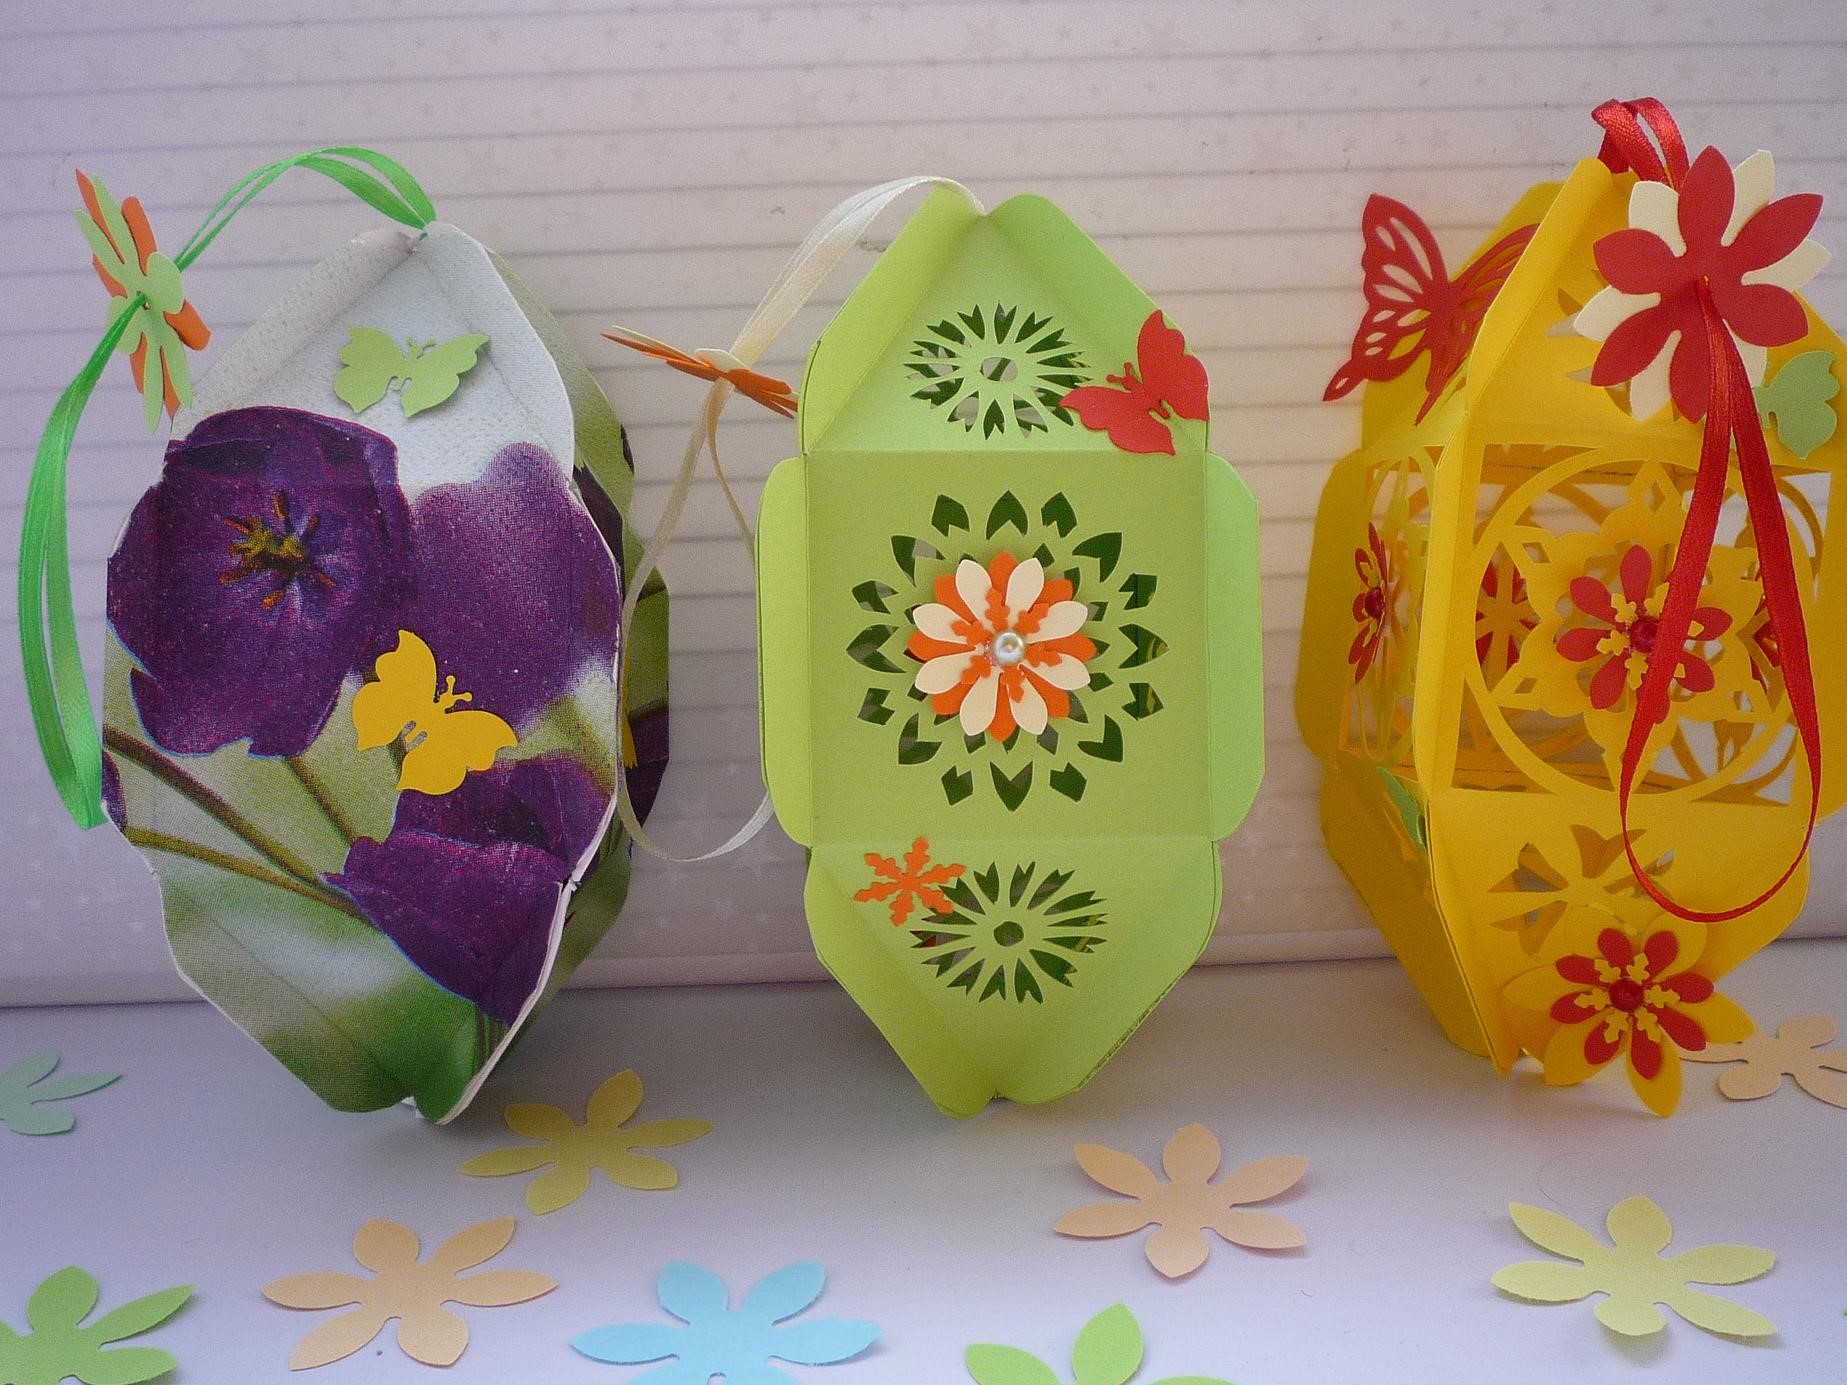
Toy flashlight
To begin with, I will take two sheets of paper of different colors. For example, white and red. Next, cut two rectangles. White will be 100 to 180. Red will be 120 to 180.
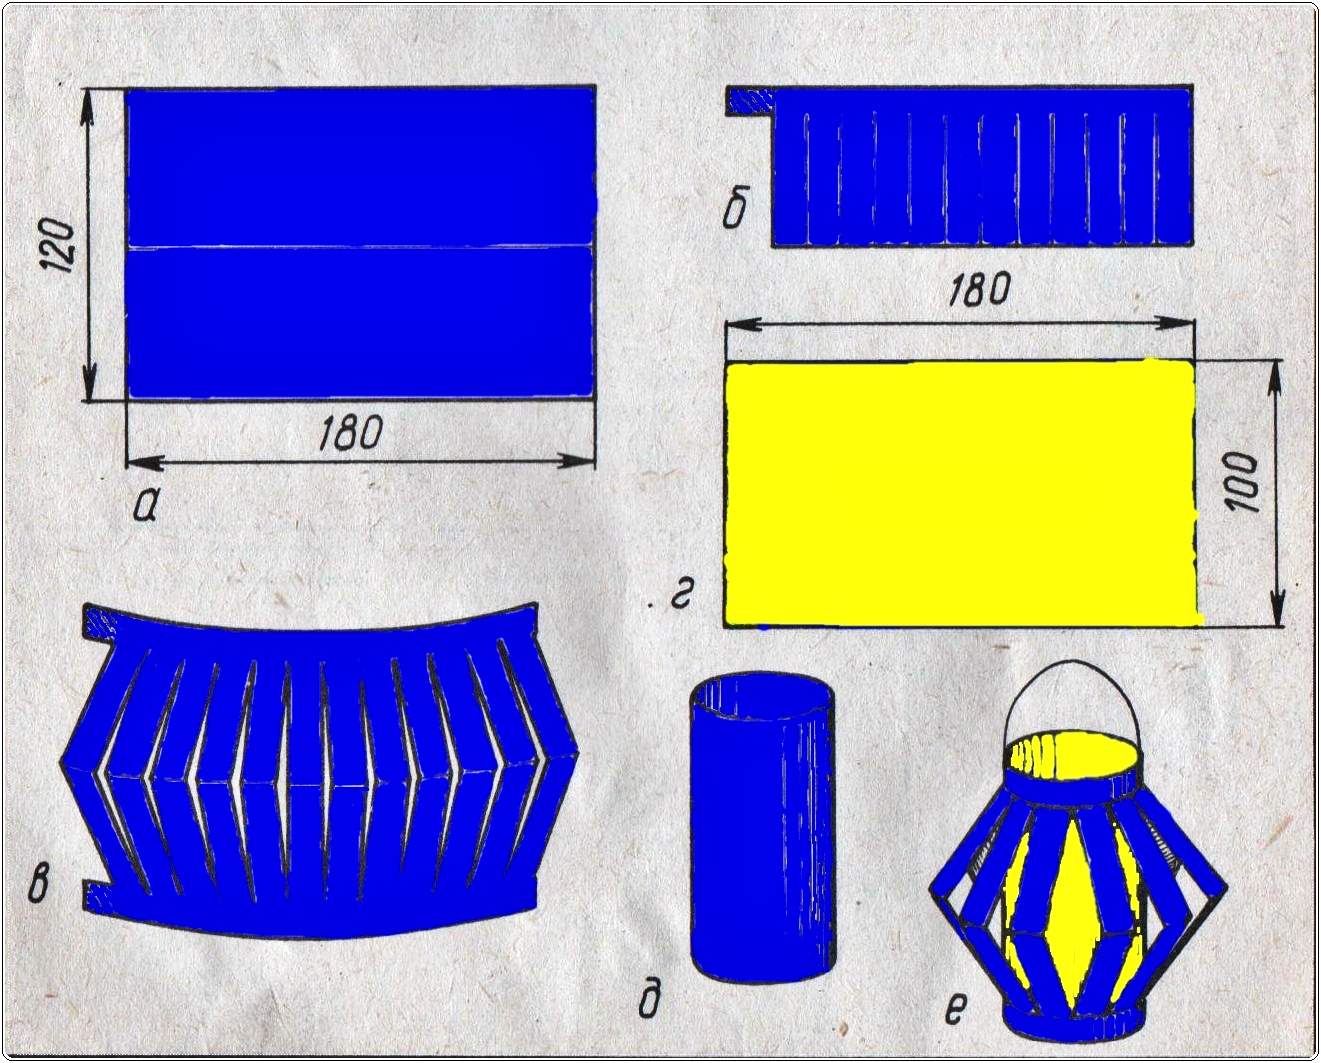
We take paper of any color and size according to the instructions.
I'll start with red. I will fold it in half and make cuts in such a way that there is a place around the edges. White do the same as red.

Delicious Chinese paper lanterns
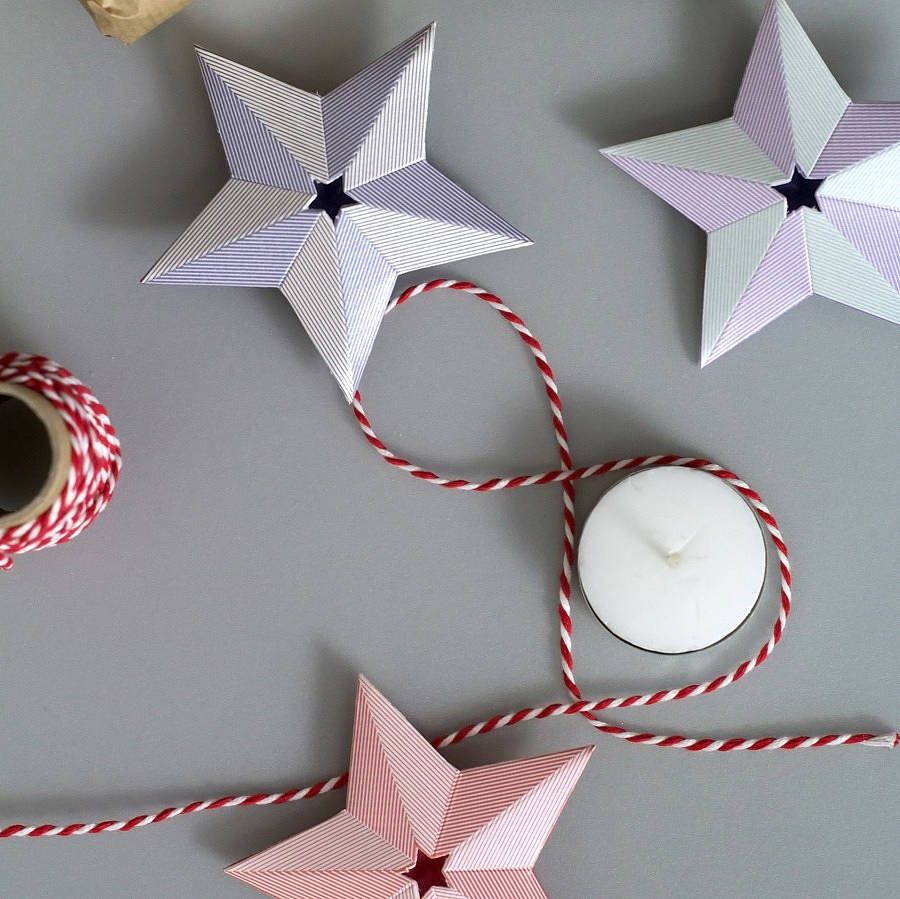
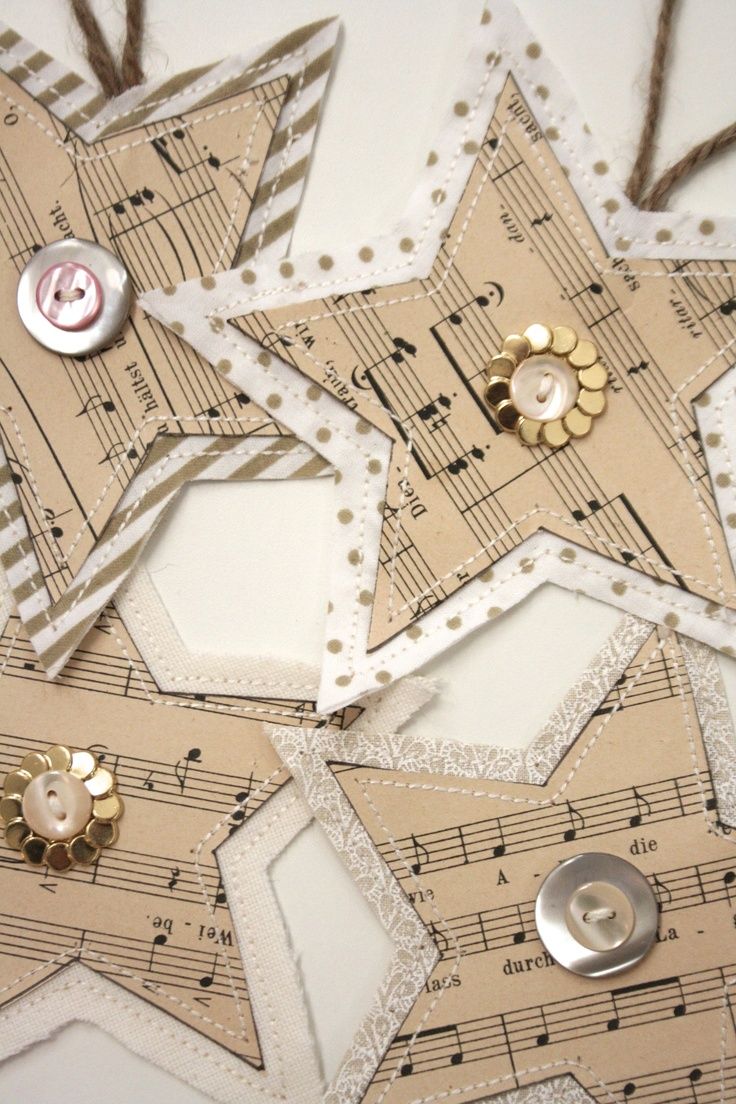
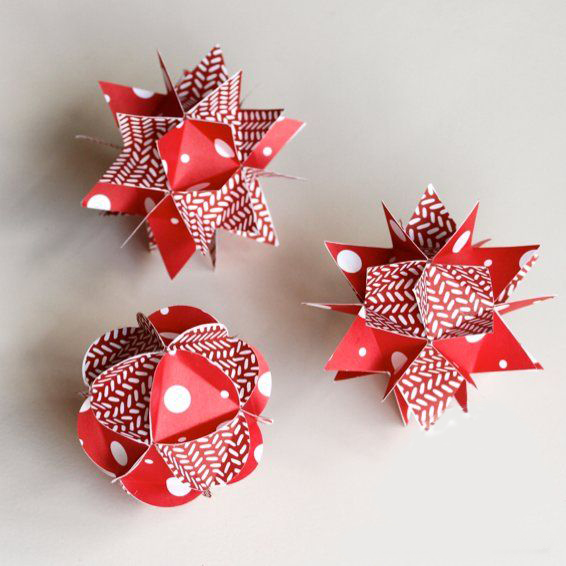
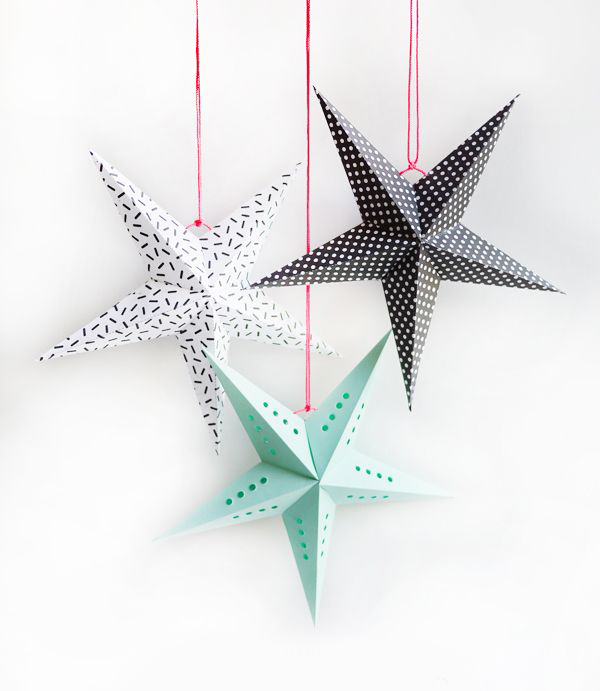
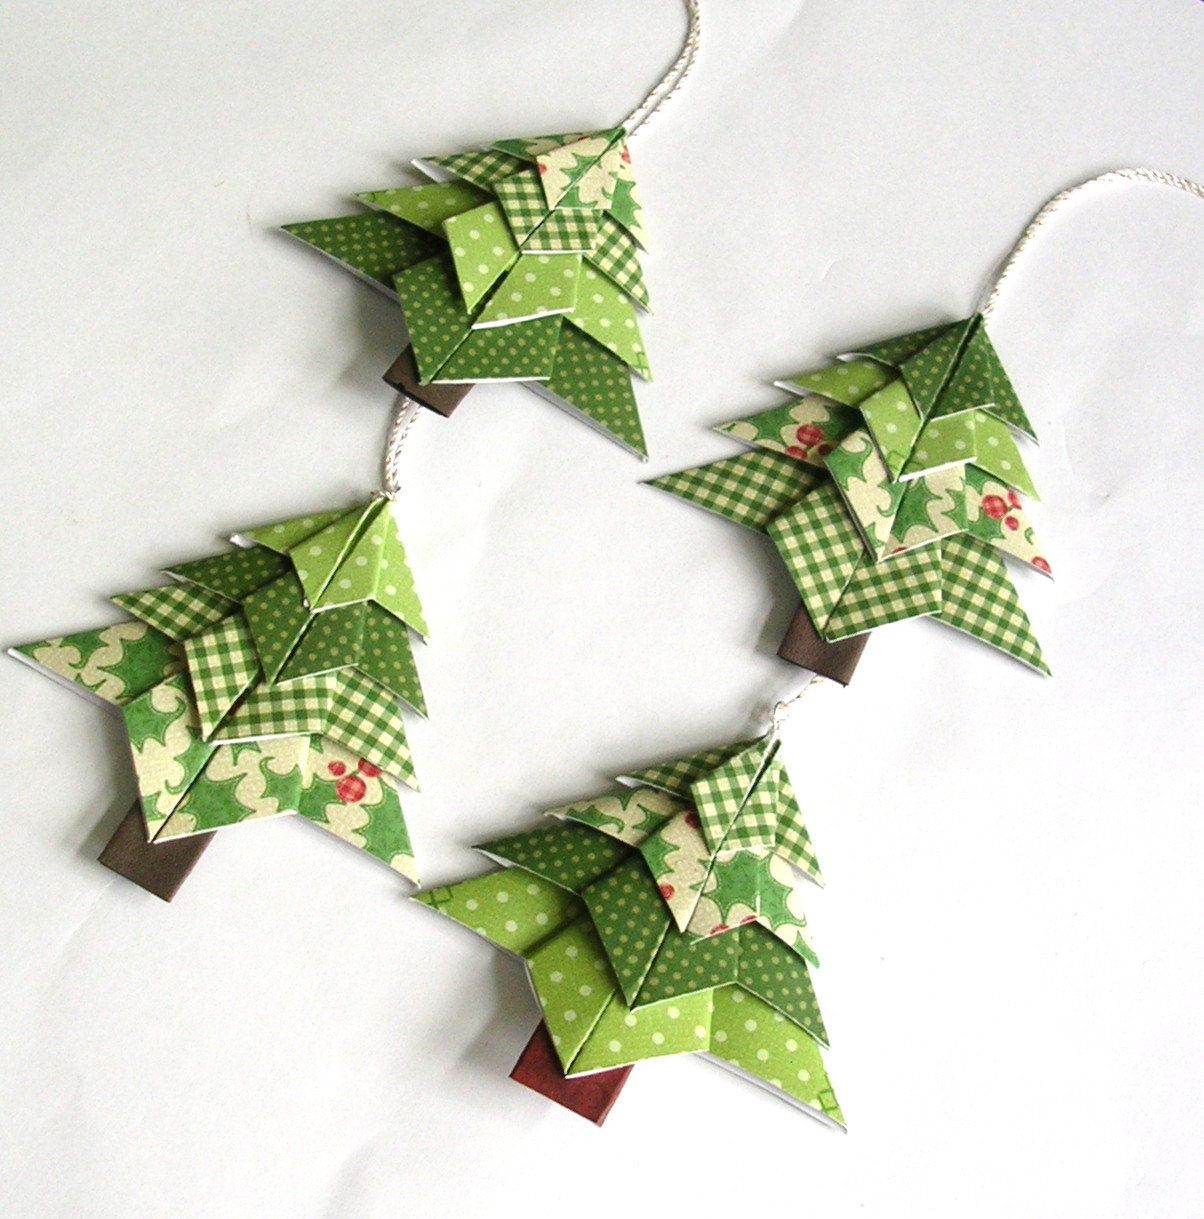
Star
To do this, I need to prepare 10 by 10 squares. First you need to make two folds and then folds diagonally. After that, I need to make cuts and fold into corners. Next, glue the corner in the center.
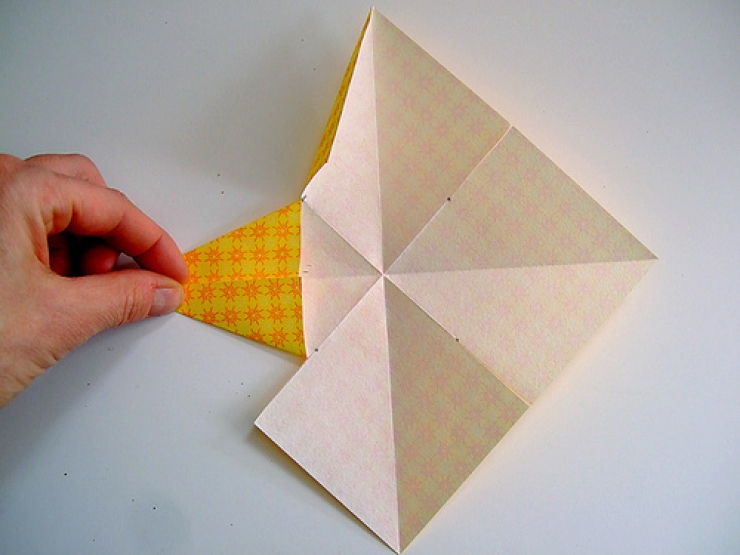
Cut and glue the corners to the center
Repeat the procedure with the second sheet of paper. Then glue the two halves.
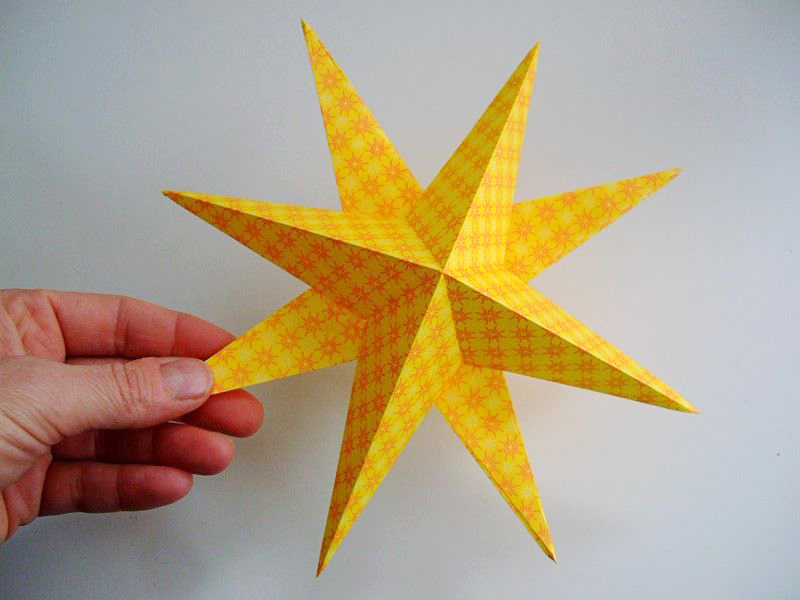
Glue two identical stars
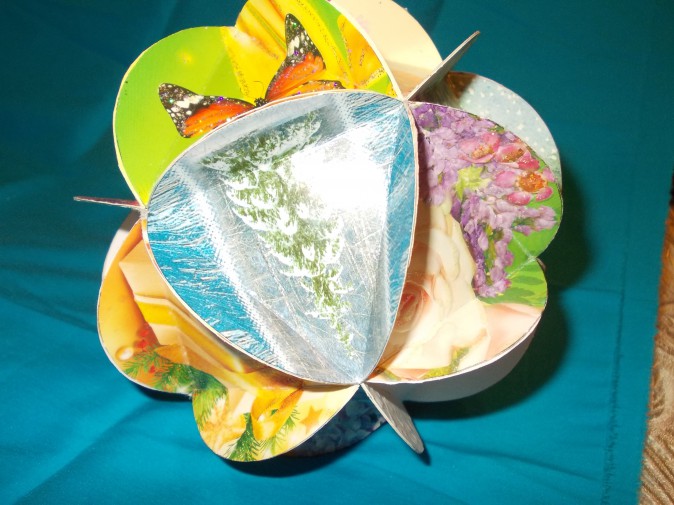
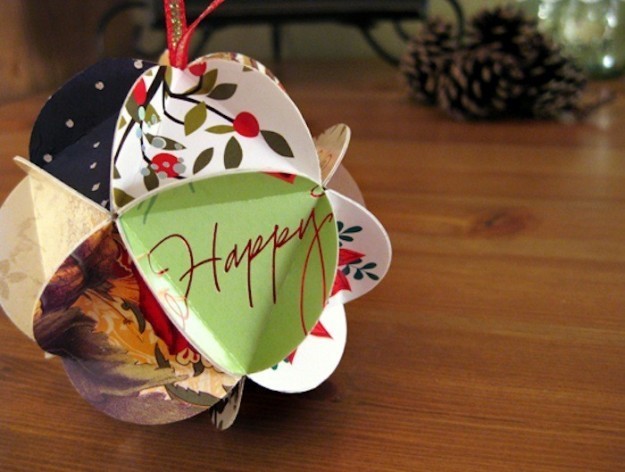
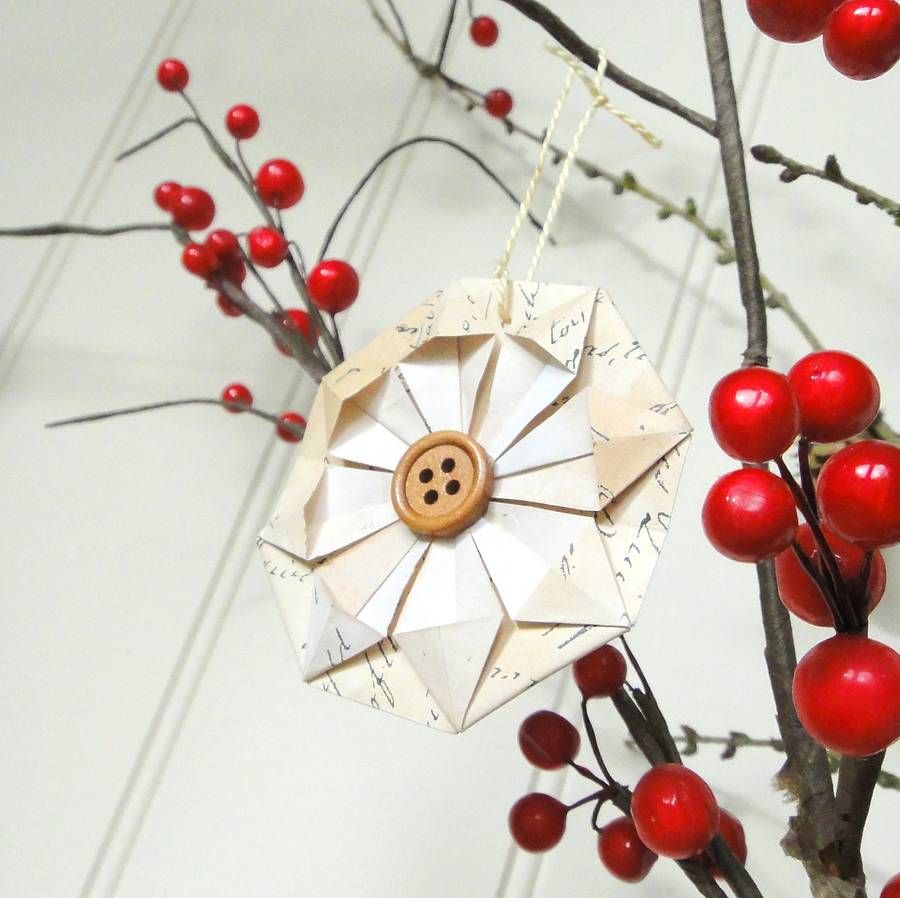
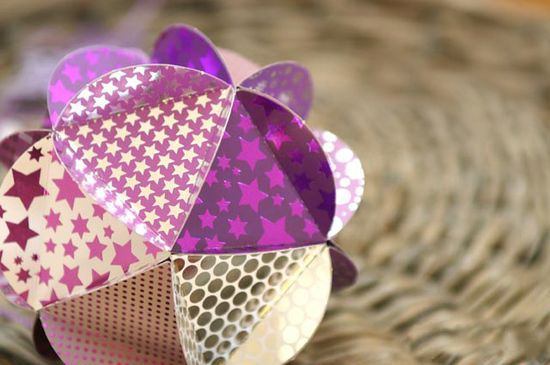
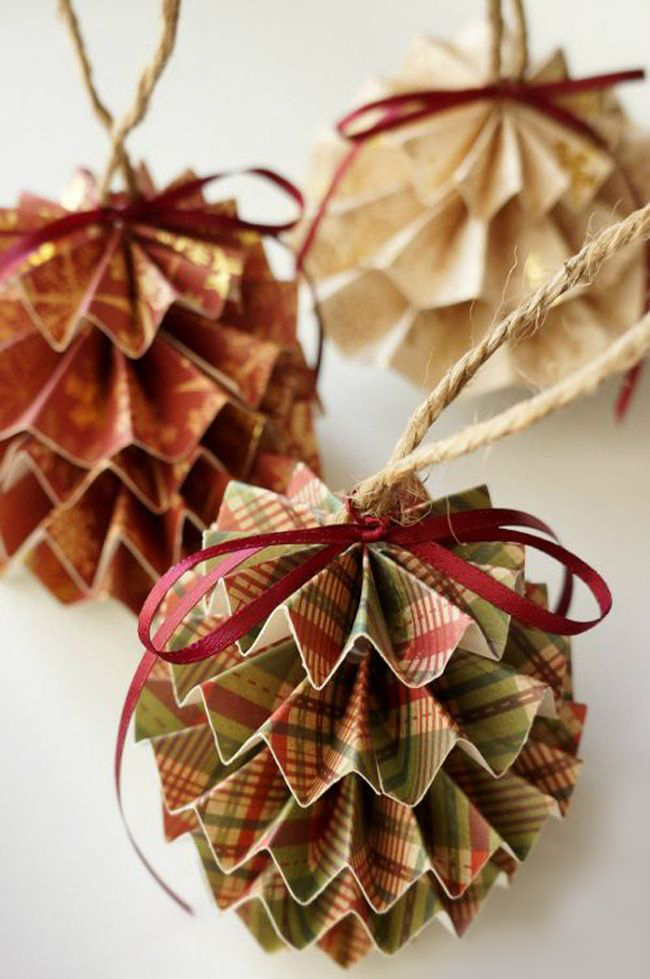
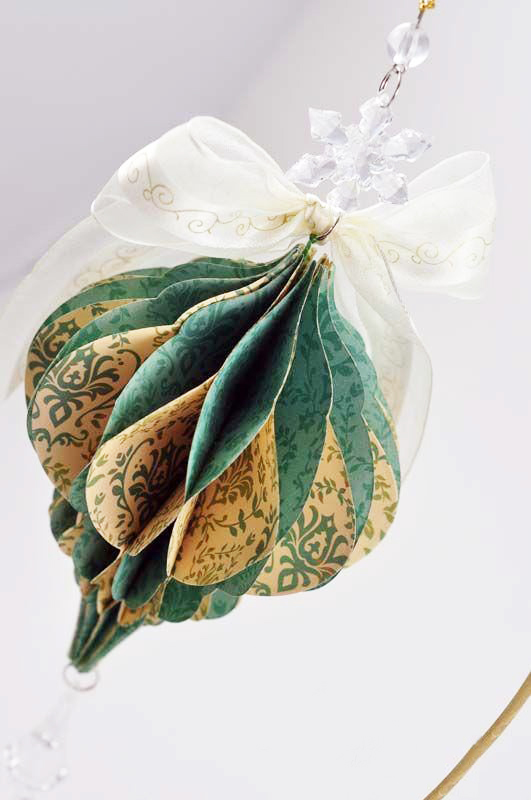
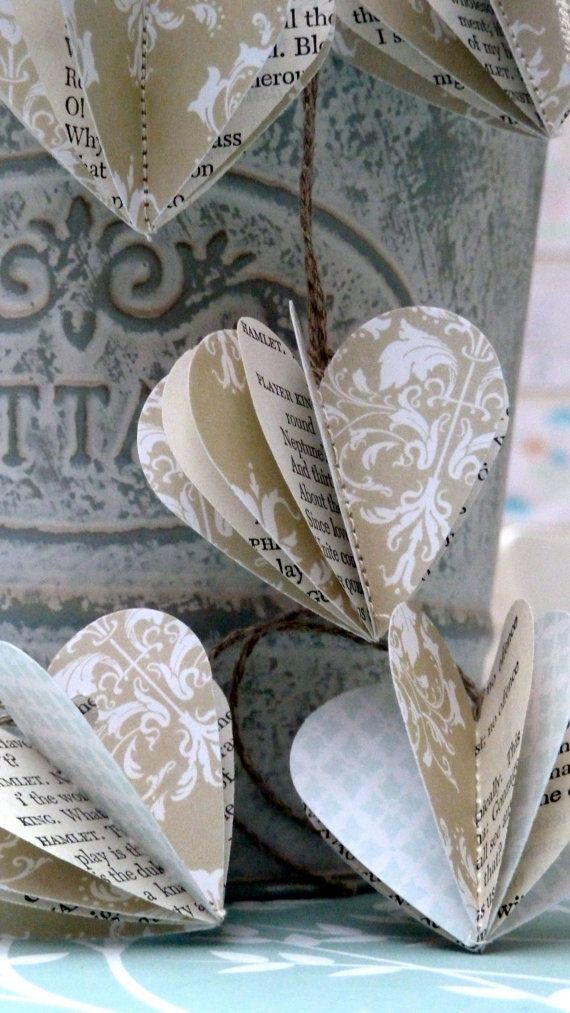
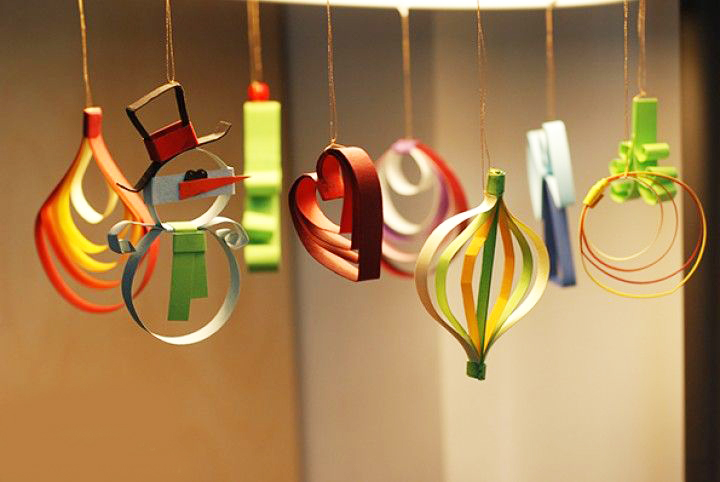
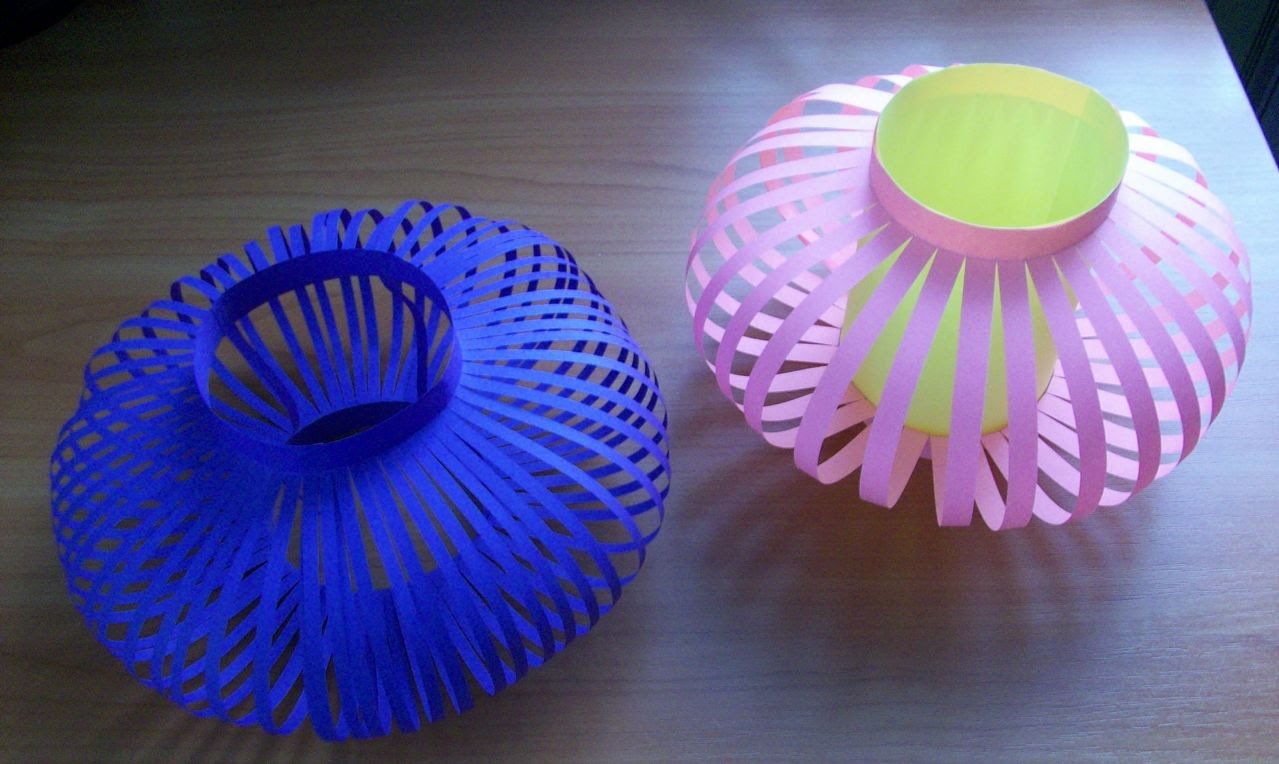
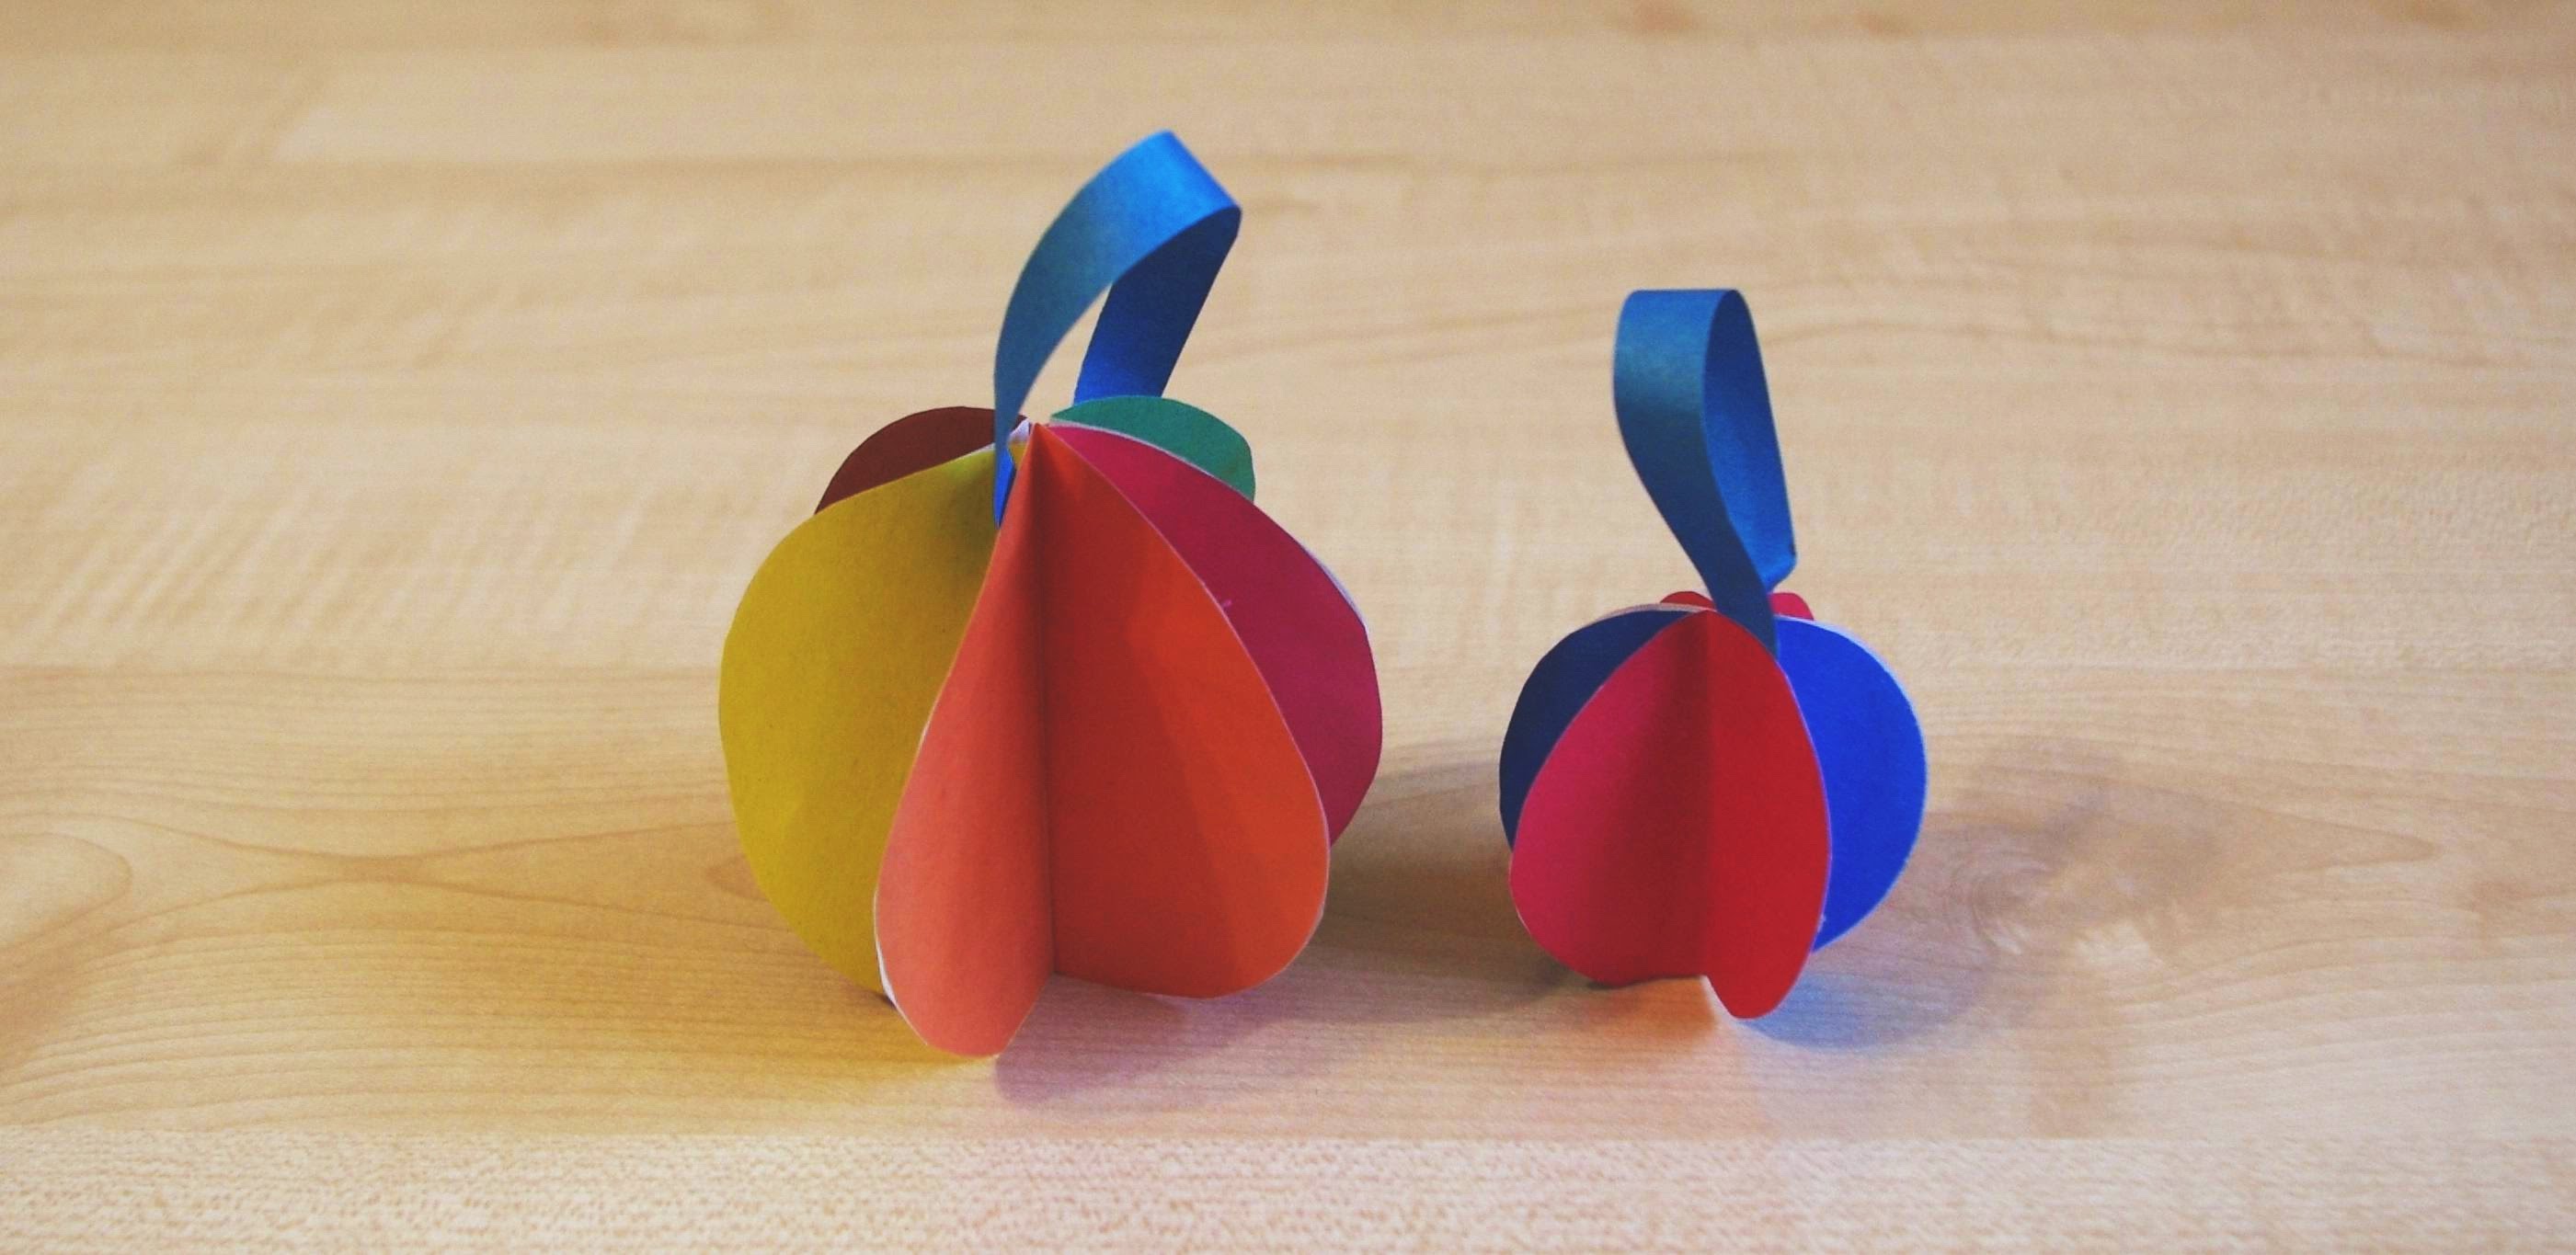
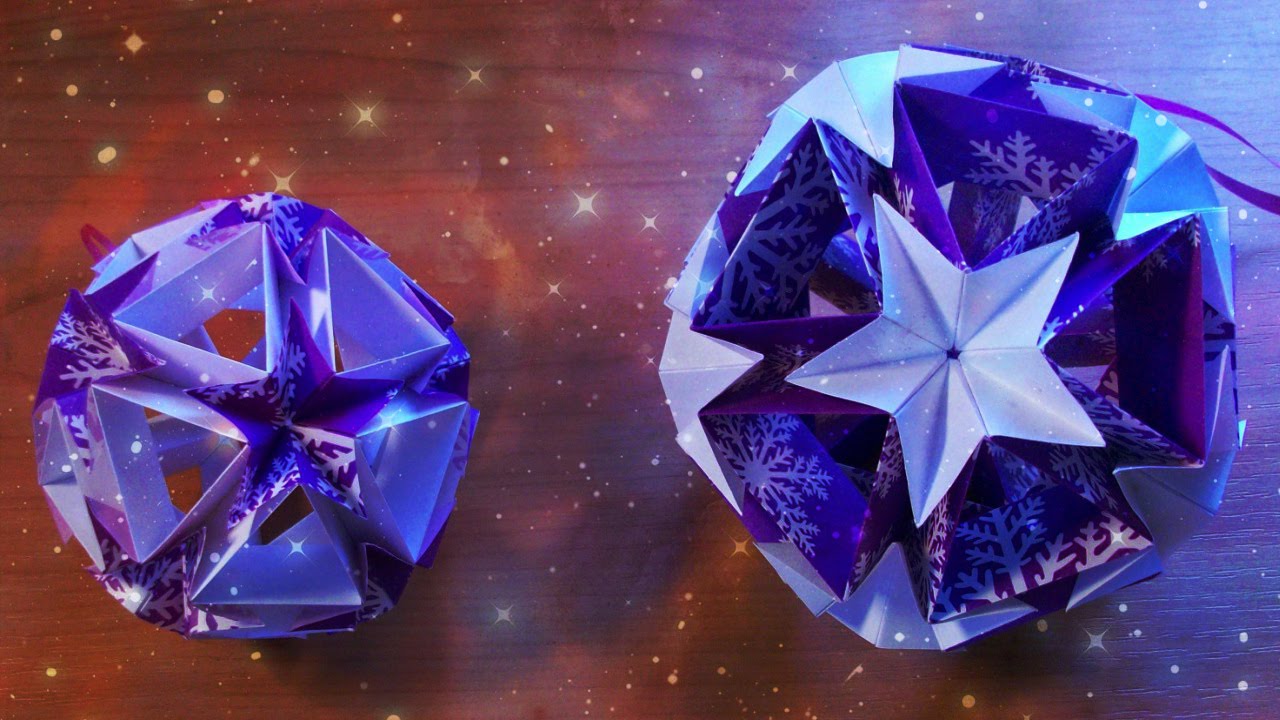
Charming ball
For this venture I needed eight circles. Then I cut two more circles, which should be half the size of the previous ones.
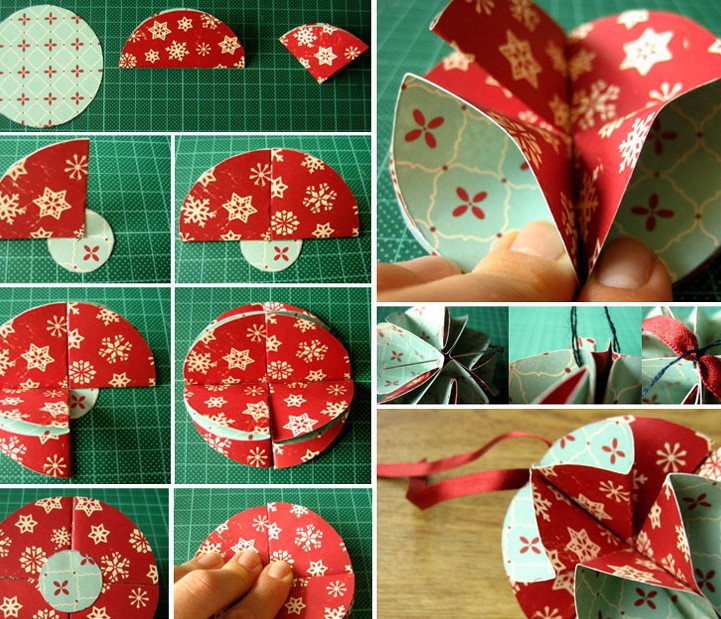
Make a ball with your hands according to the instructions
Each circle I folded in half, and then again in half. Now it is necessary to glue four large circles into one small one. Next you need to correctly position the quarter. Pockets that turned out, straighten. Now only need to do the other half of the ball. It remains for me to glue the two halves and the ball is ready!
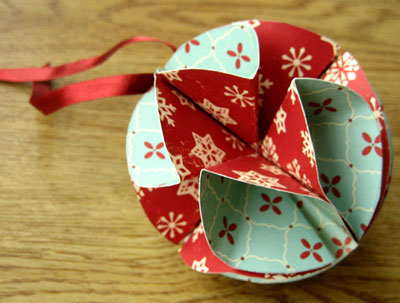
Beautiful and simple ball on the Christmas tree
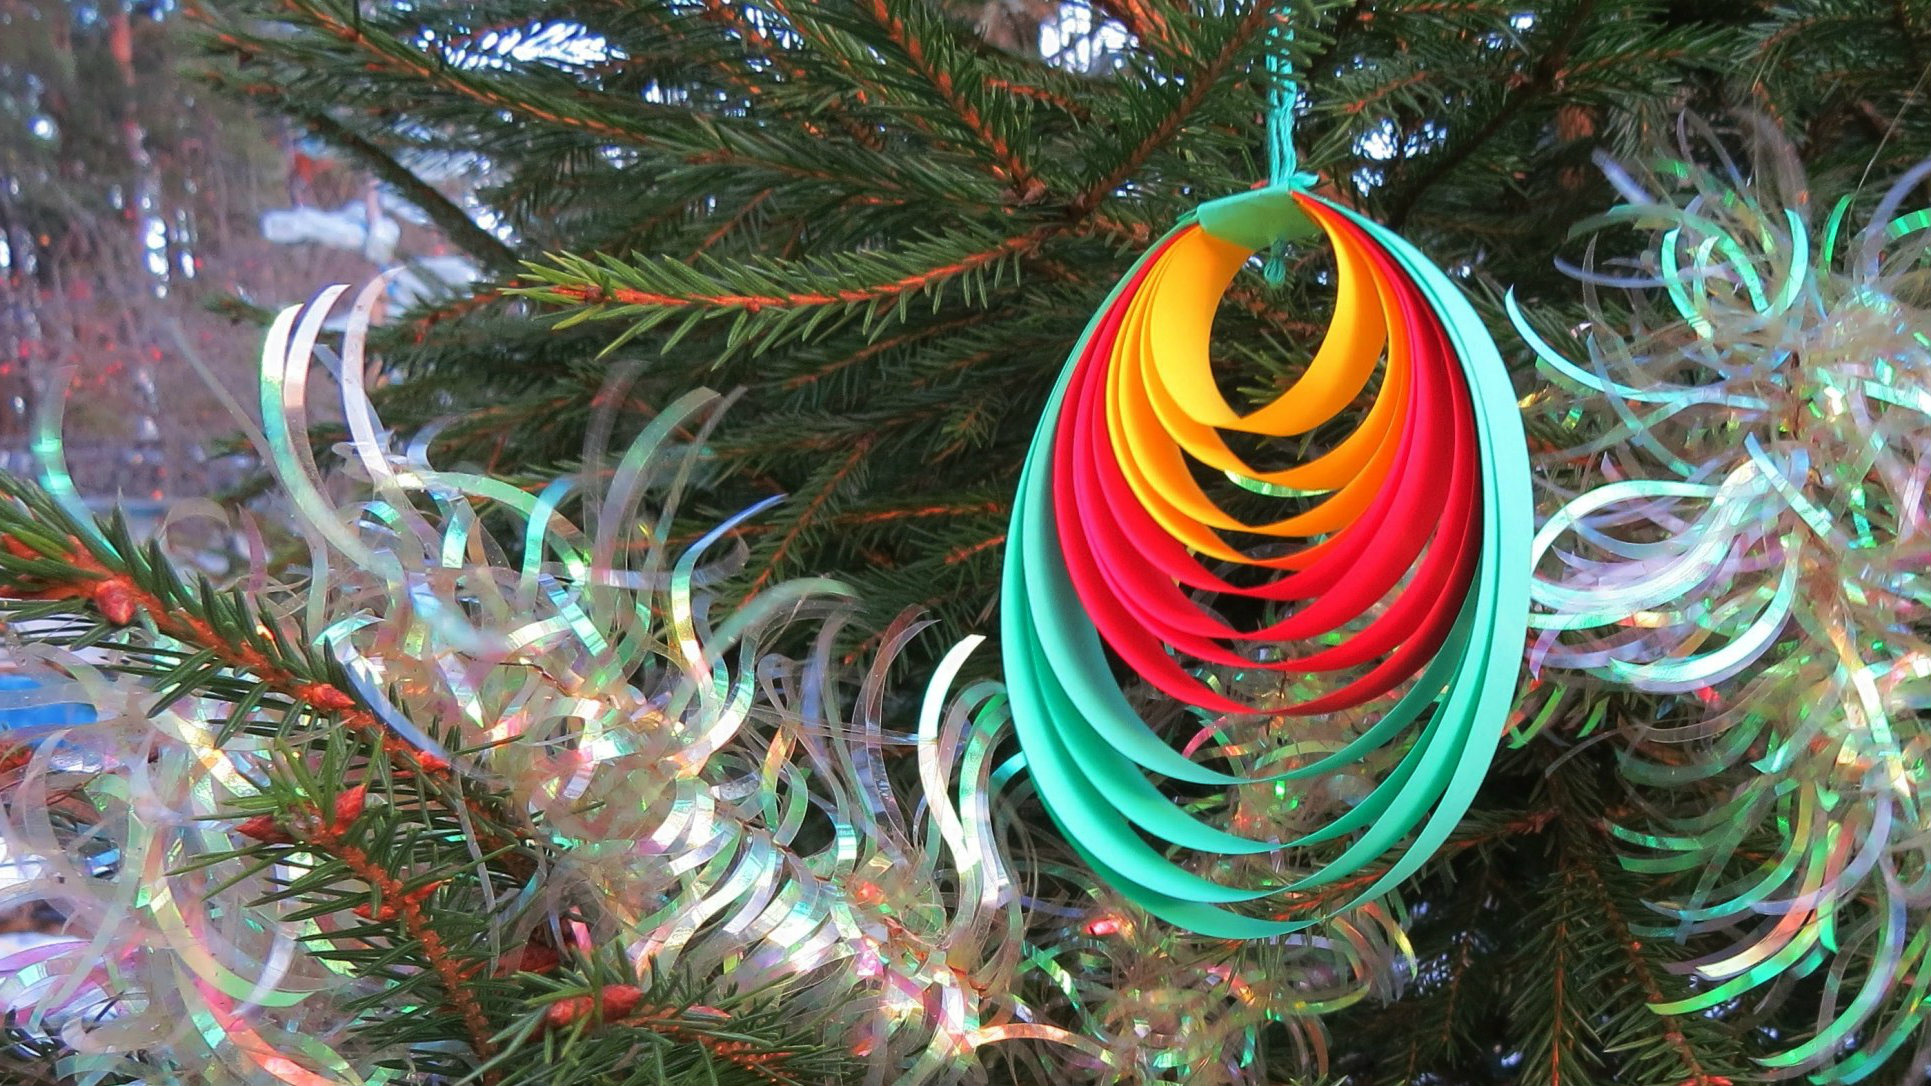
Candles
I was almost going to finish the article as to my attention on one site I saw information on how to make candles. After reading, I realized how easy it was and decided to share with you.
It is necessary to prepare two strips of paper approximately 20 millimeters wide, and 30 centimeters long. I also need red and yellow paper to make a “flame”.
I glue the ends of the strips at a right angle.
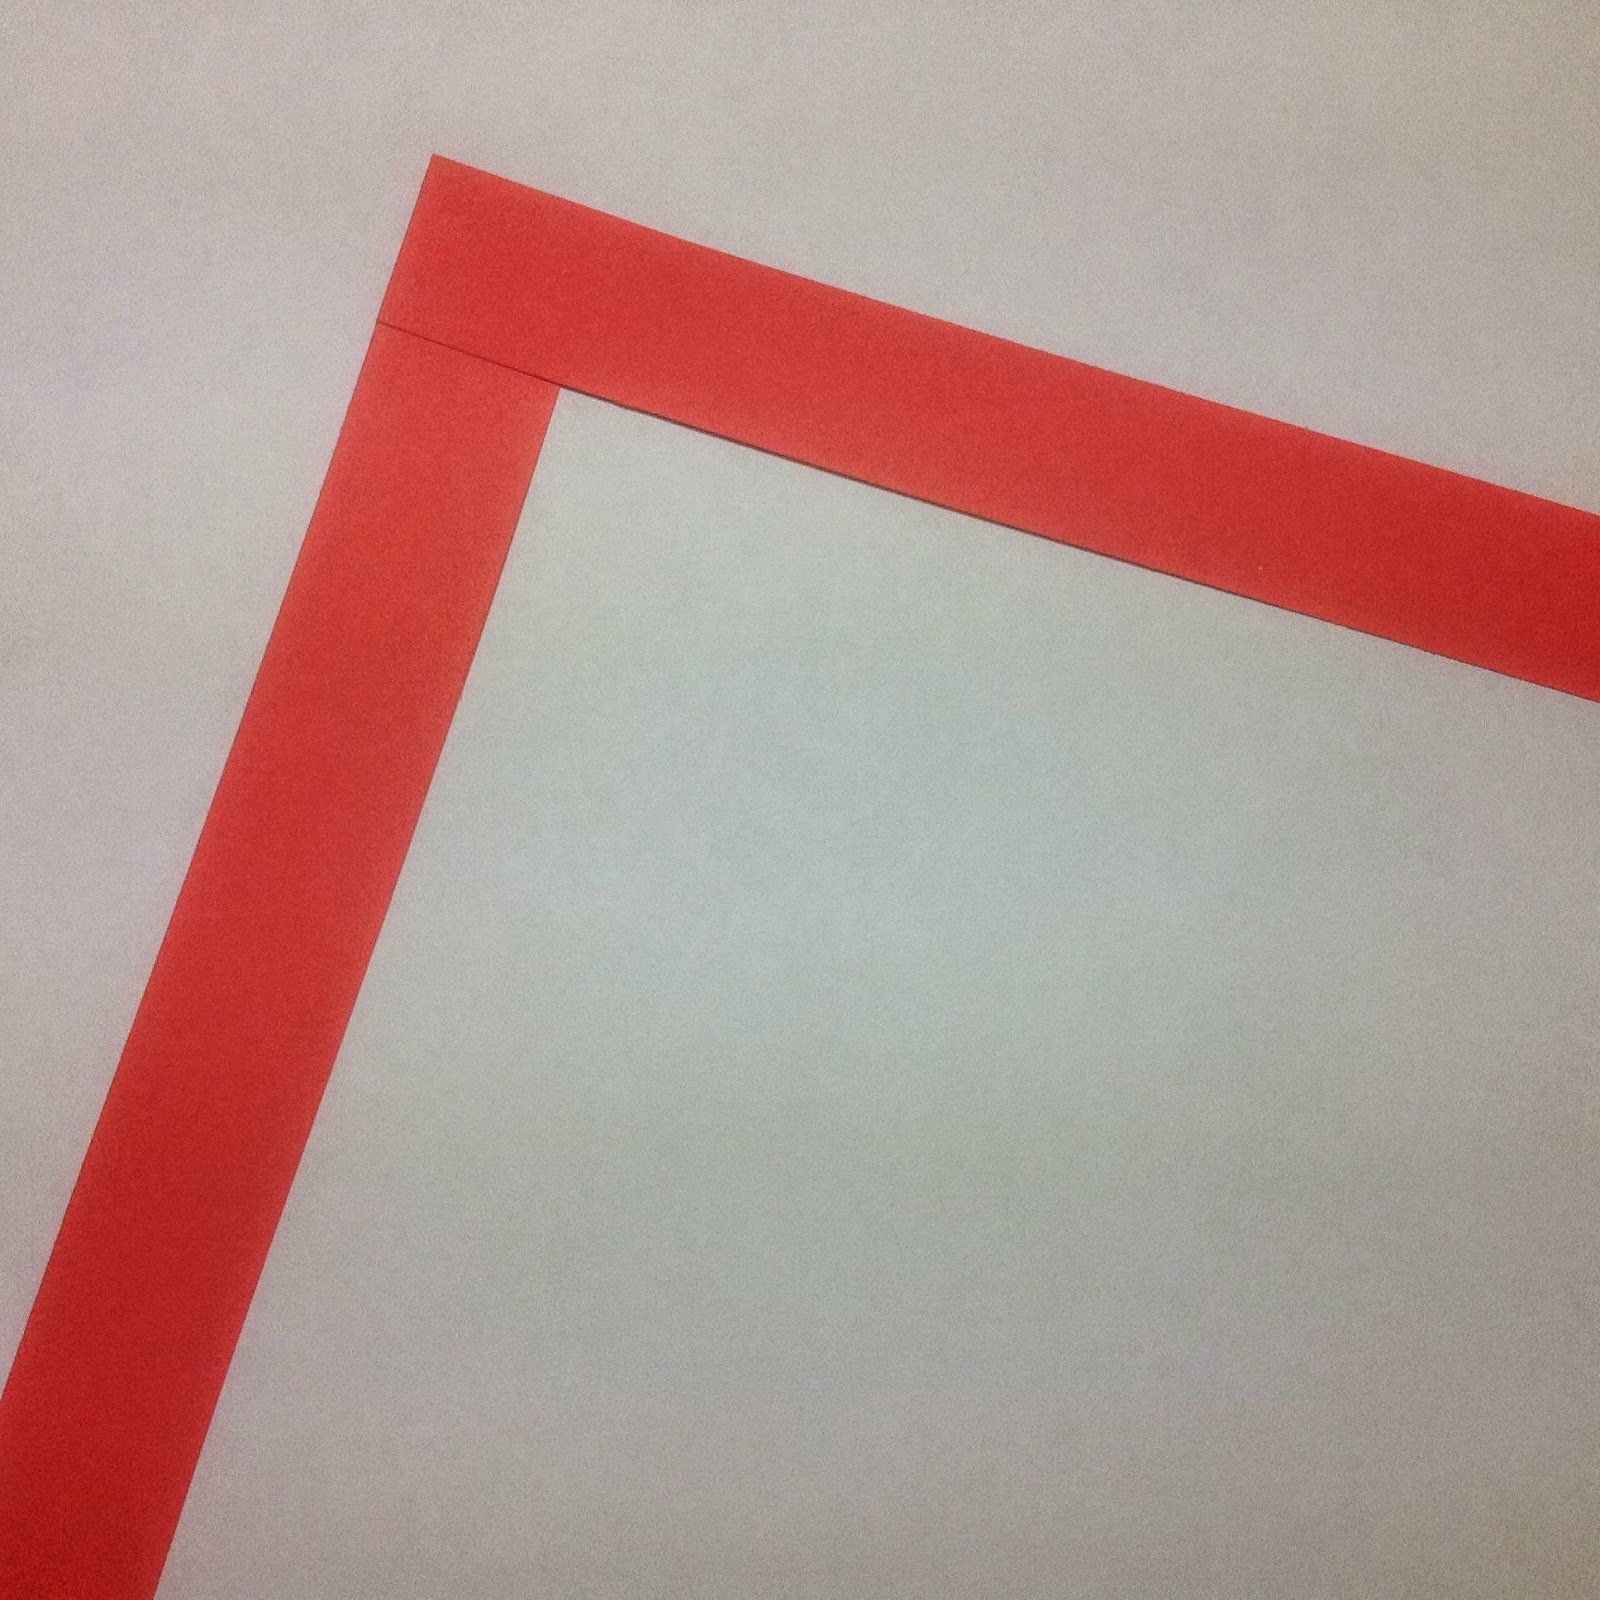
Glue de strips together
I fold the candle case out of the strips so that they find each other.
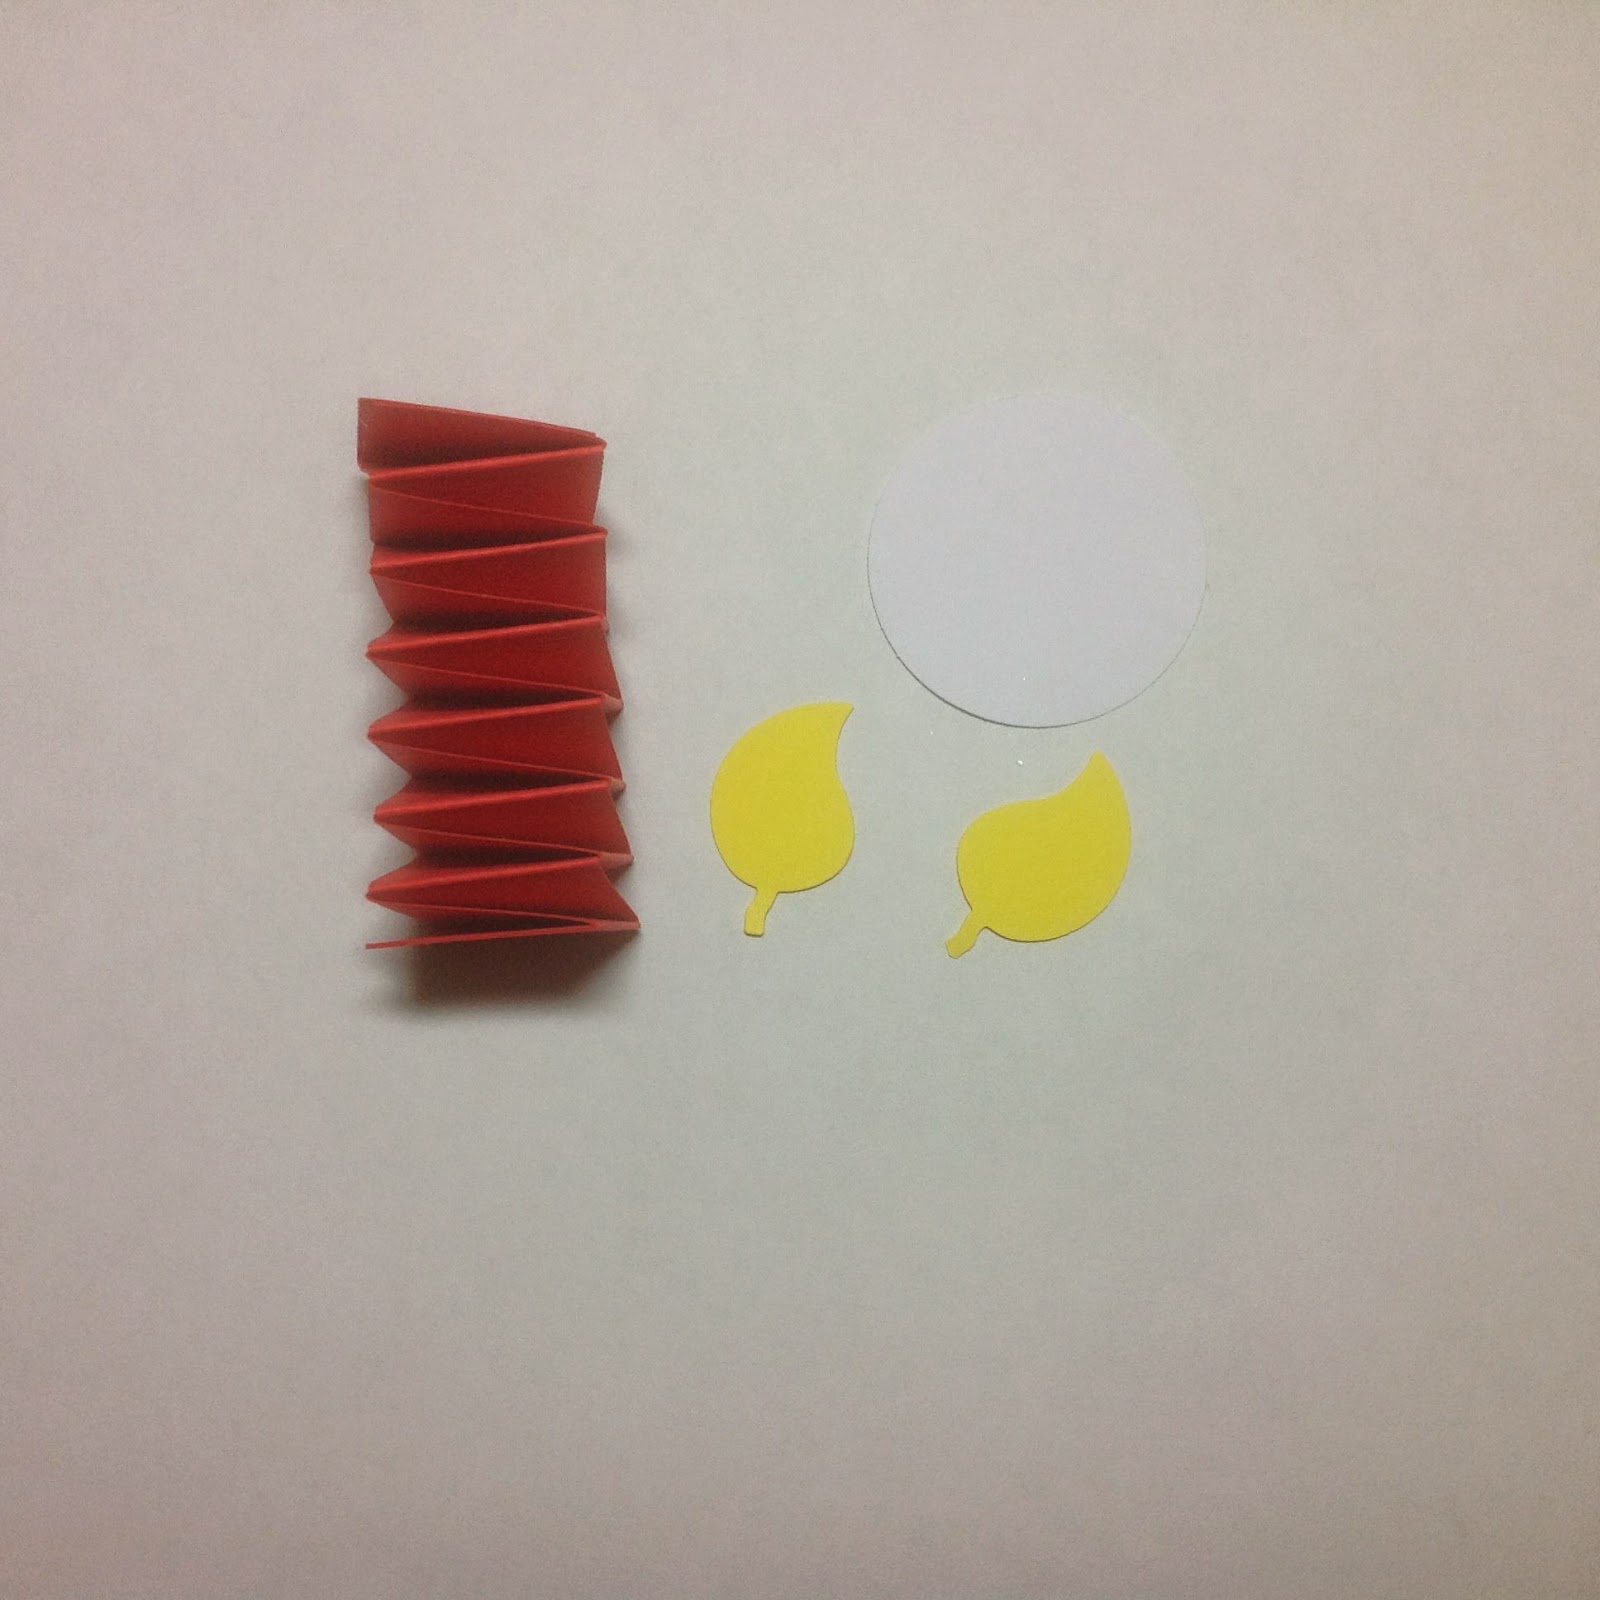
Making a candle flame
I cut out the flame of a candle and stick it to the body of the candle.
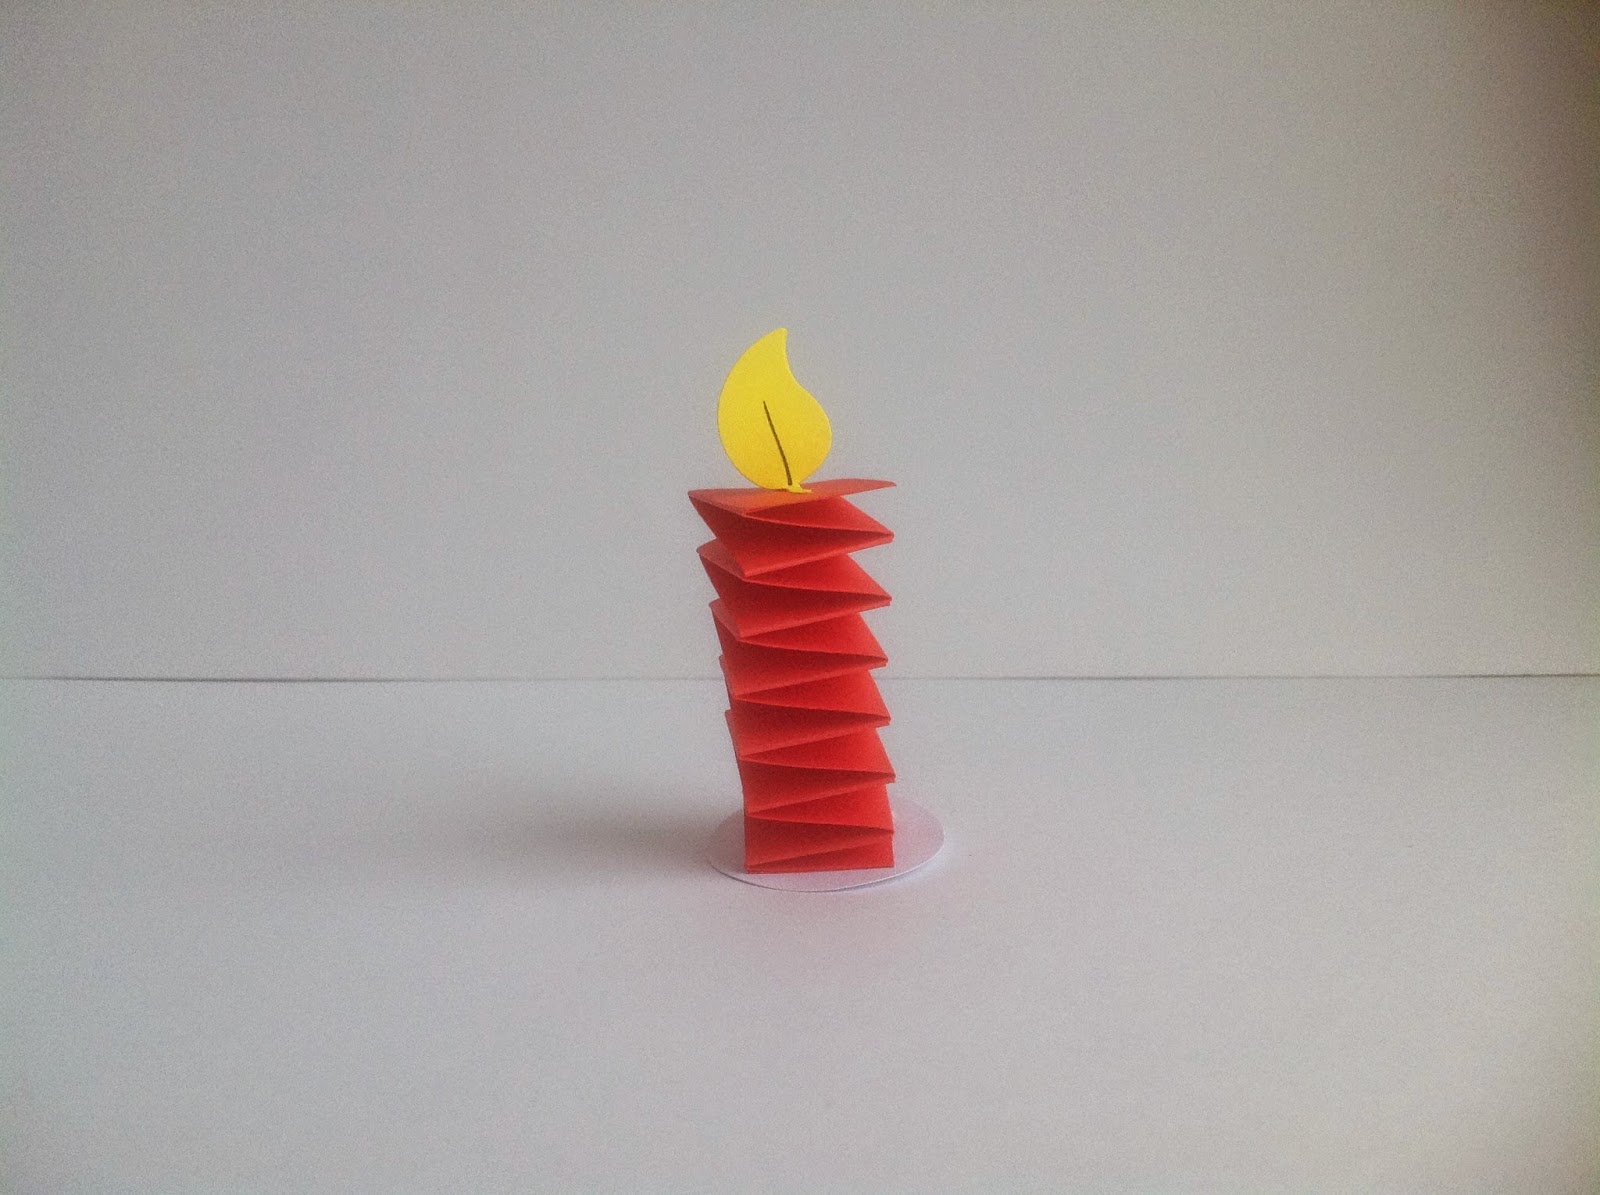
Paper Candle for New Year's mood
Our candle is ready.
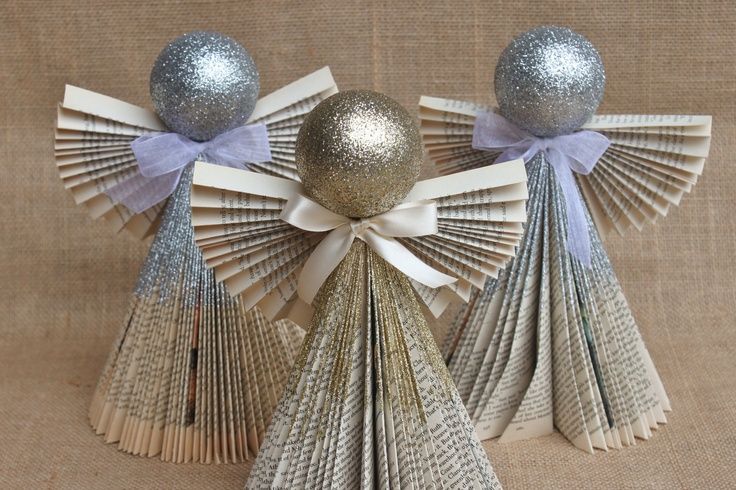
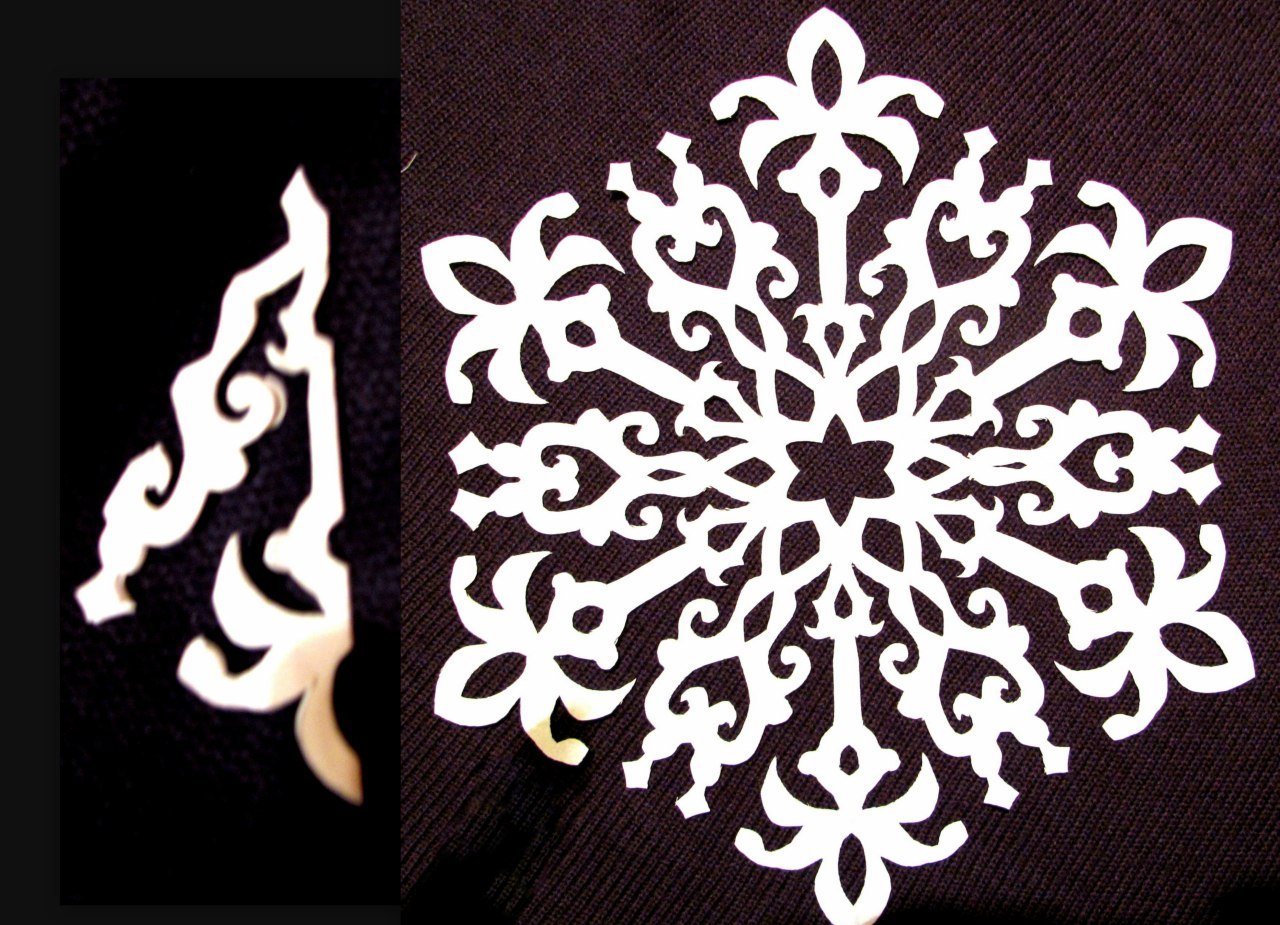
return to menu ↑Snowflake openwork
I will need:
- An old waste book or sheets of paper that have turned yellow.
- Scissors.
- Glue gun loaded with hot glue sticks.
- Ruler.
- A pen.
- Glue.
- Dry glitter.
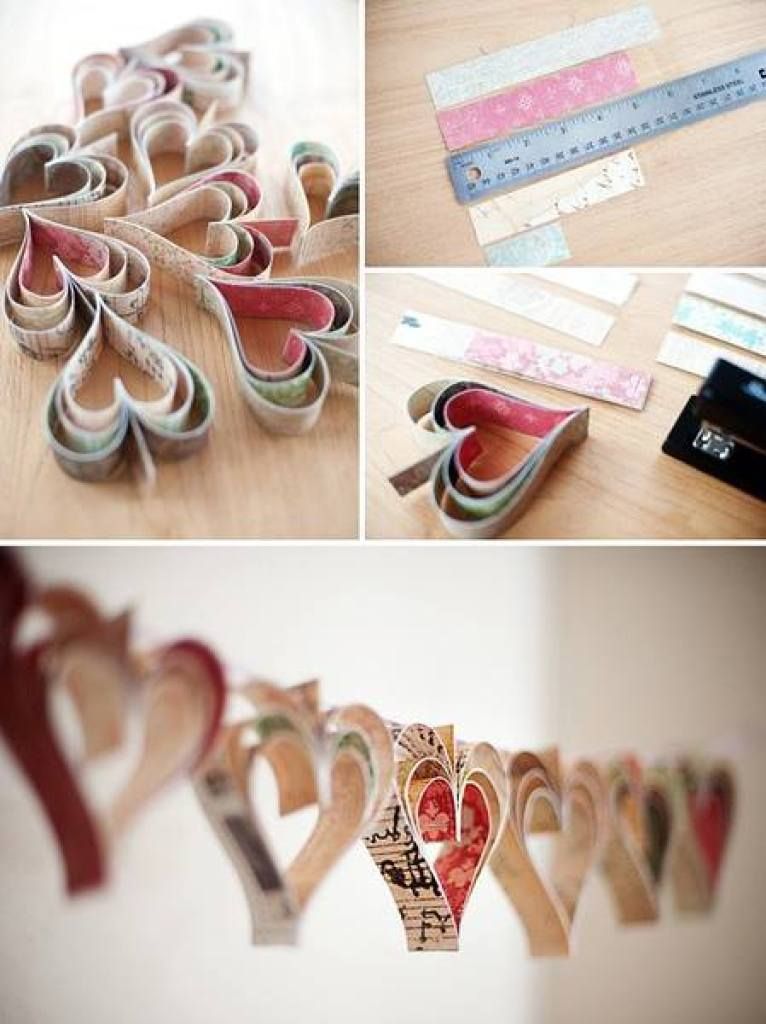
So let's get started.
On paper, make a markup. Stripes must be the same width.I need to make a lot of such bands, since one small detail will consist of five bands that are folded together.
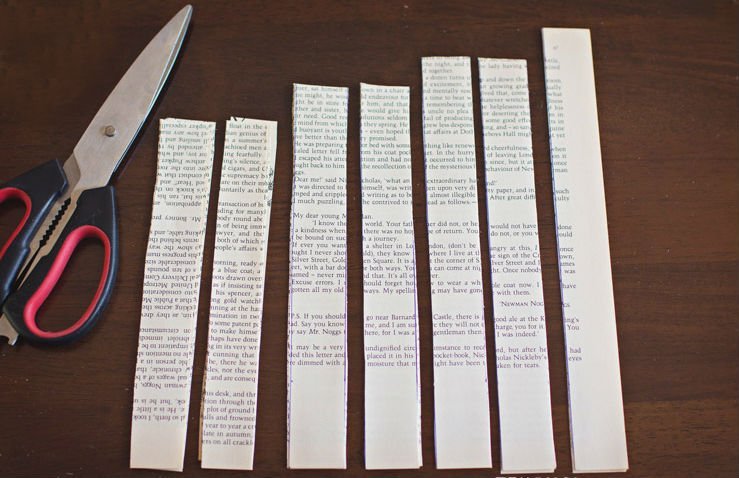
Cut strips of different lengths
Next, I have to cut the strips and divide them into heaps. In total there should be seven of them. Three pairs must be different in length. The difference is from 0.5 to 1 centimeter. The longest is the middle of the snowflake.
Now you need to bend all the heaps in half and collect snowflakes in the crystal. I tied the end of the billet with a fishing line. I need to make eight more. This is not an easy job, I tell you.
One pack of strips needs to be bent and secured with a fishing line, but already on the outer edge. It should be a circle.
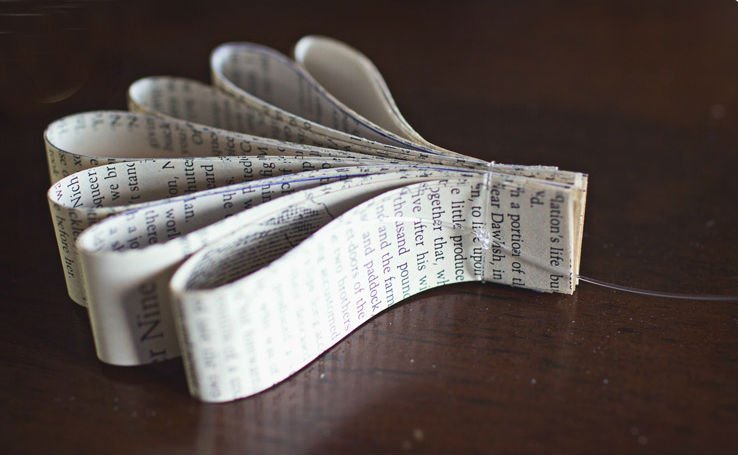
Bundle bundles of 5 pieces
I bond all the crystals with hot glue to the harvested circle. I almost forgot. And four more blanks must be inserted in the intervals between the first.
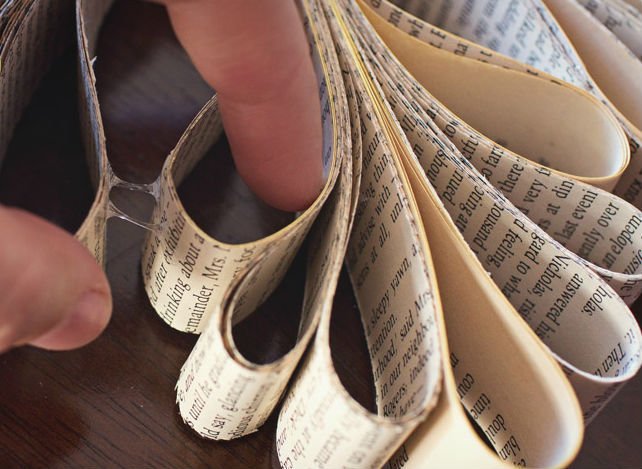
We glue individual branches with glue
I fasten the sides of the crystals.
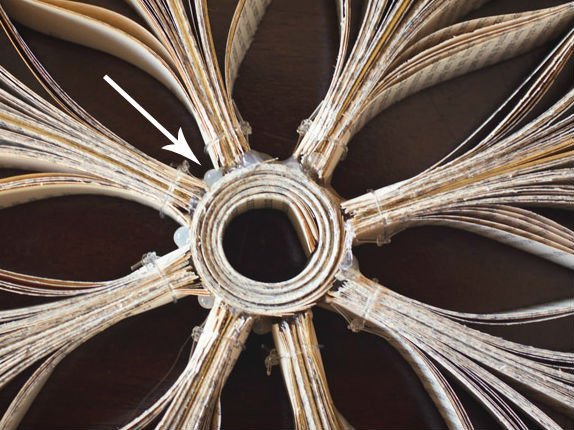
Making a centerpiece to hold all the pieces.
Sprinkle with sequins and an openwork snowflake is ready.
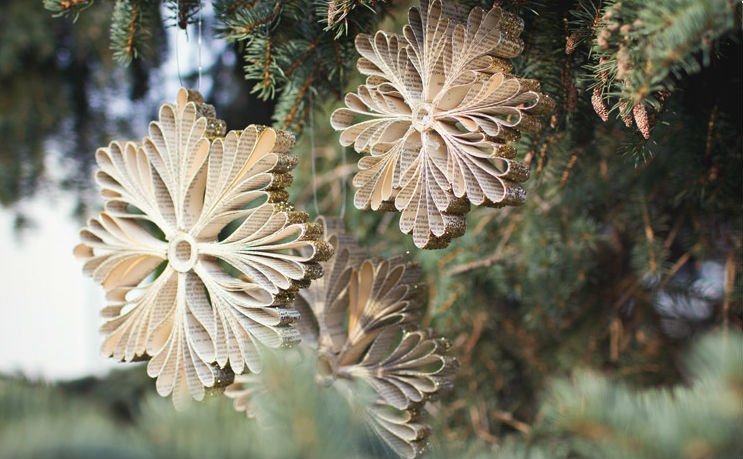
The original snowflake for the Christmas tree is ready
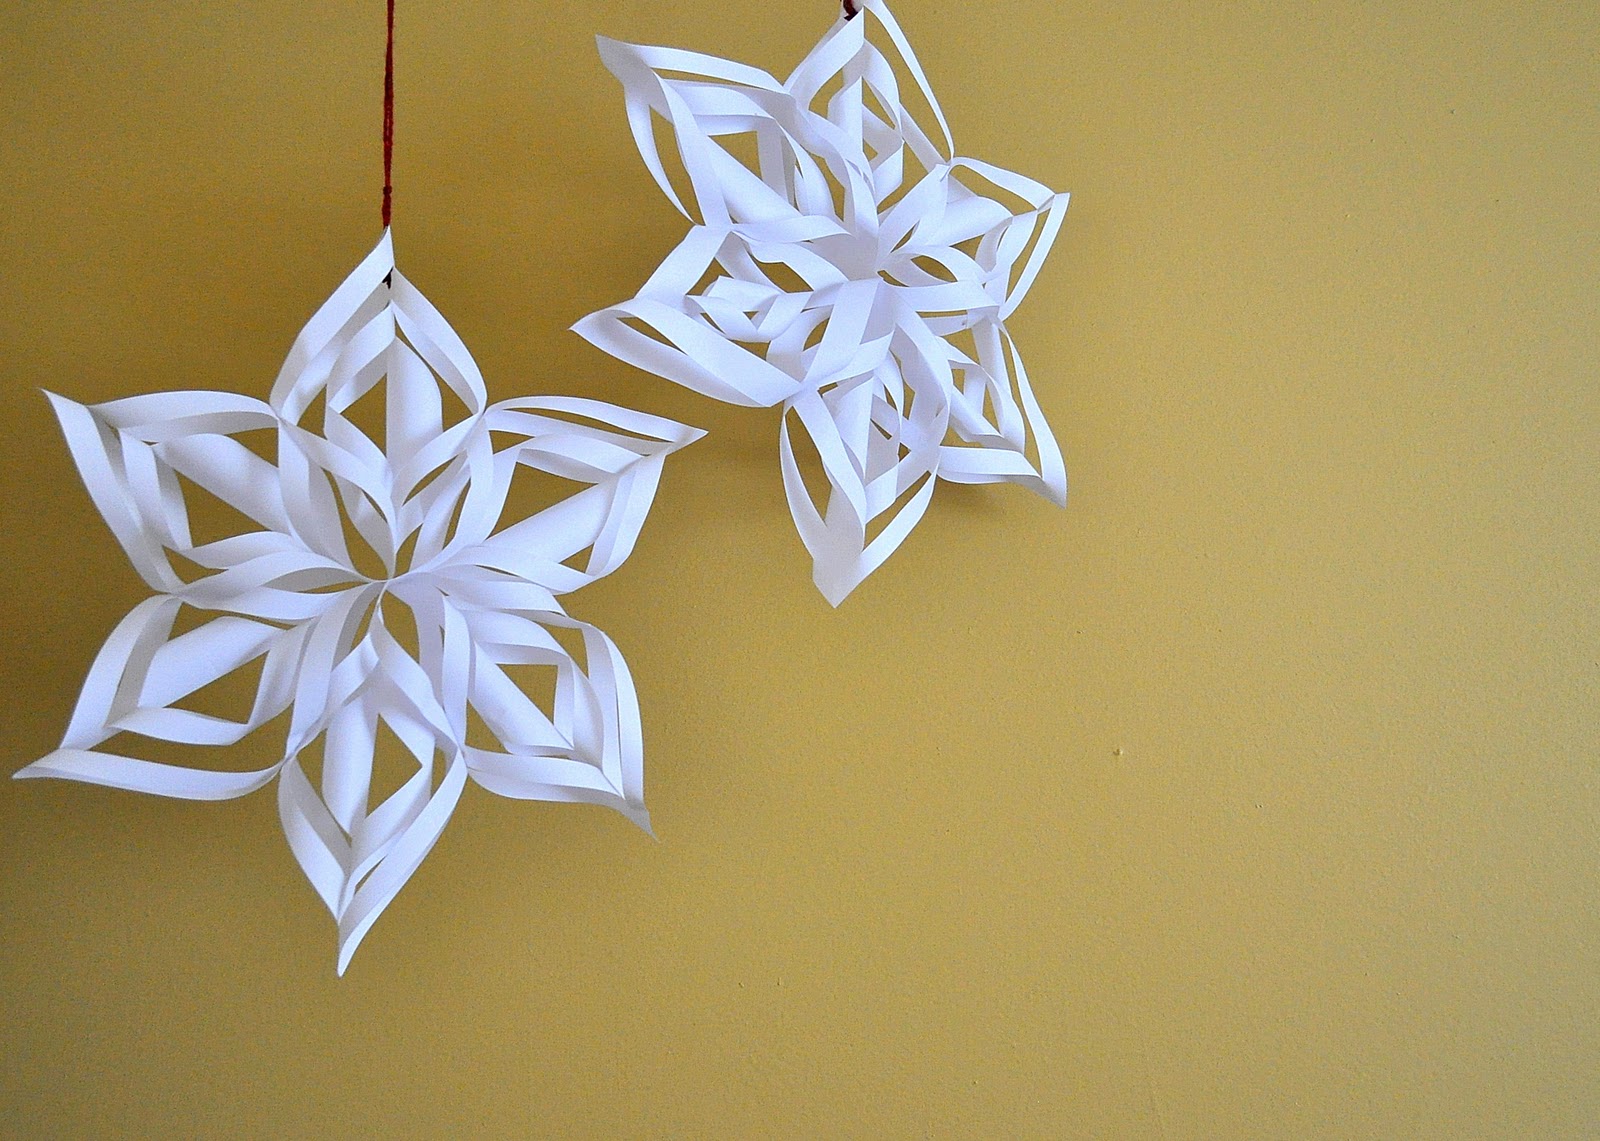
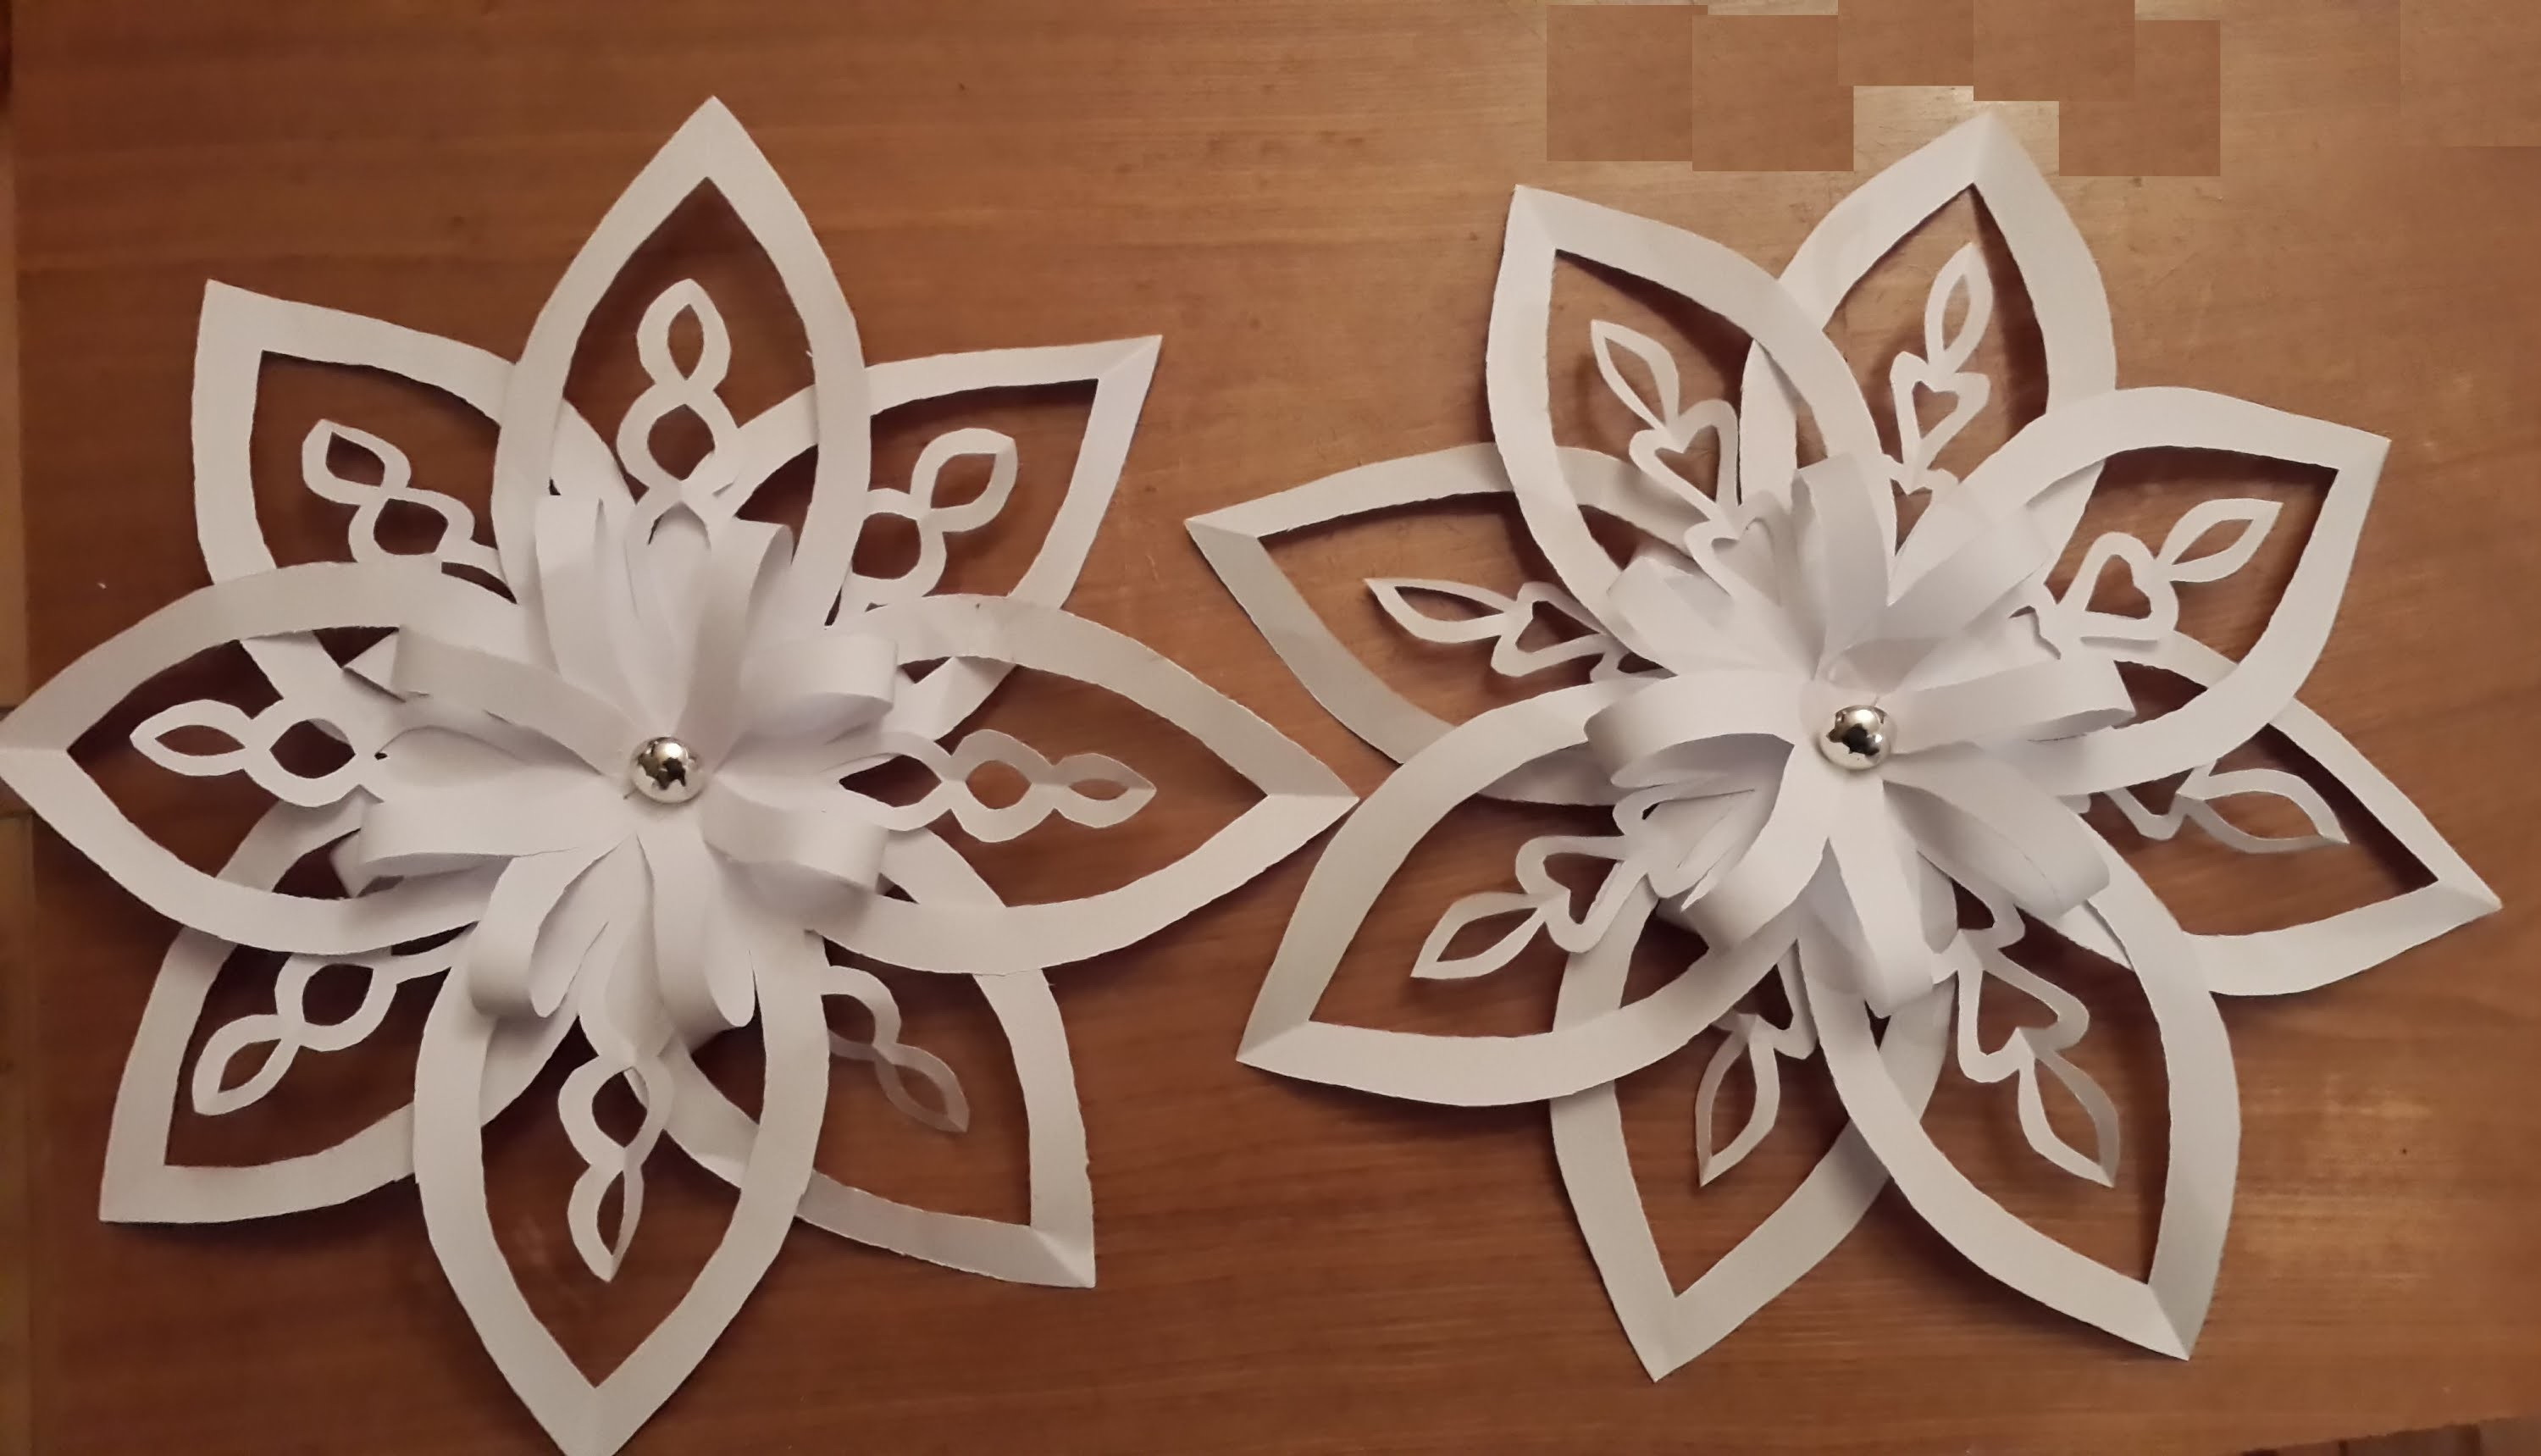
Think that's all? And no! Finally, I still left the most interesting thing - a volumetric snowflake. Do not worry, it is very simple.
return to menu ↑Option 1 volumetric snowflakes
I am drawing a sheet of colored paper on rectangles measuring 5 by 6 centimeters. Then we make it with white paper, but already rectangles measuring 3 to 4 centimeters.

Cut and glue as icicles
Next we need a cardboard. Cut circles in the size of 5 to 5. From white paper, also cut circles, but smaller, 2 by 2. I make icicles from their rectangles 5 by 6. I stick these icicles to a large circle.
Glue in a circle alternating color
After that, I take the rectangles 3 by 4 and also twist the icicles and glue them on the workpiece with large icicles. A small circle glue glitter and glue in the middle of the resulting blank.
We get beautiful volumetric snowflakes
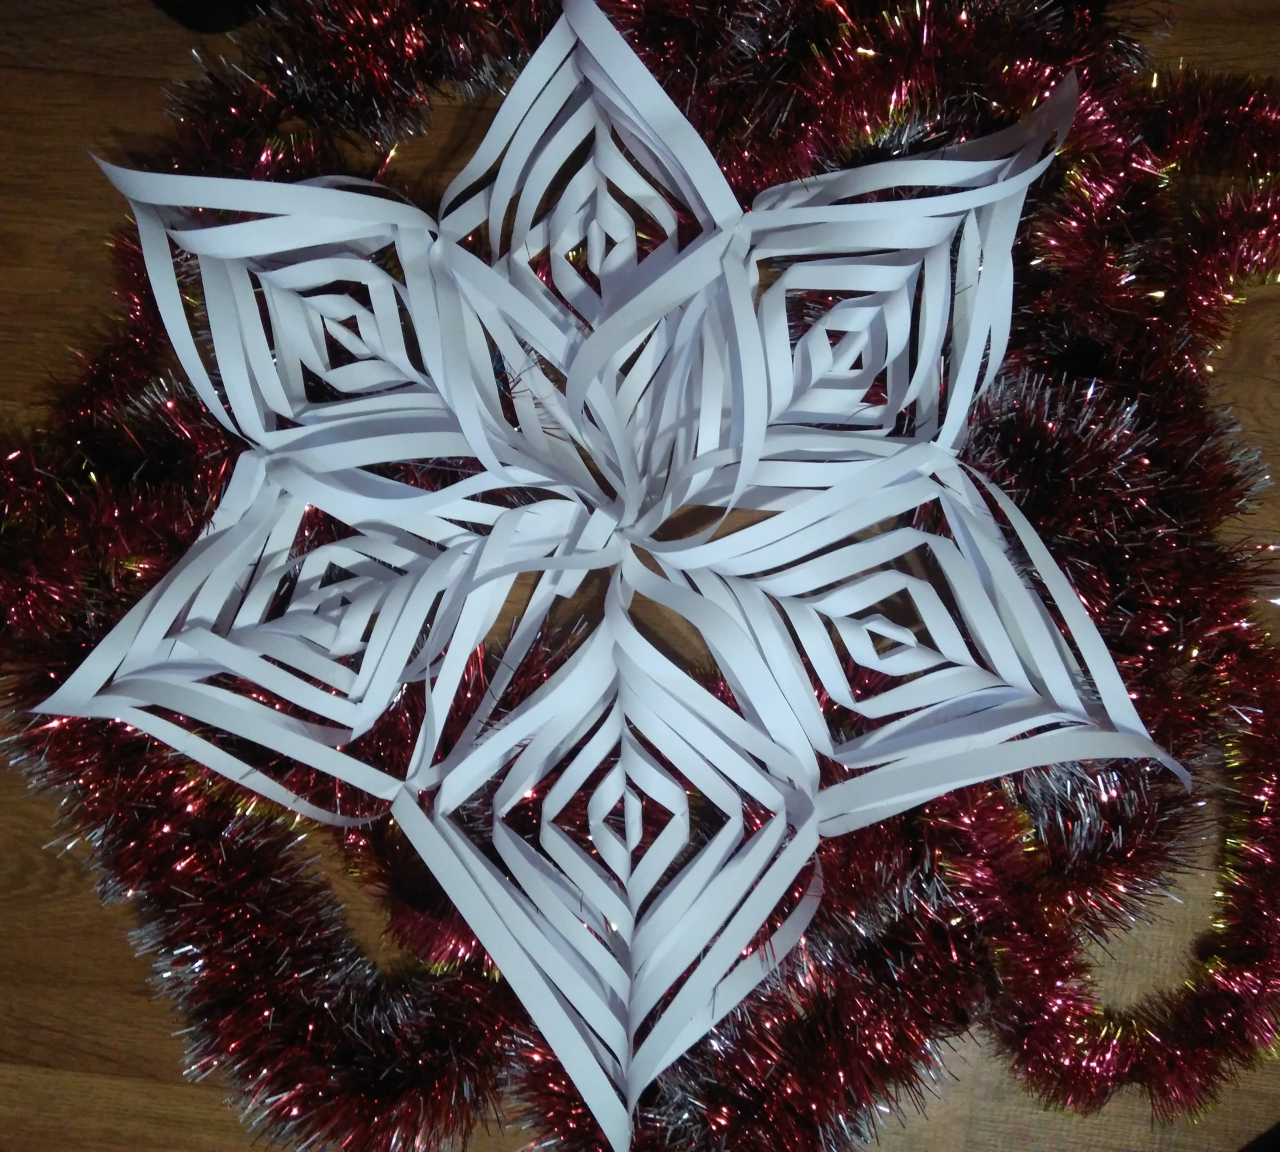
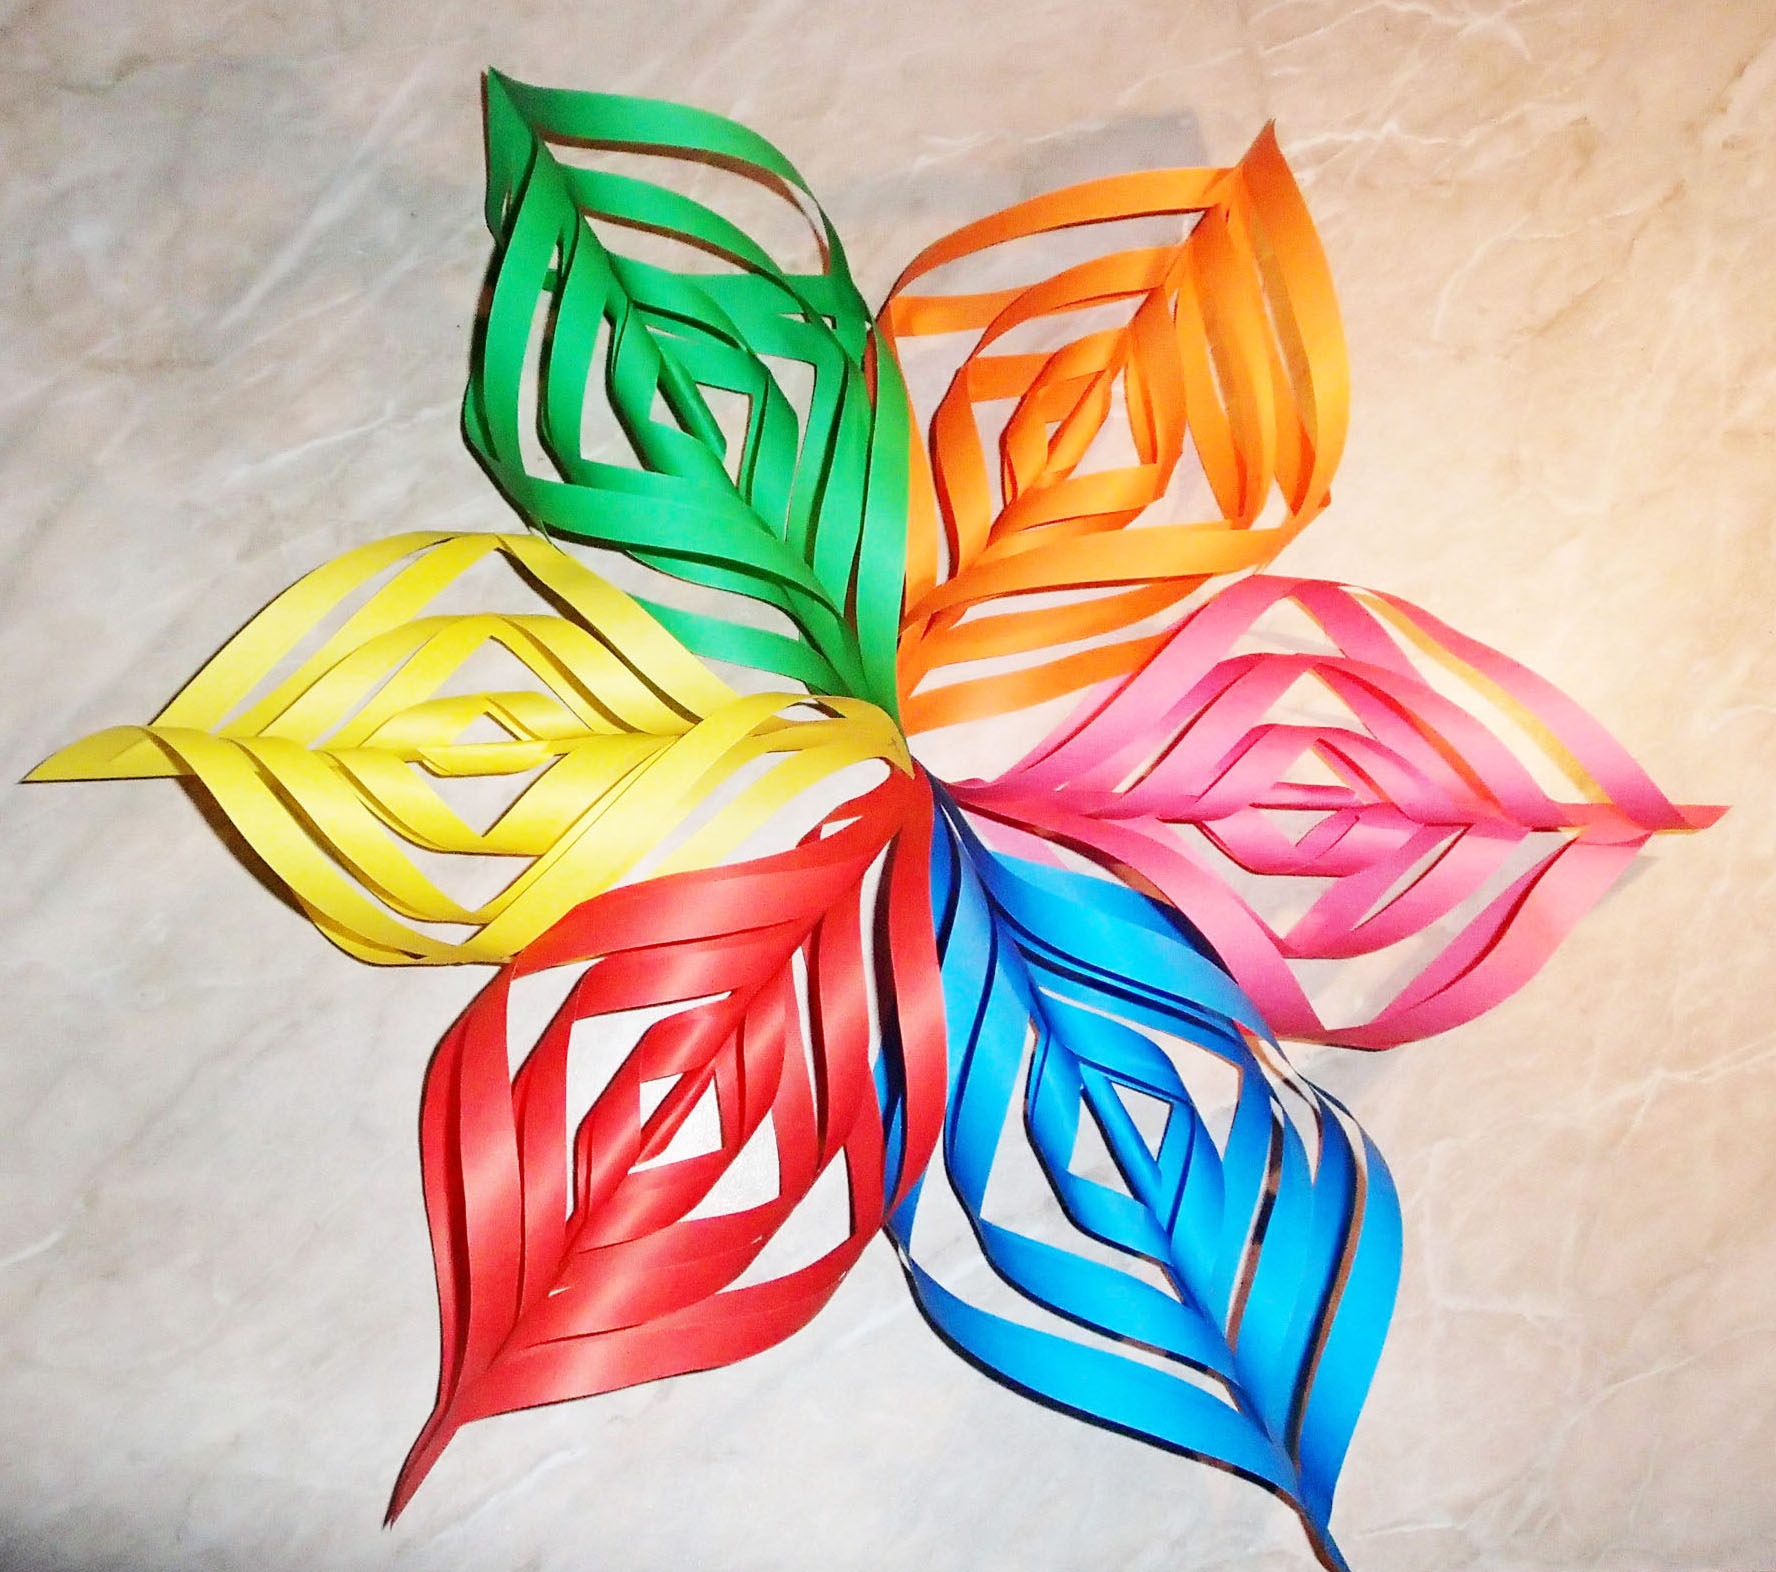
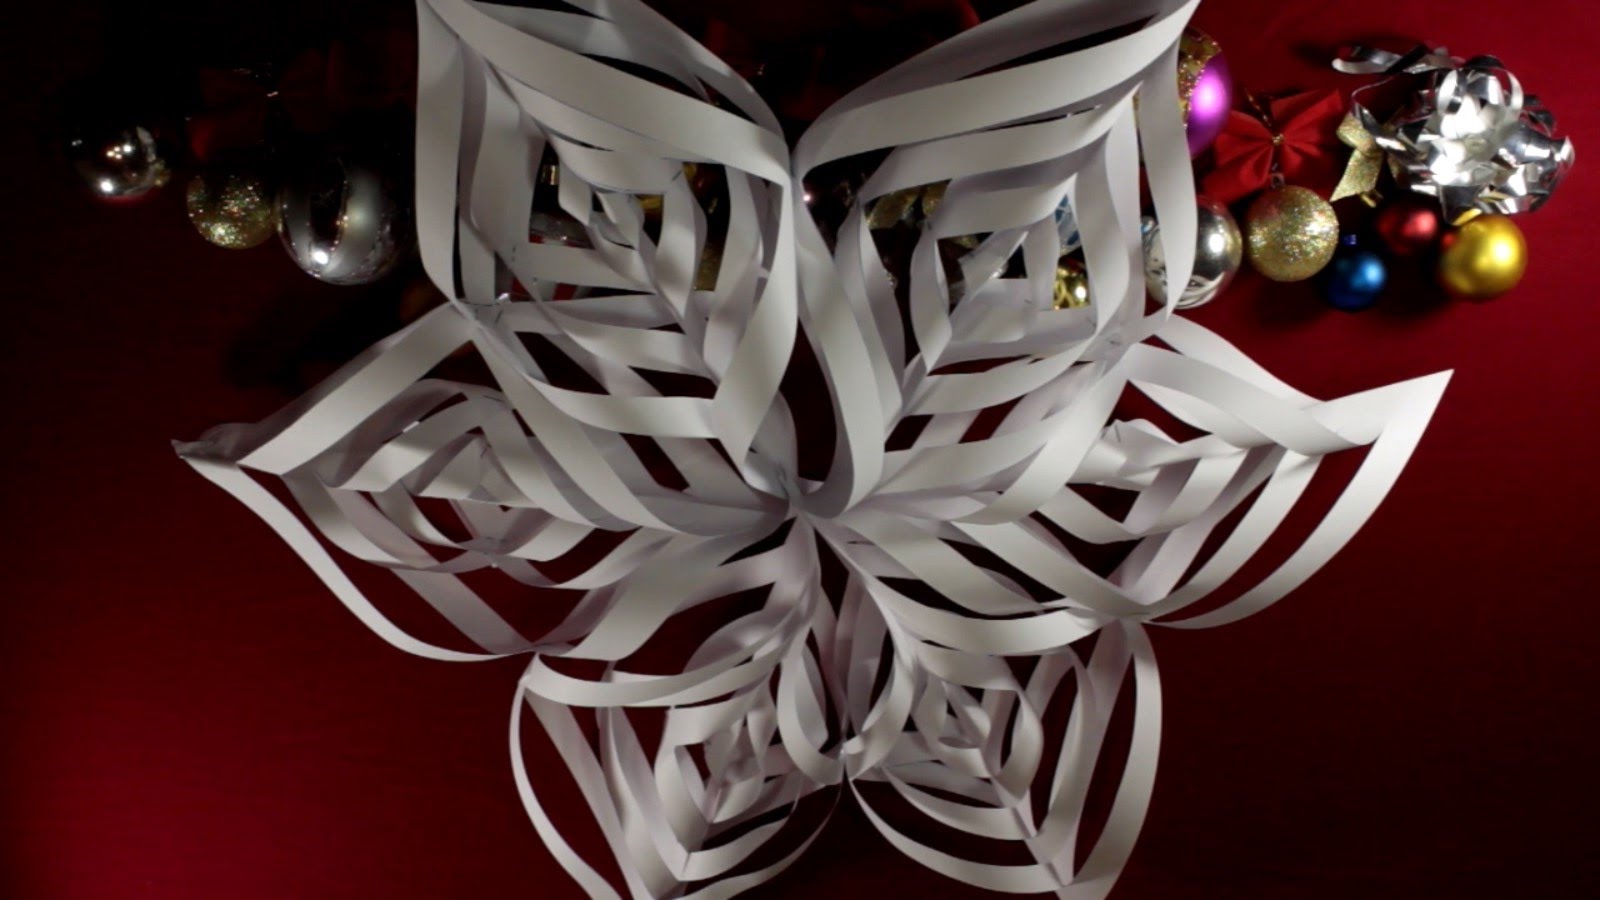
Option 2 volumetric snowflakes
For this venture I will need:
- Glue.
- Scissors, stapler.
- Stationery.
- Paper.
- I warn you at once that this snowflake is much more difficult to make than the previous one.
For a start I will prepare a stencil. For stencil we need cardboard. Draw on it six lines at right angles. The lines should be 1 cm apart.

Making a stencil for future snowflakes
Now we have to bend six album sheets diagonally and make stencil cuts. I should have 6 triangles with cuts running parallel to each other.
Begin to glue from the middle
After that, take one of the triangles and unfold it. That is, I should get a square in which even smaller squares are placed. You need to start from the center. I tuck the corners of the central square towards the center. Glue it. I turn to the other side and do the same with the central square. In the end, I should get an icicle.
We get a voluminous icicle
It remains the case for small. Fold all my icicles together and our snowflake is ready.
Use for snowflakes and colored double-sided paper.
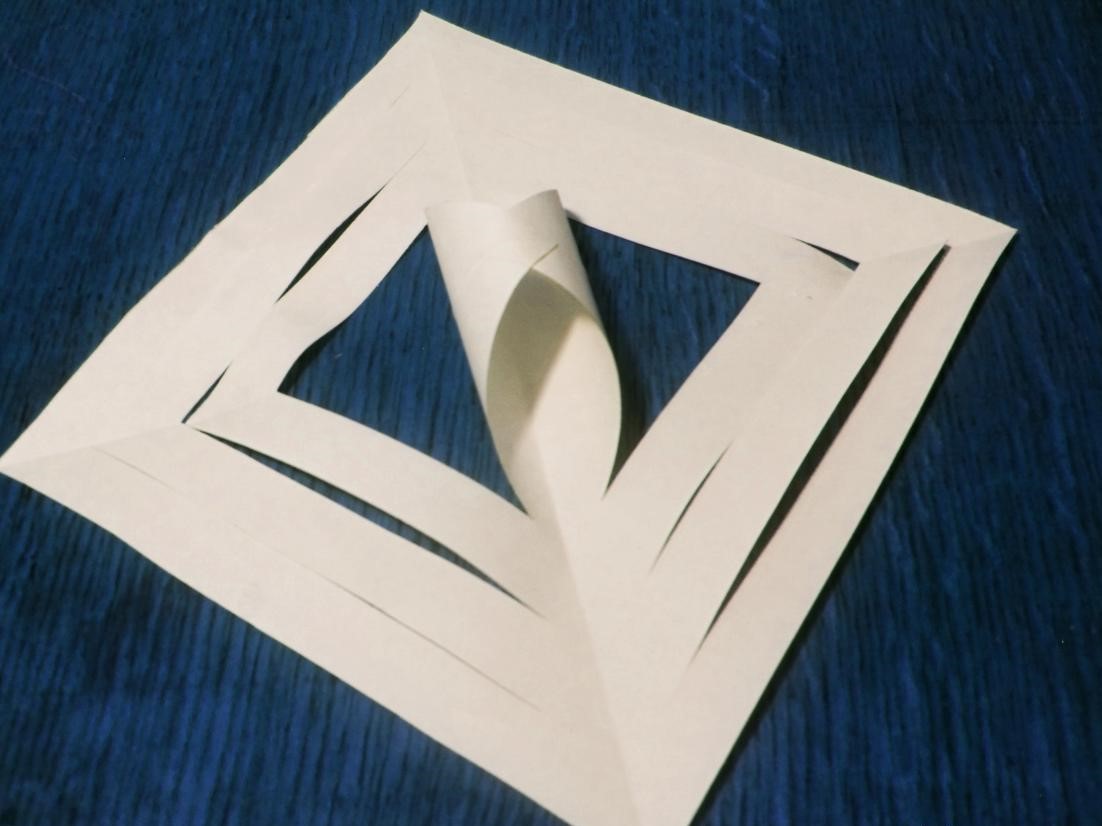
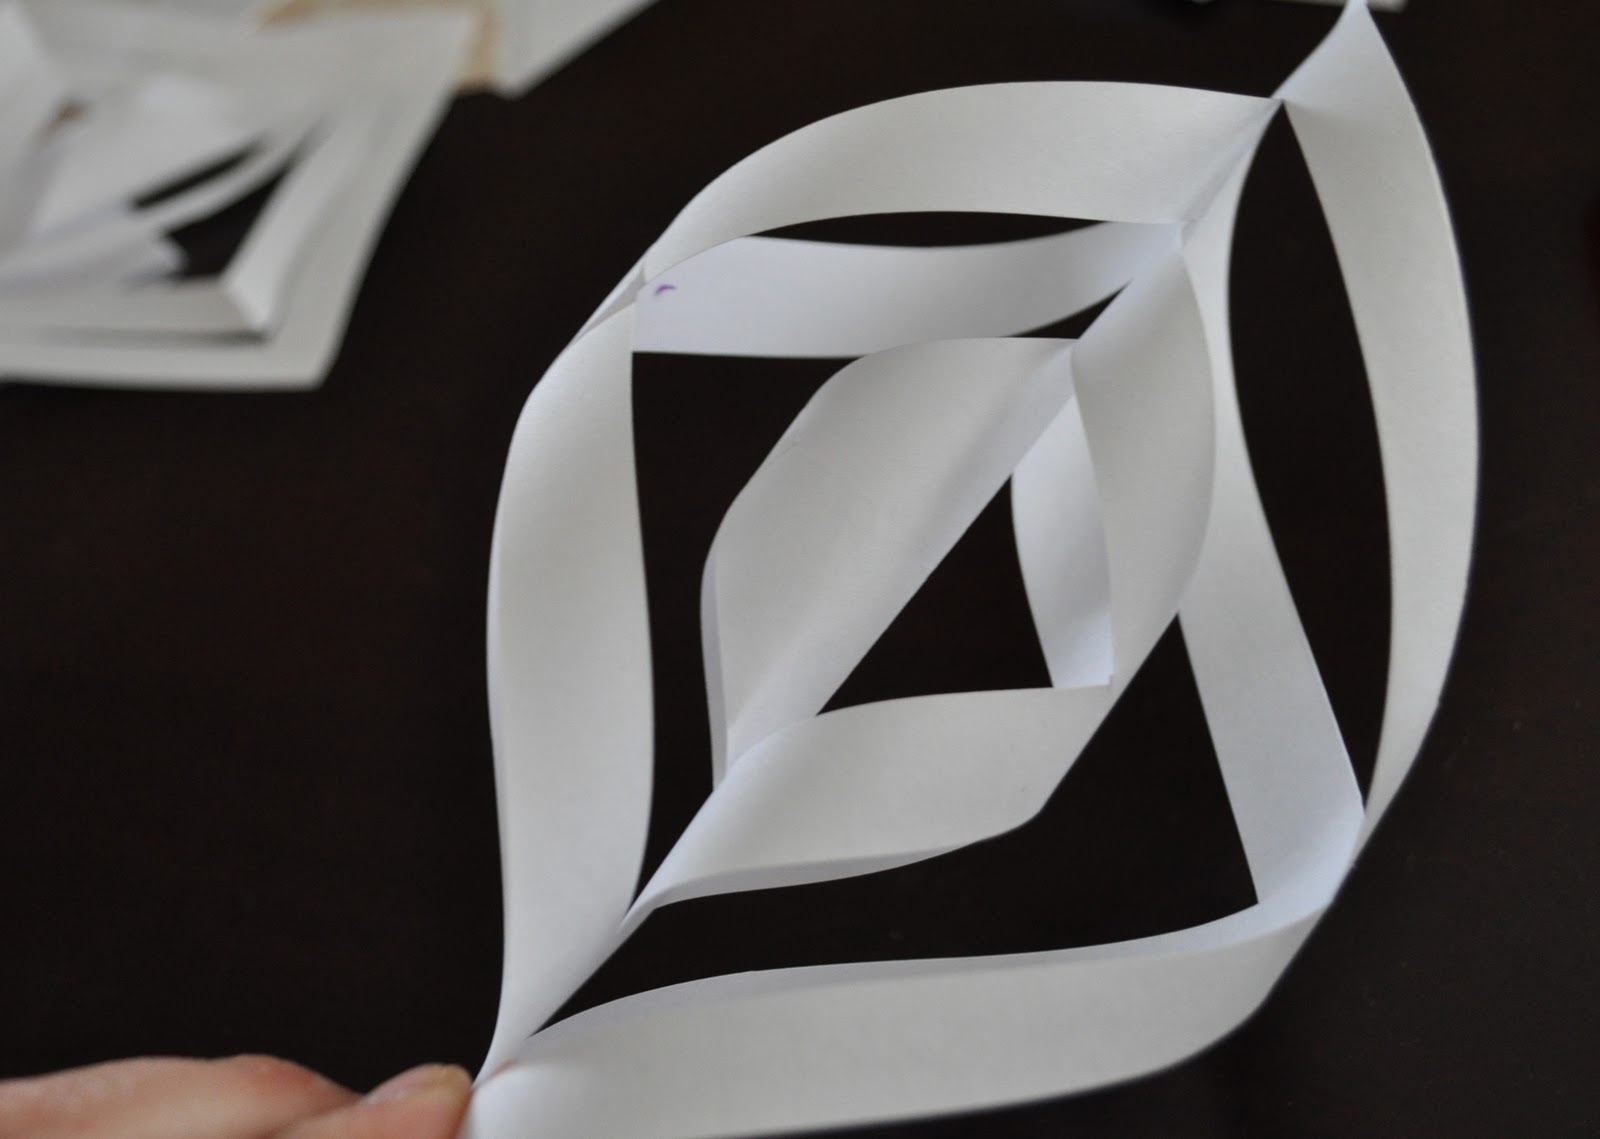
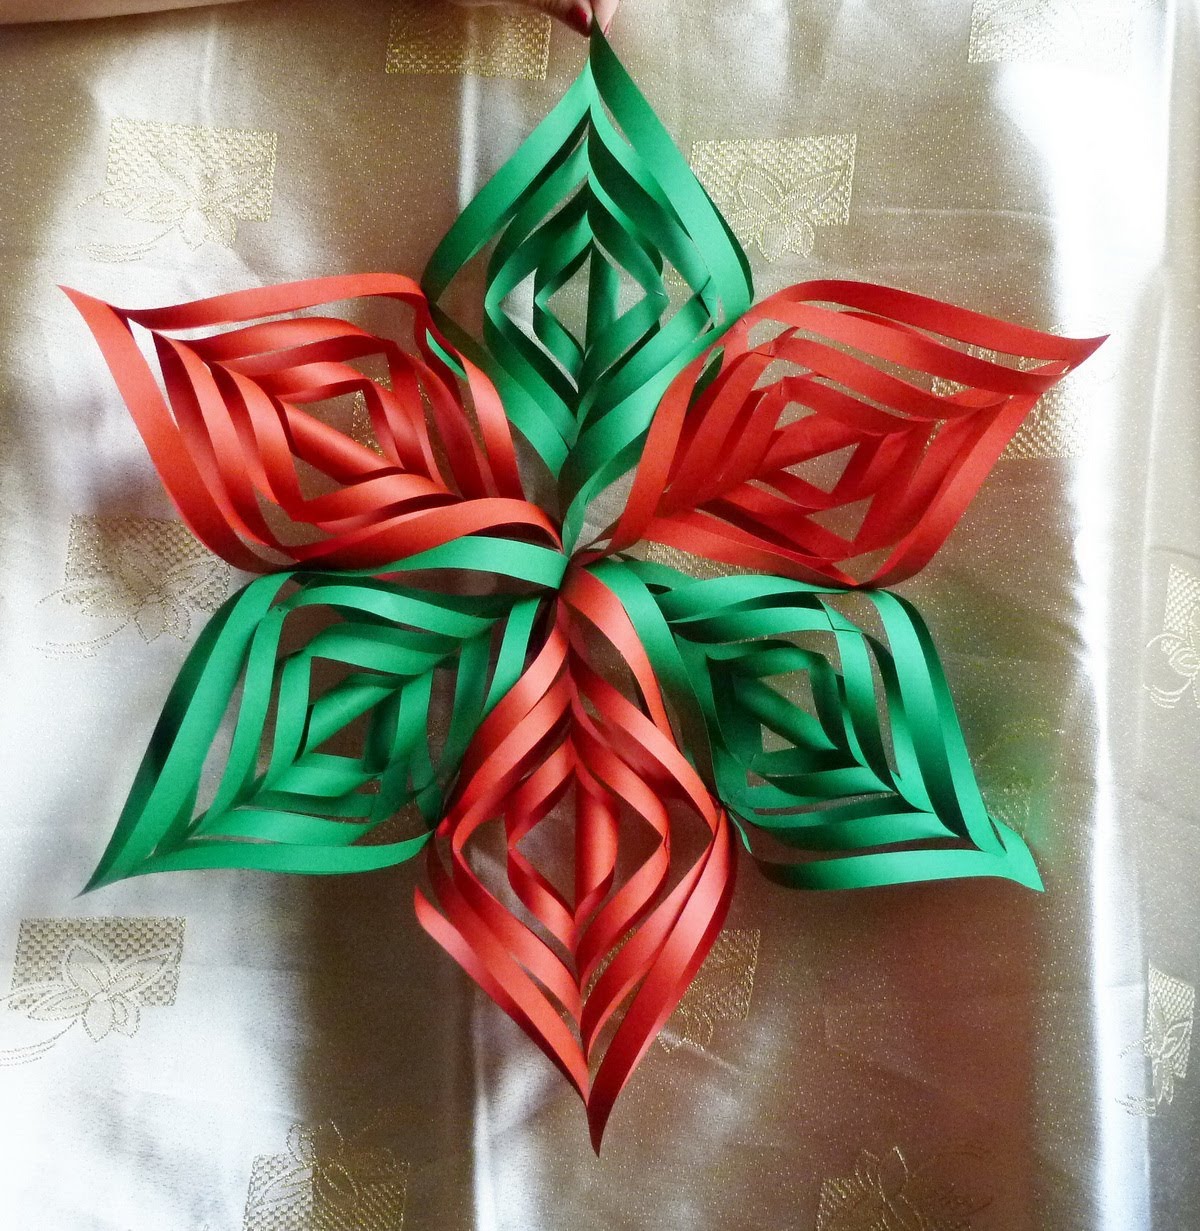
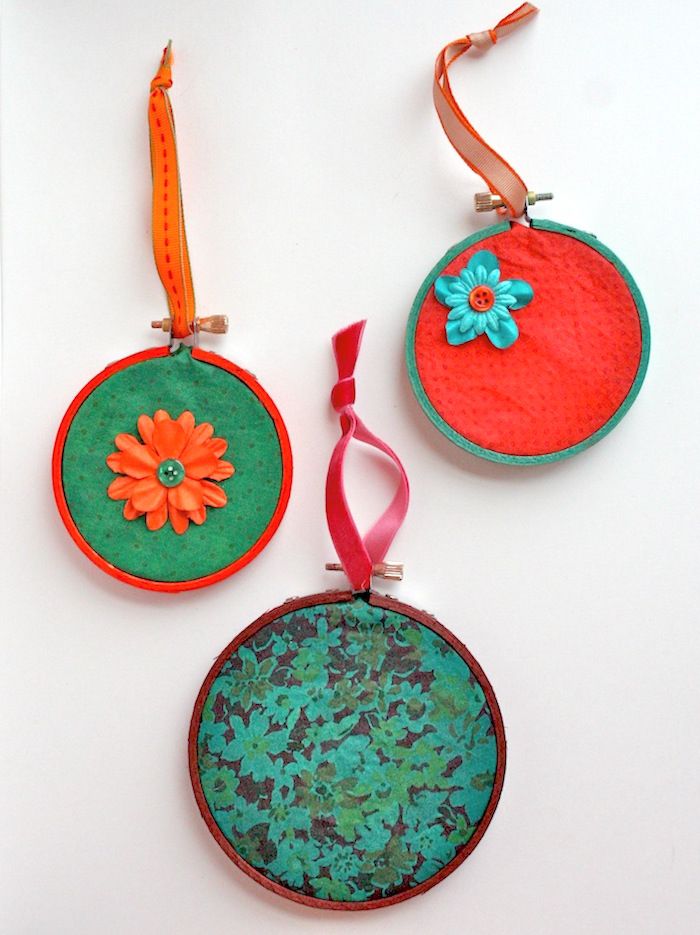
Option 3 volumetric snowflakes
For this option I will need:
- A4 paper.
- Threads.
- Needle.
- Red shred.
- Stationery.
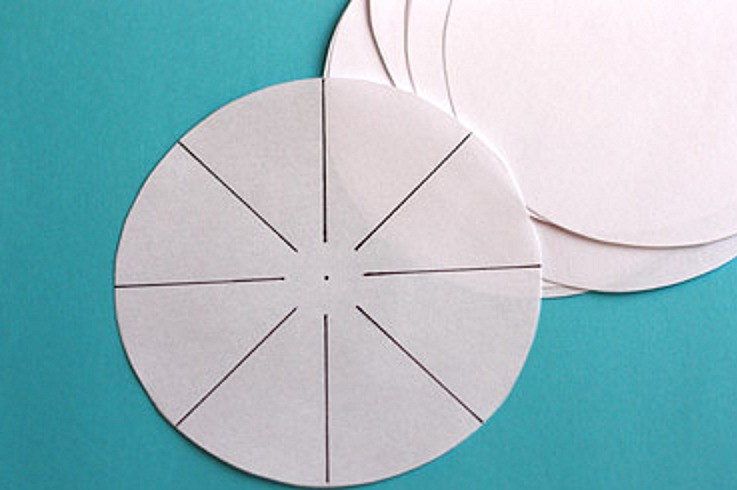
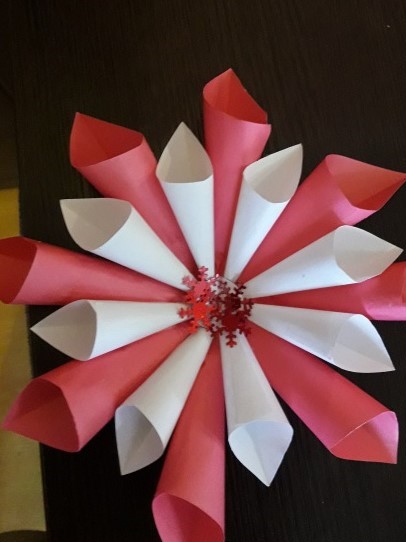
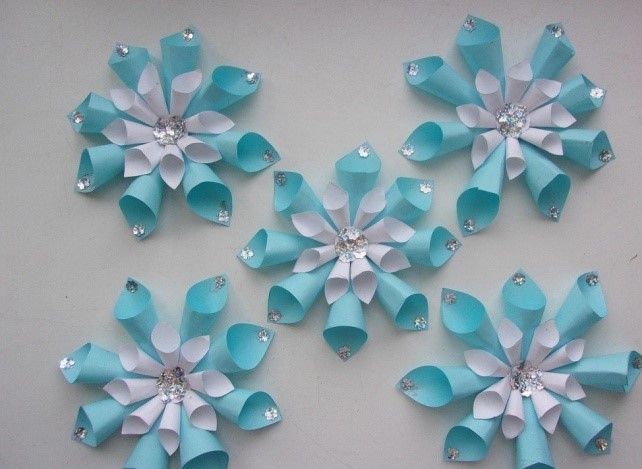
Mark the circle into eight parts
On a sheet of paper I draw four circles, which must be of the same diameter. Cutting circles and outline eight equal parts. On the planned lines I make cuts towards the center. After that, I podgibayu tip of each such "petal" and stick.
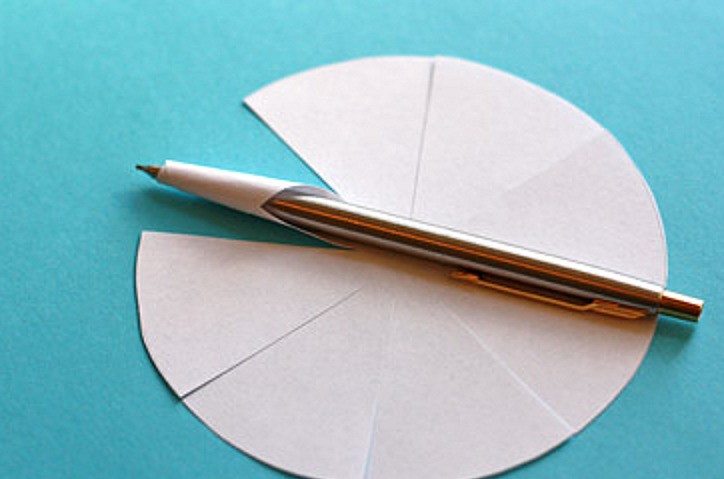
We glue each tip
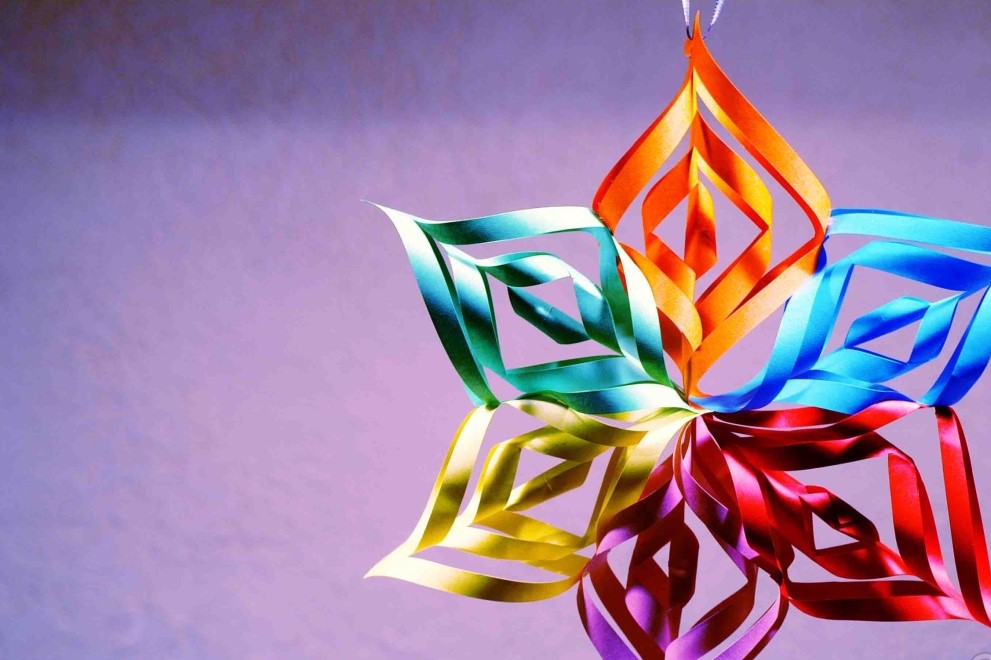
I do all the same manipulations with the rest of the circles and sew. Red shred is needed to give the product completeness. Cut out a circle from the patch and glue it.
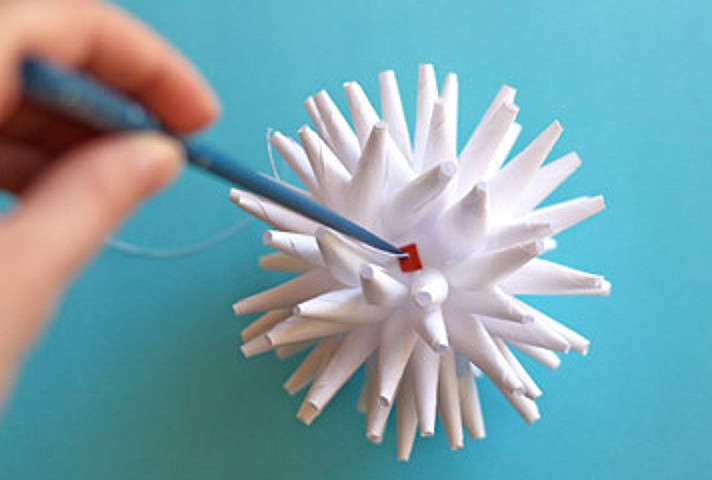
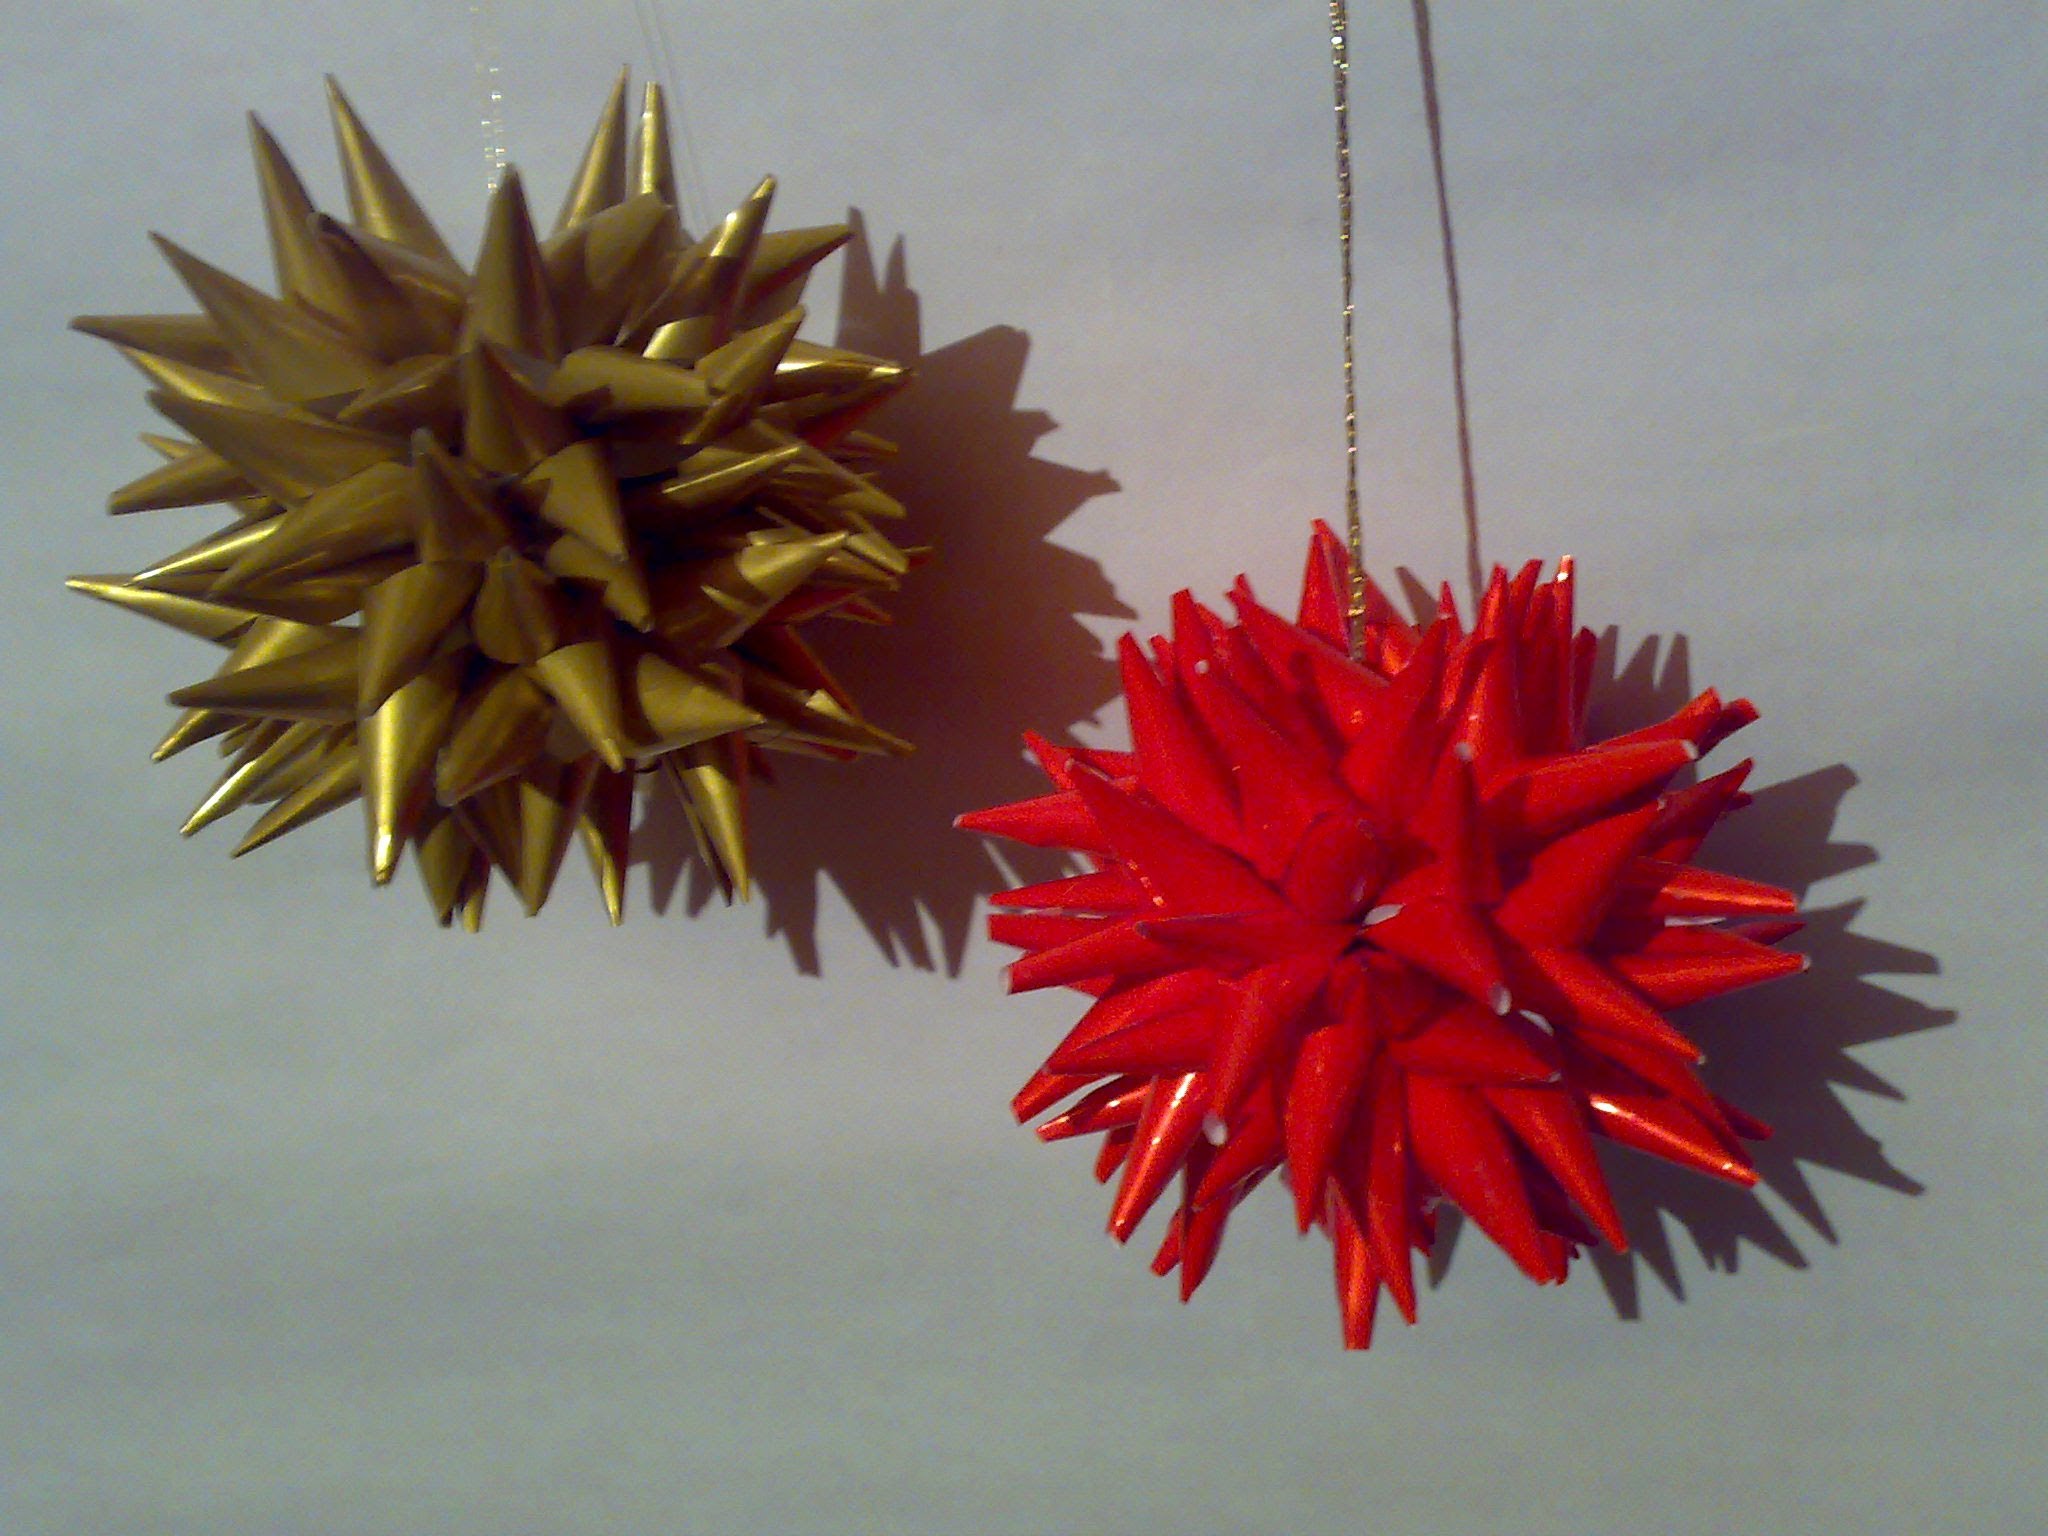
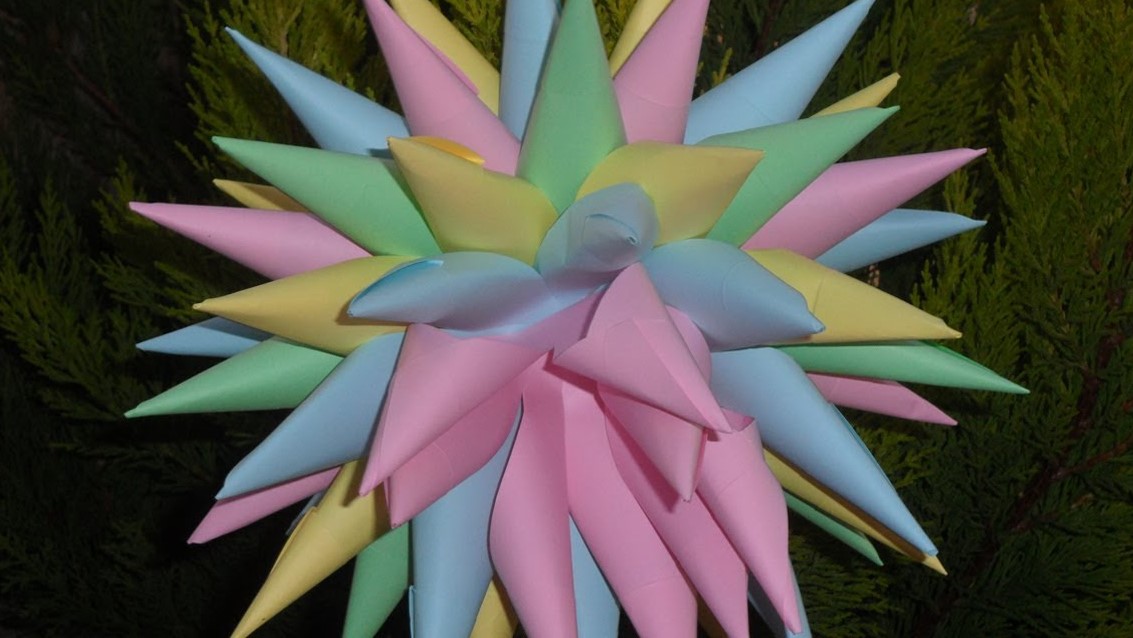
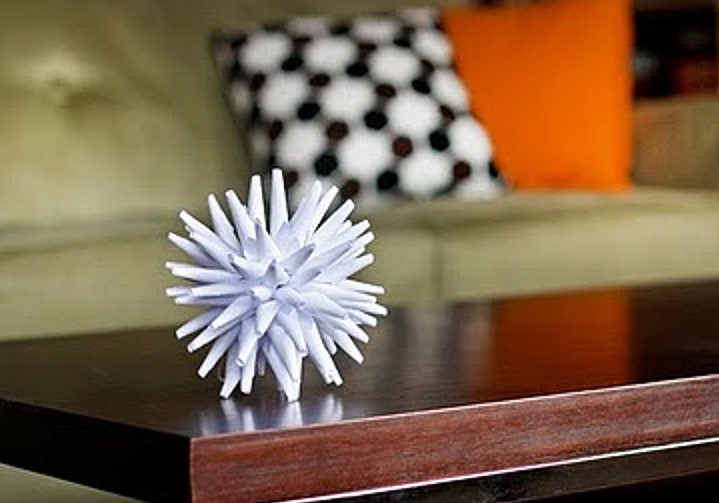
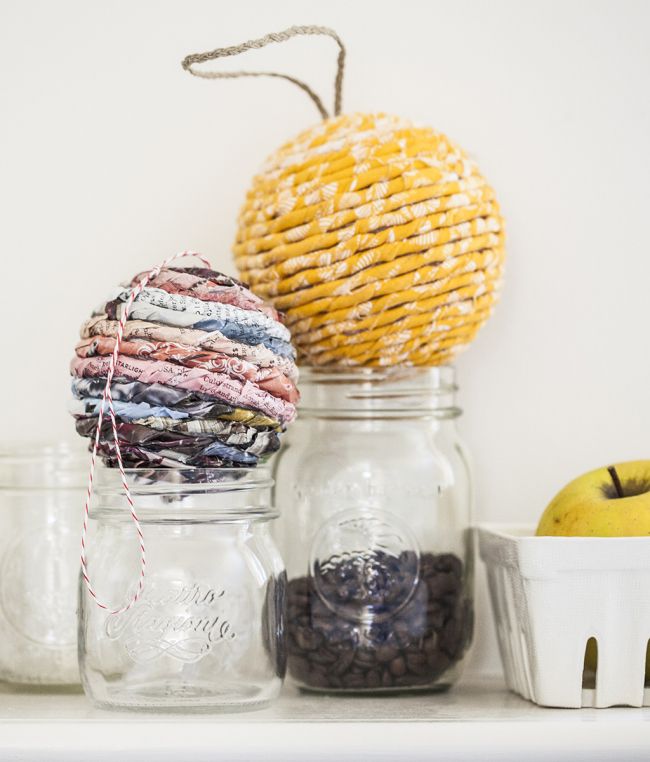
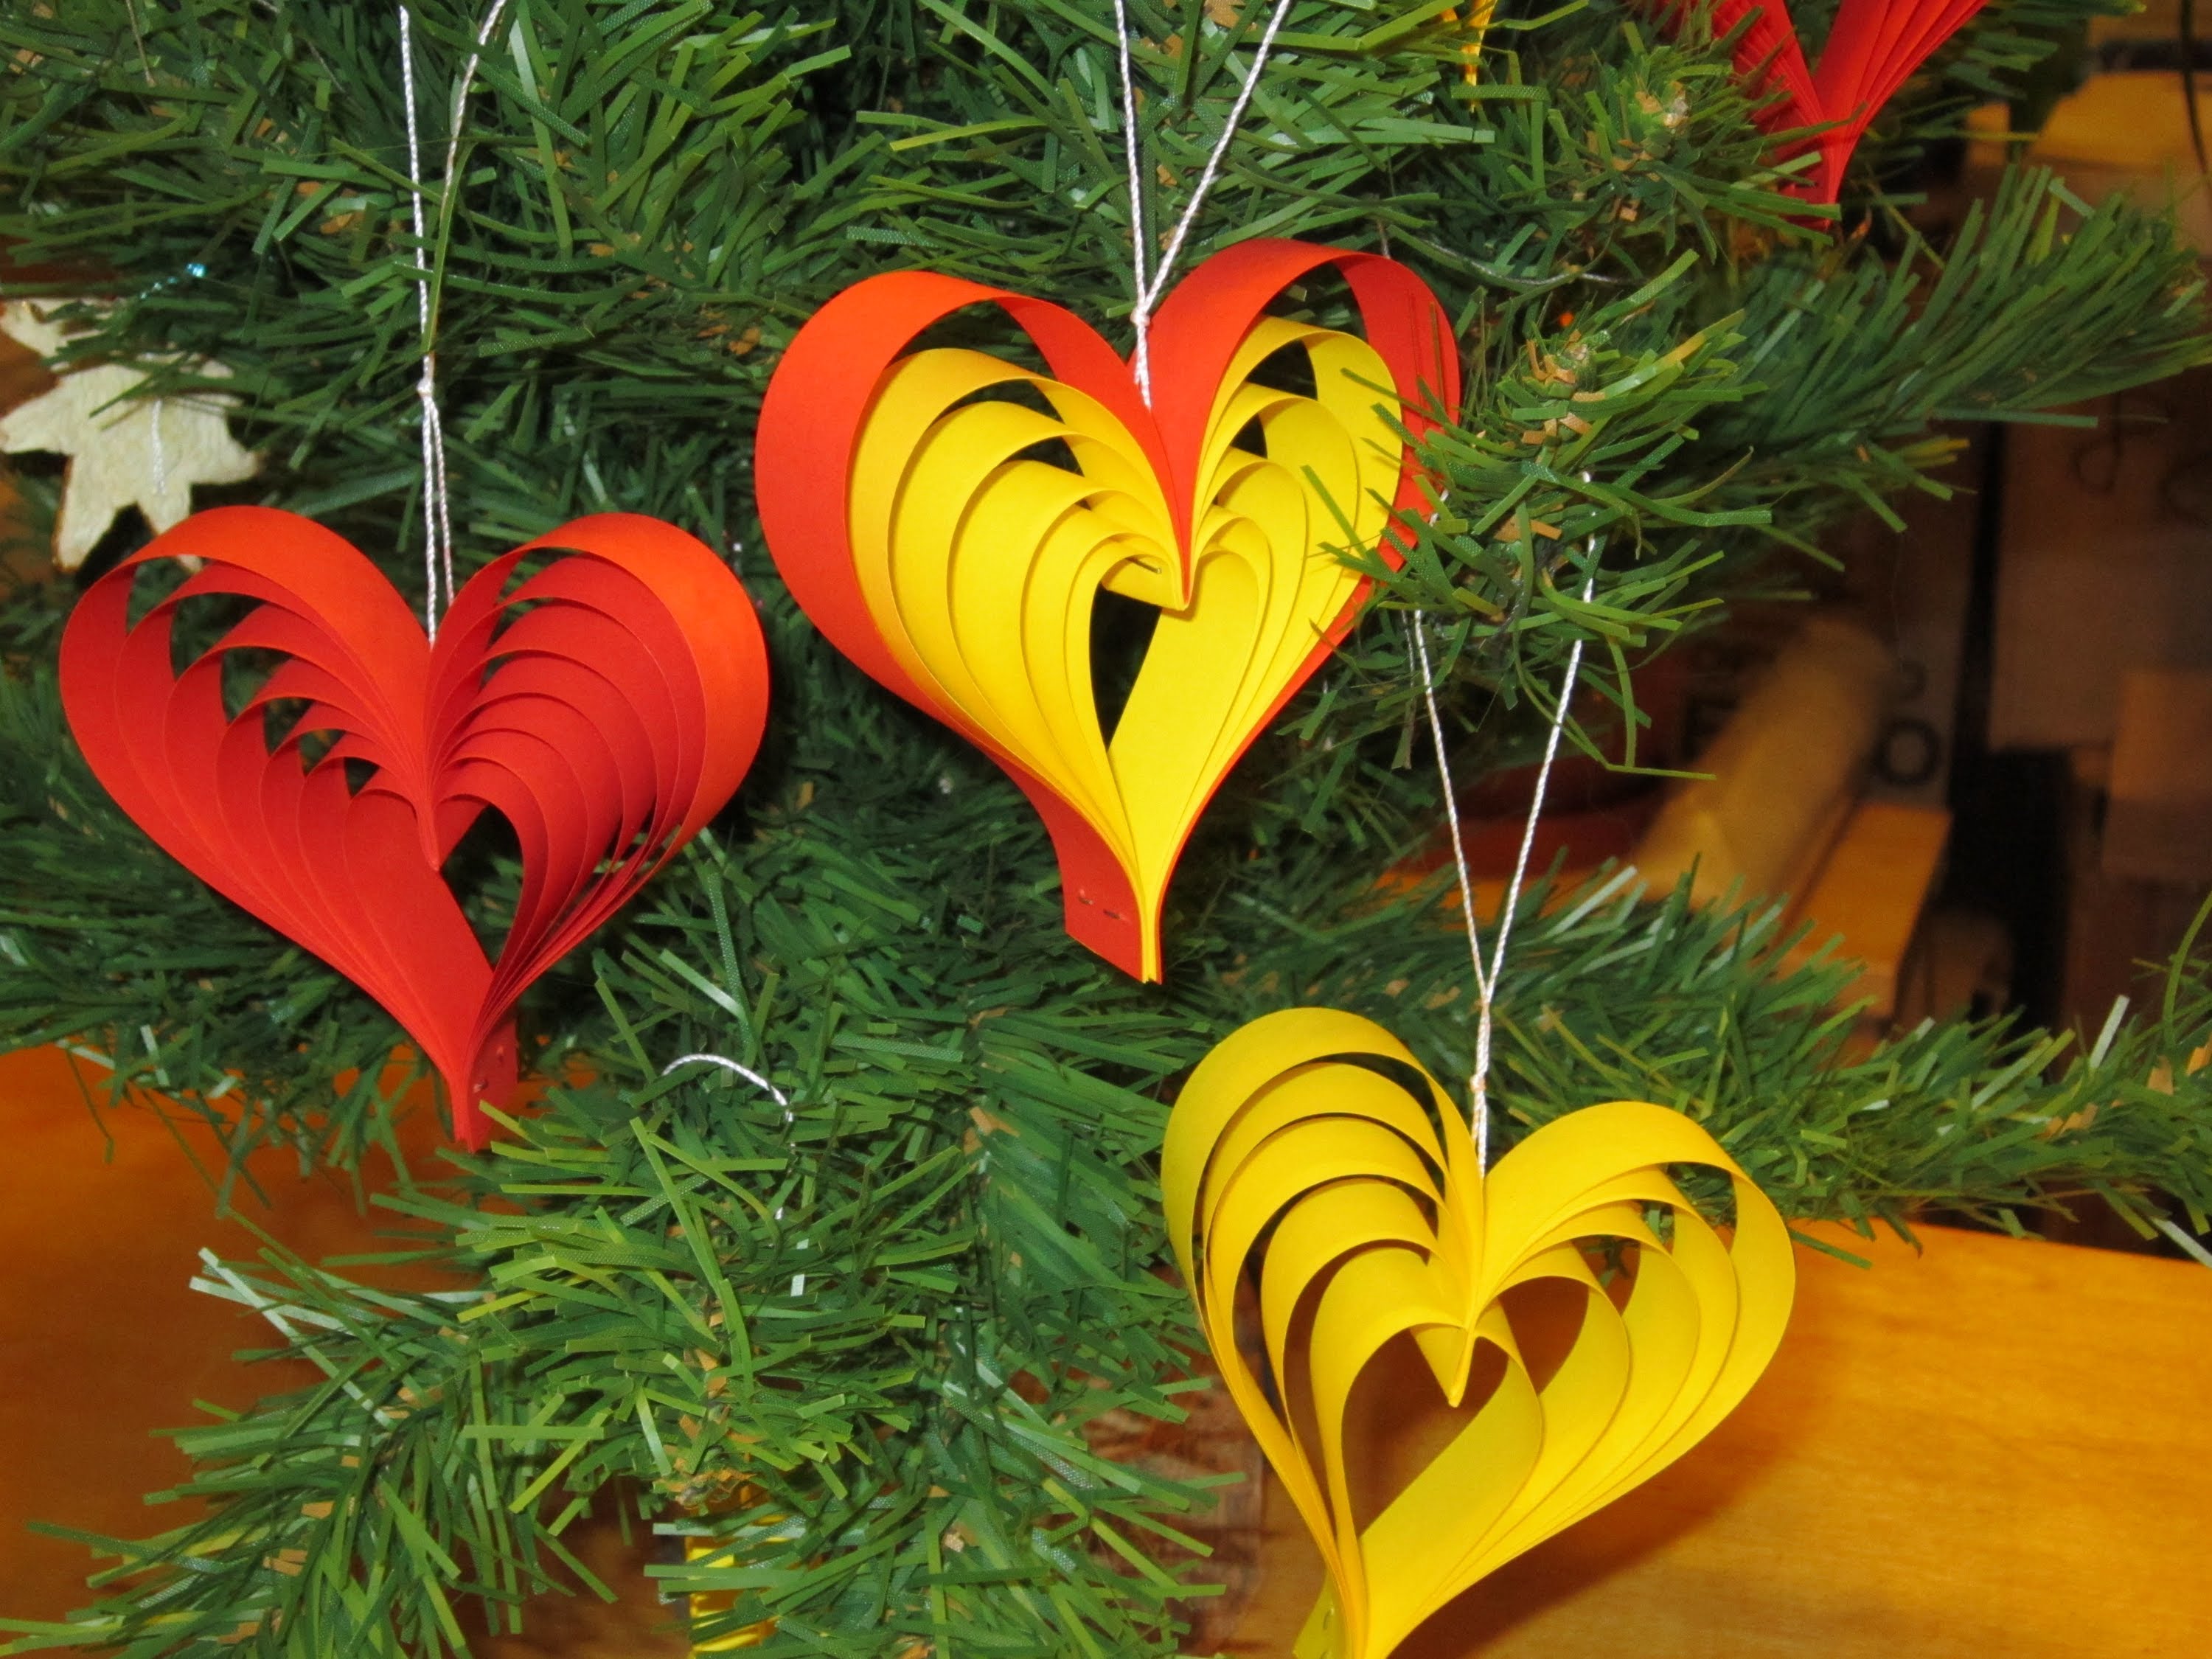
Volumetric ball hedgehog
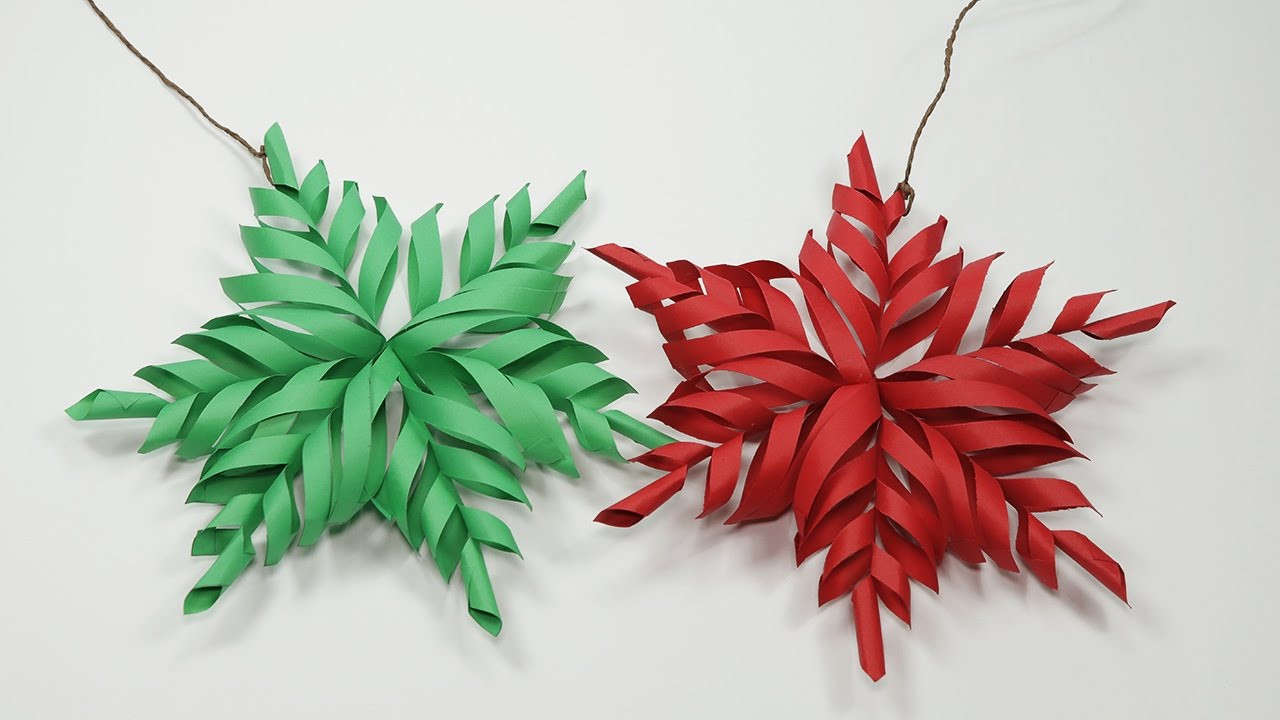
Rummaging, again on the Internet, I stumbled upon another version of the volumetric snowflake. This snowflake is made of strips of paper. So, cut the paper into strips. The strips should be five millimeters, and a length of 21 centimeters.
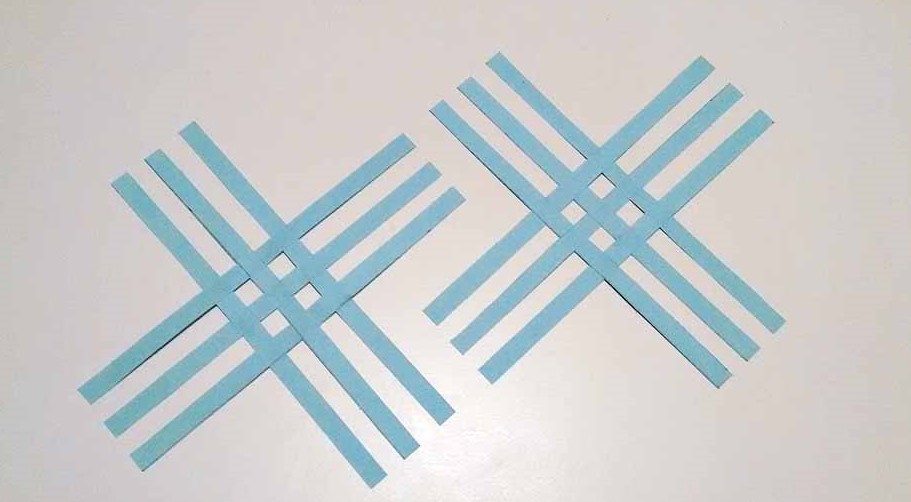
Cut the same strips
A snowflake consists of two halves. That is, for one half you need 10 strips. The first two strips are glued together, so that I get a cross. Then I stick two more strips.
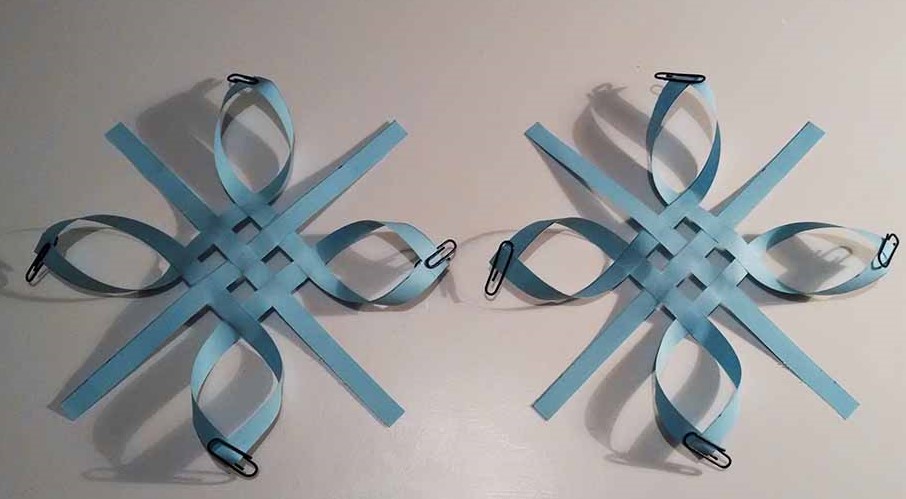
Making two identical halves
Further I pass two strips through a beam and paste. There should be two free strips. After this, I also make a soul mate. I fasten the halves with free strips and weave them together with each other.
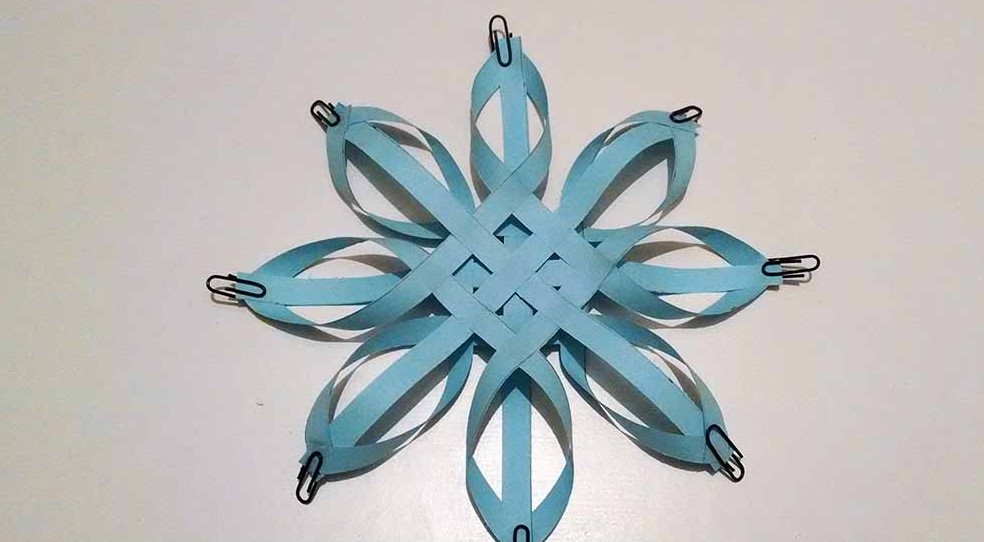
We connect and get a snowflake
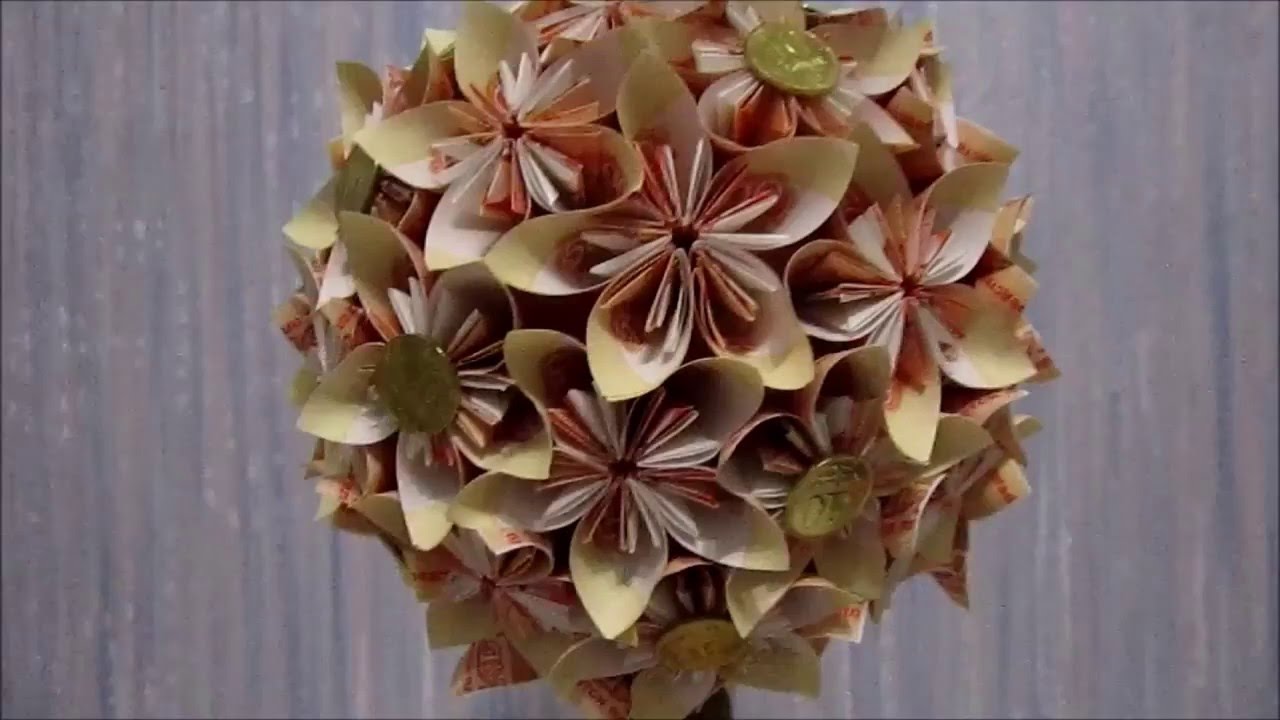
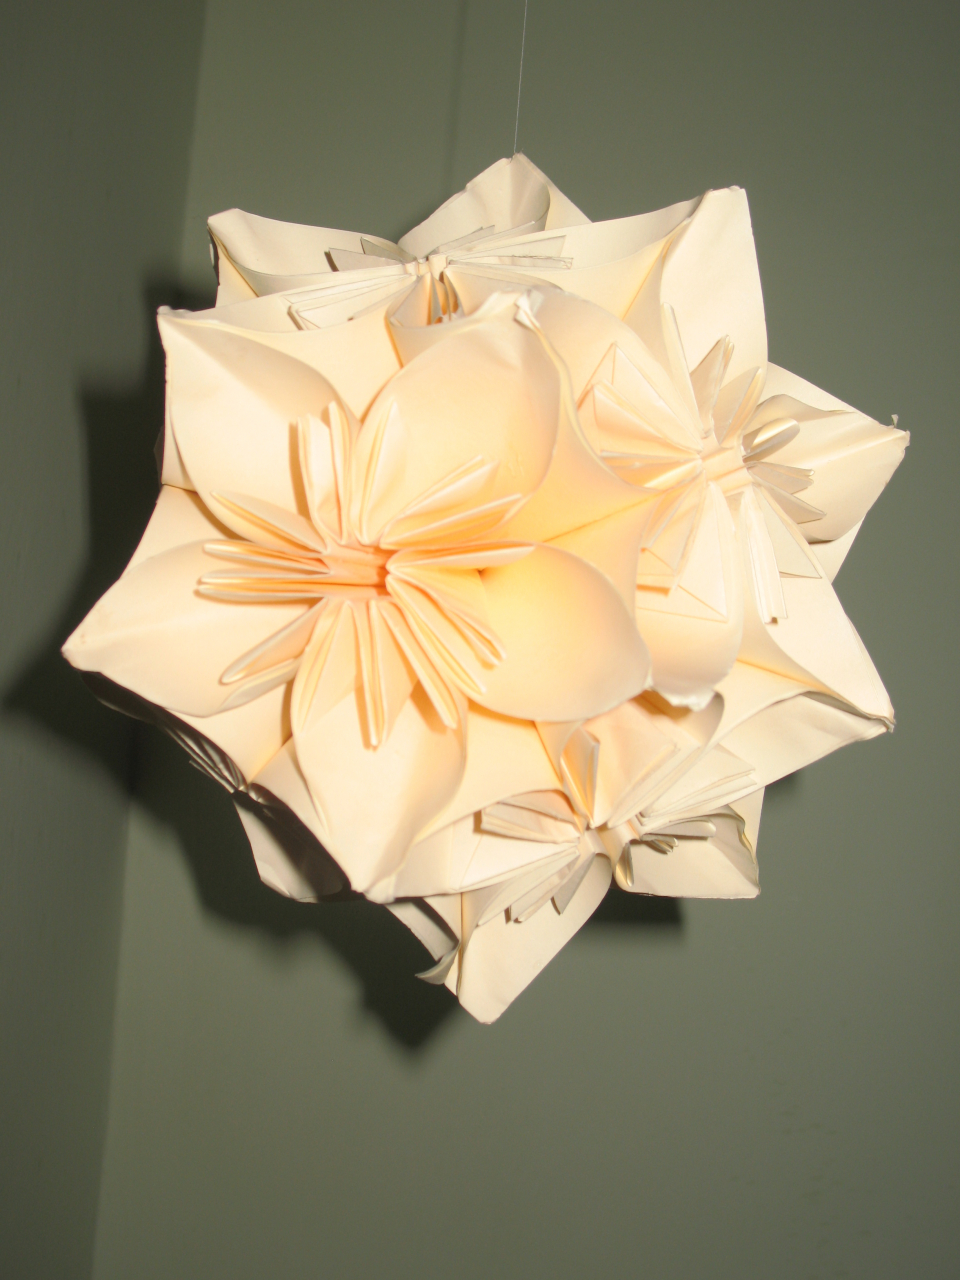
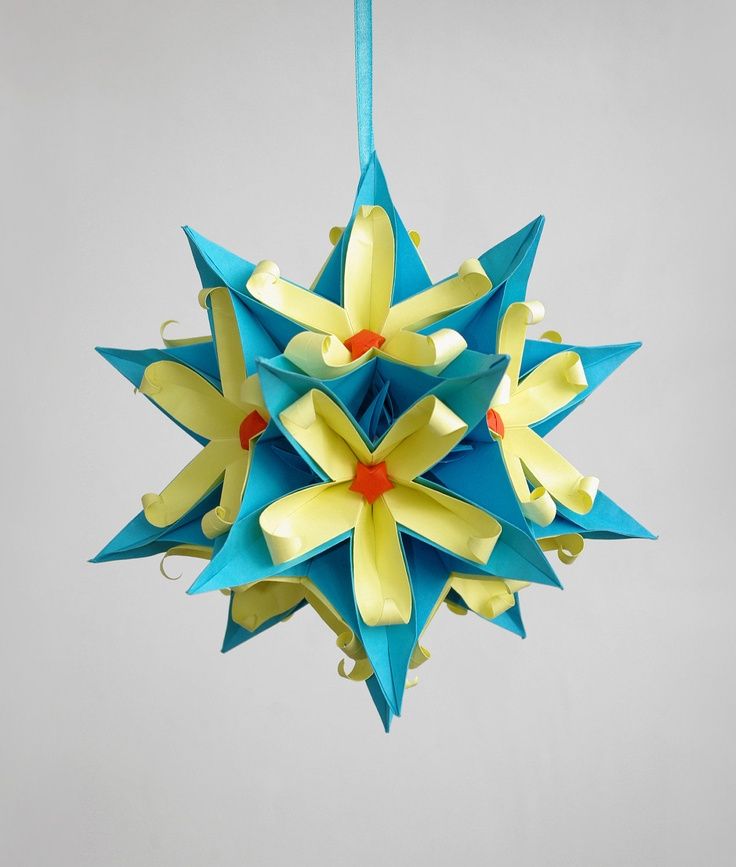
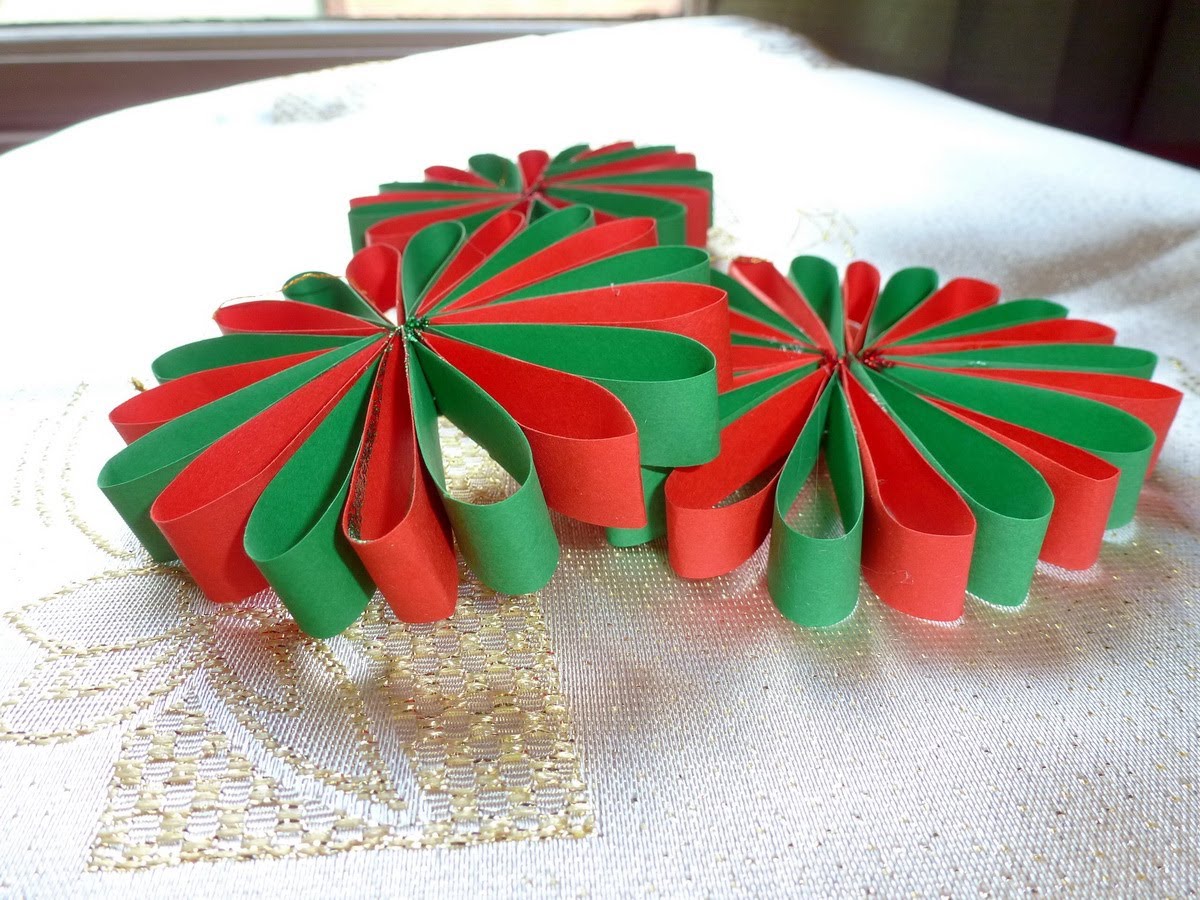
The next idea is a volumetric ball.
I will need:
- Cardboard.
- Color paper.
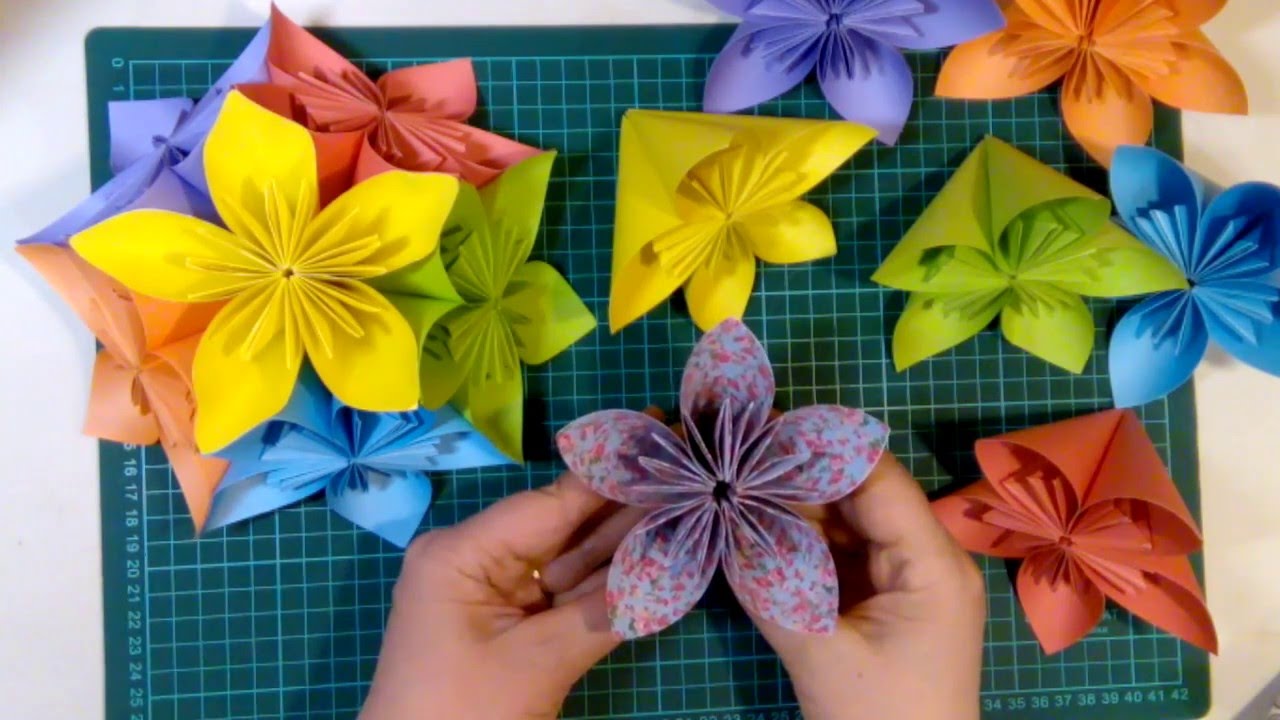
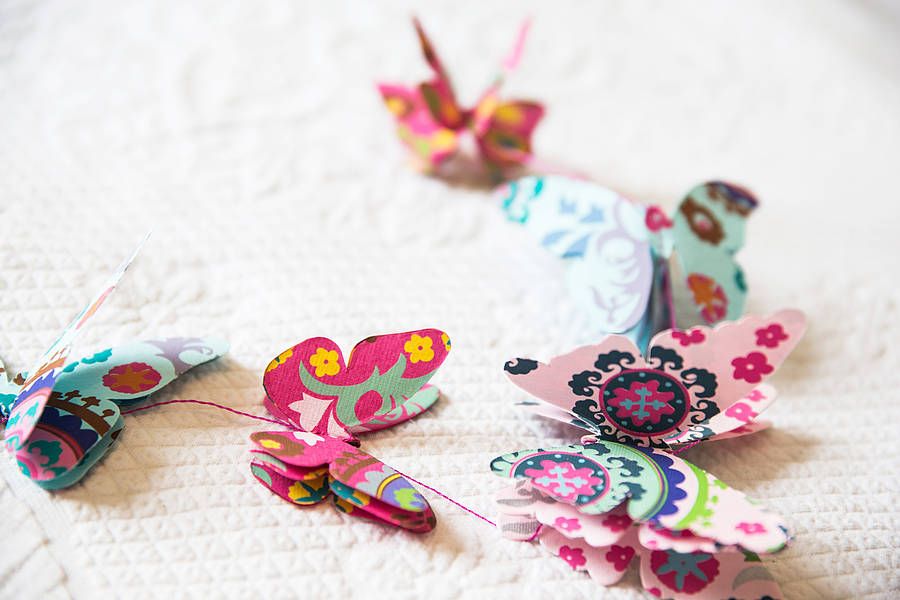
- Need to do twelve identical parts. They are flowers with five petals.
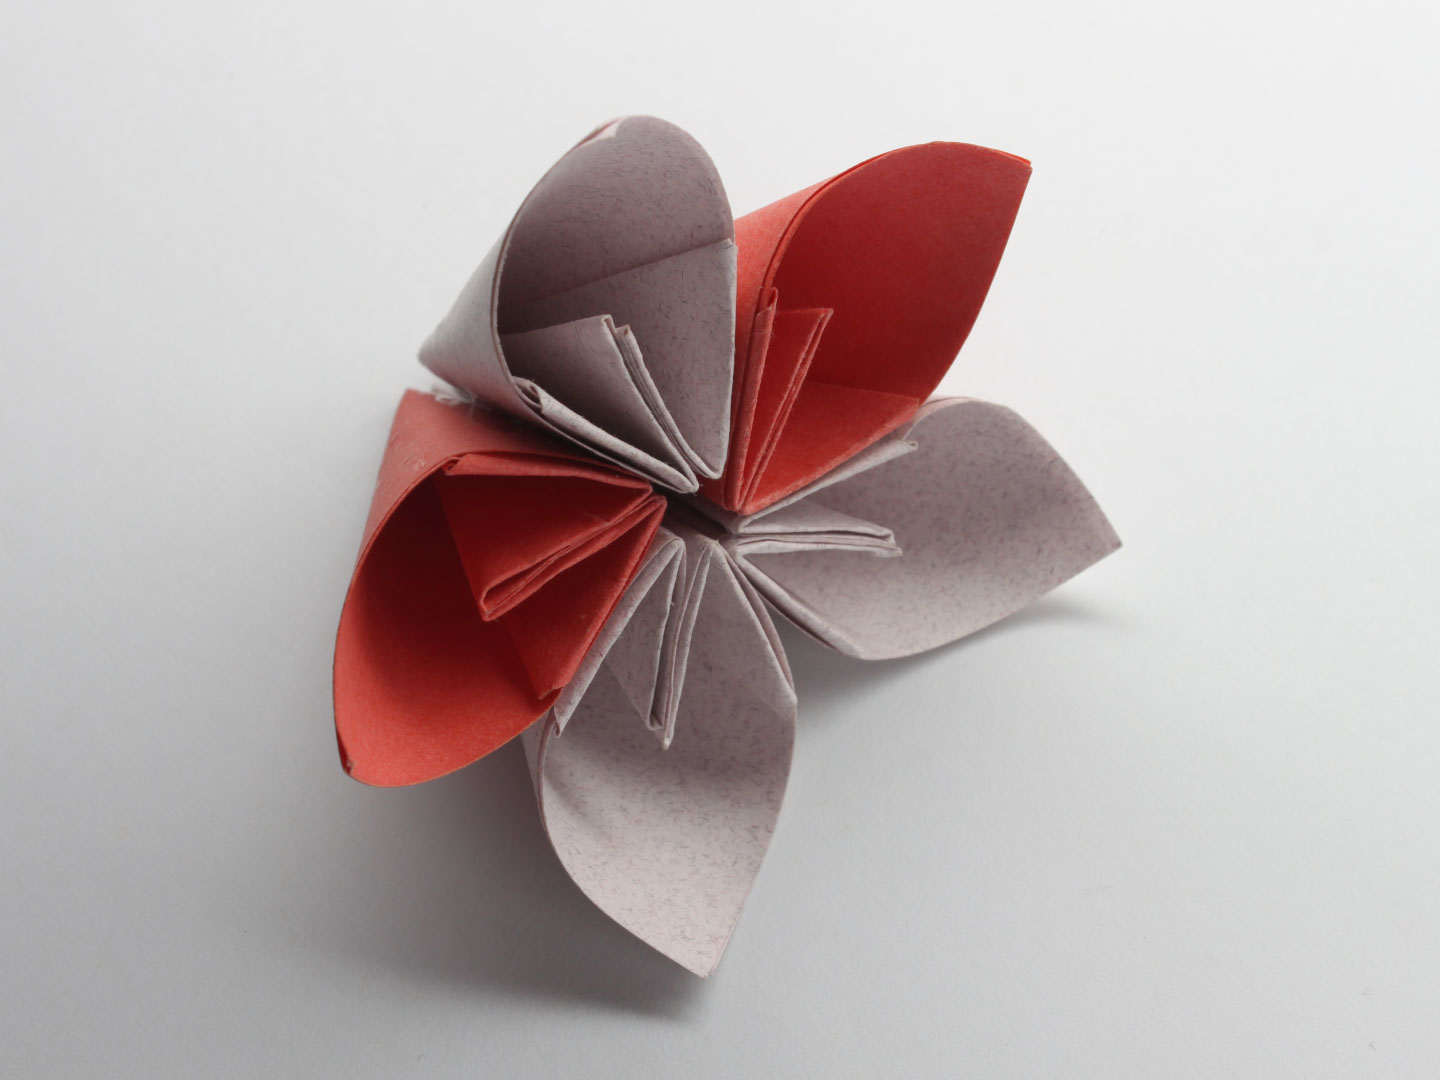
Flower with five petals
I punctured the first part in the center and let the thread through which the eyelet had been prepared was passed through the hole. Next, I secured it with glue. I connect three parts. Then three more.
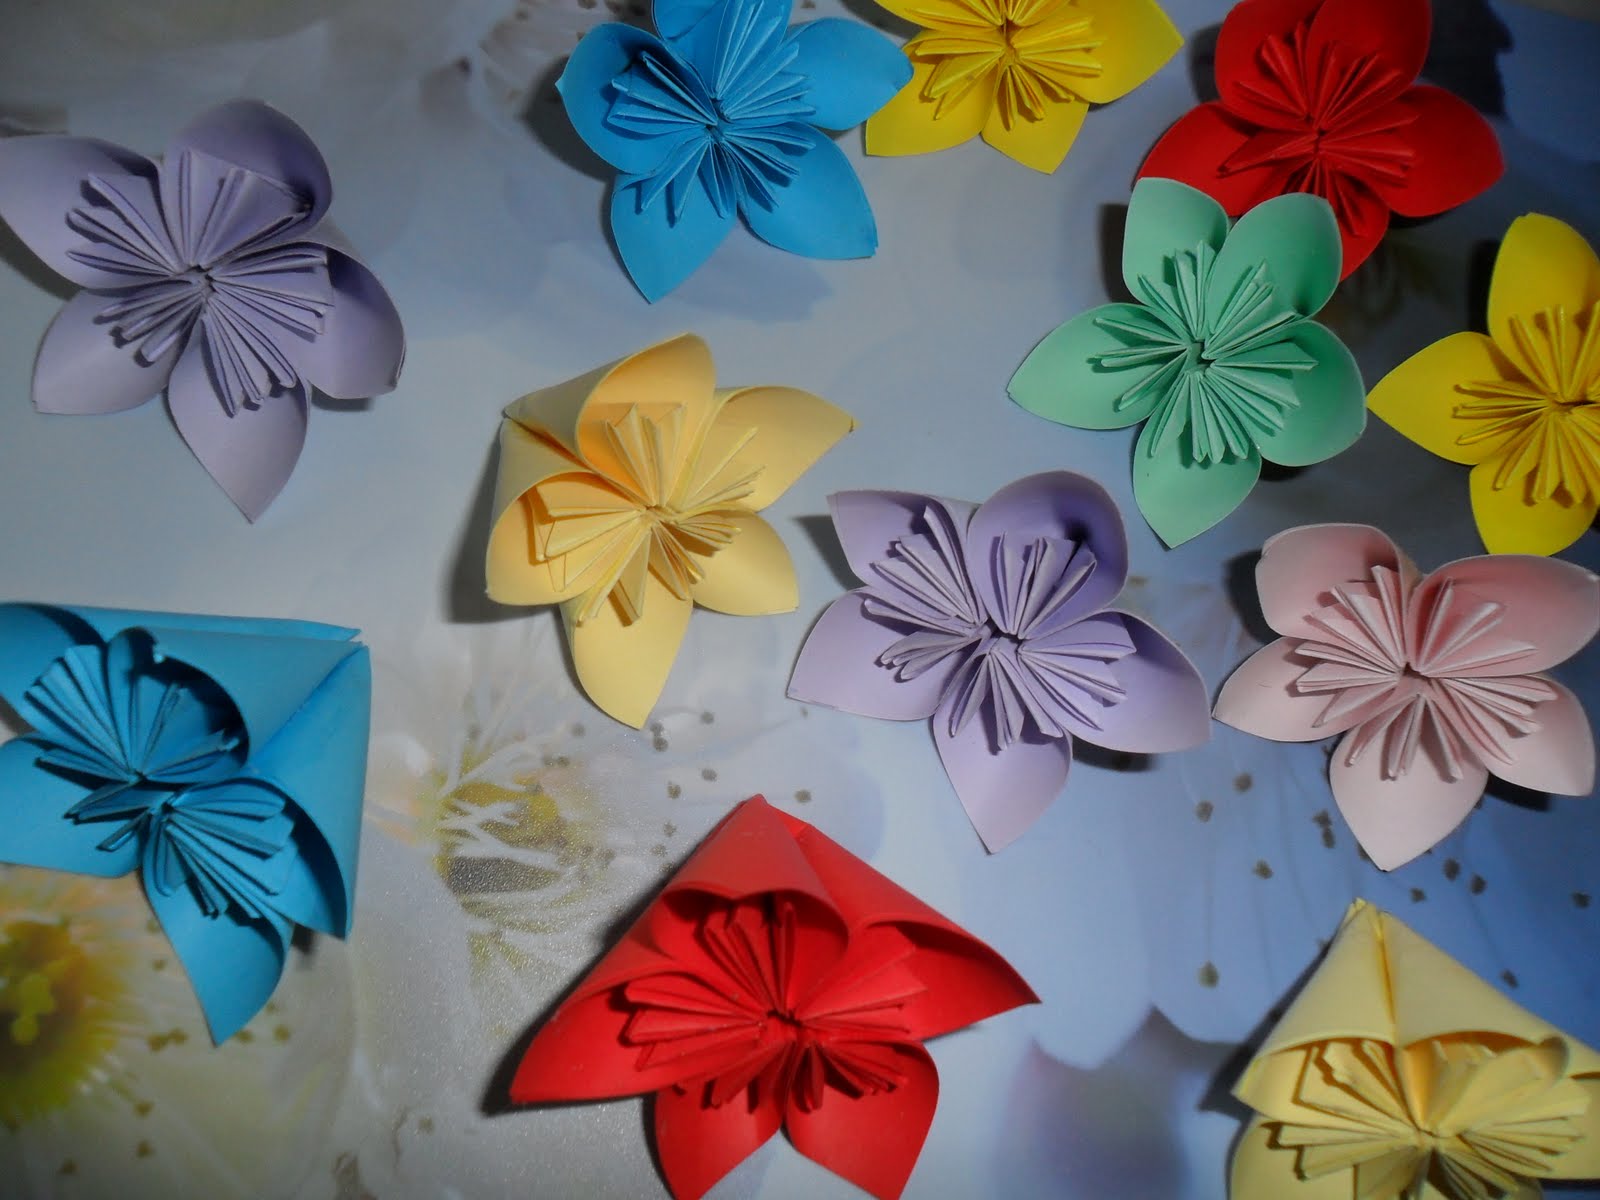
Making the colors for the ball
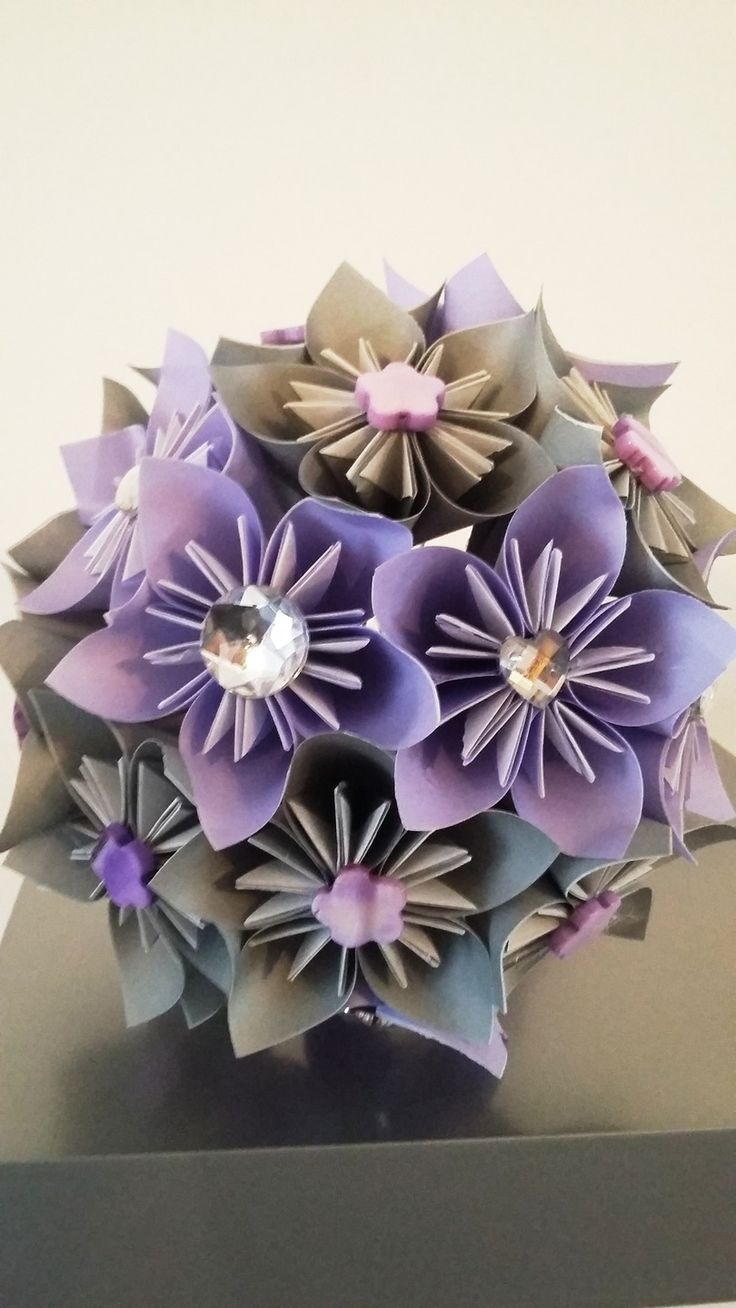
It is important that they are connected by a petal. It should make a cup.
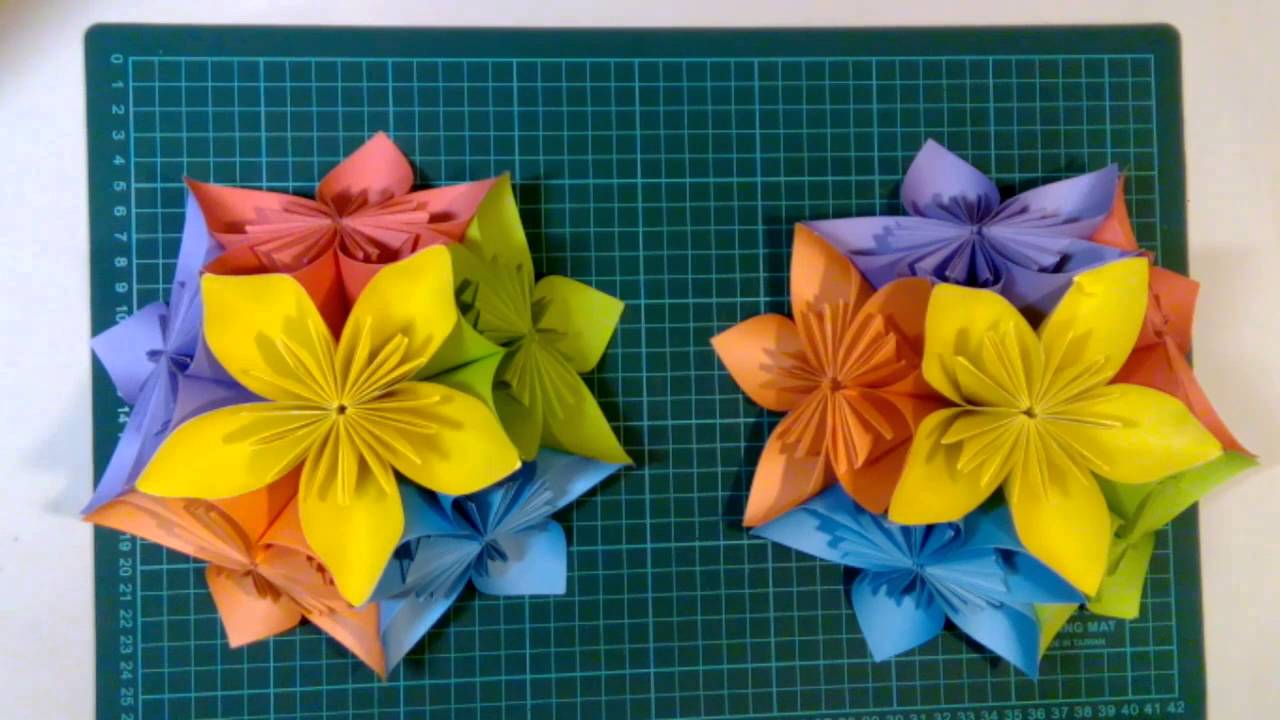
Connecting the two halves of future crafts
I do the second half of the ball. Connect the halves and the ball is ready!
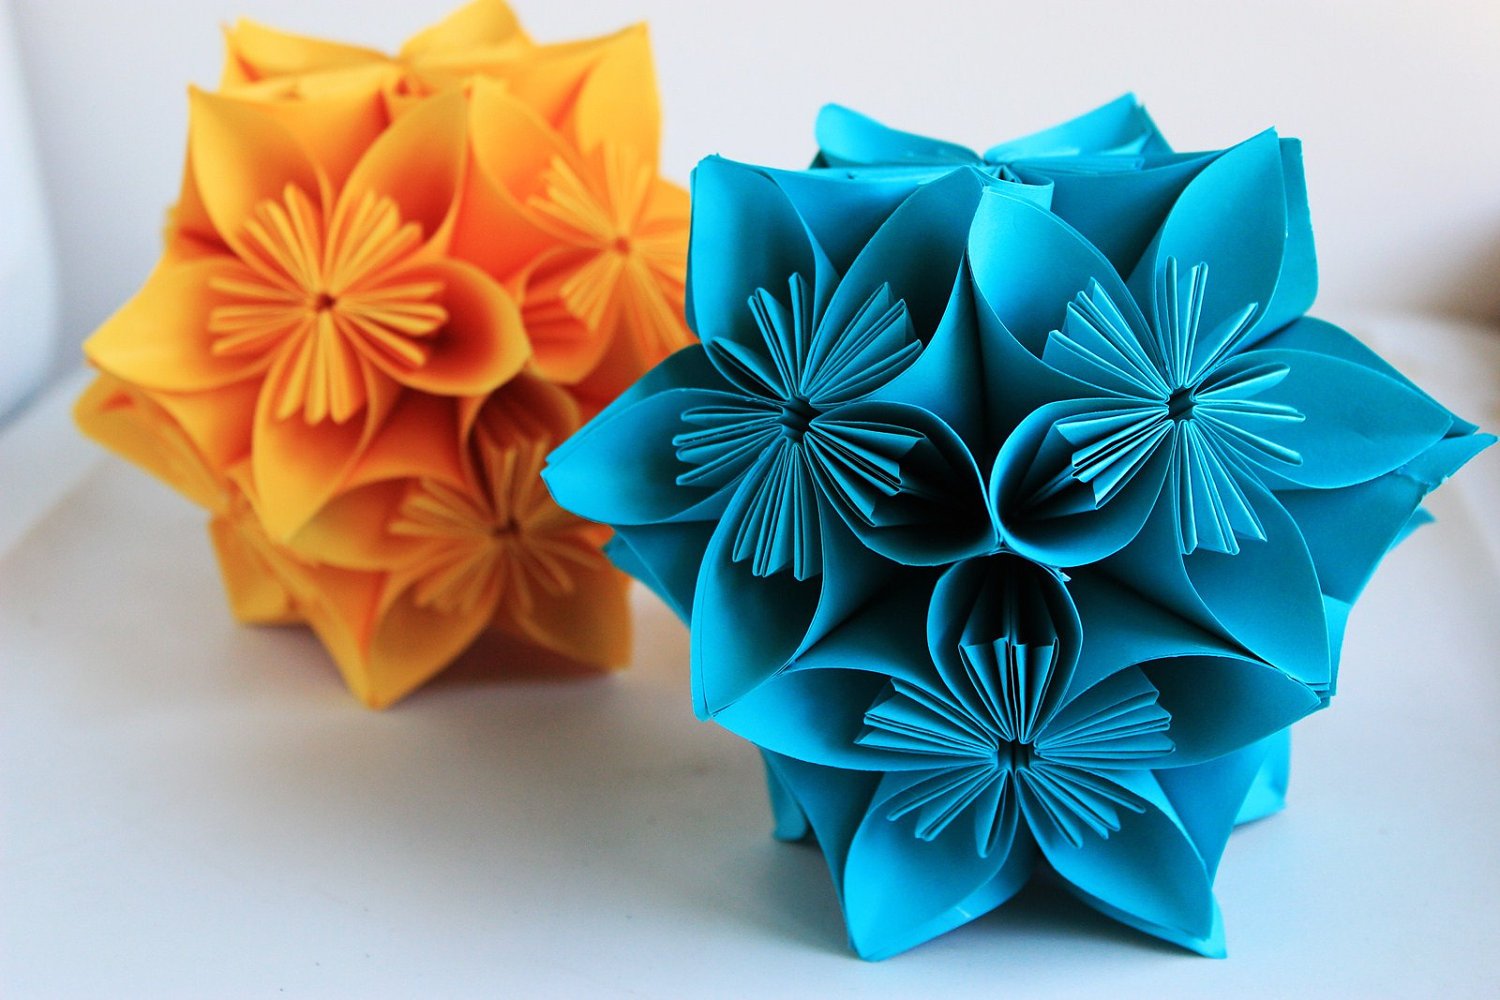
The product is ready as a New Year's ball
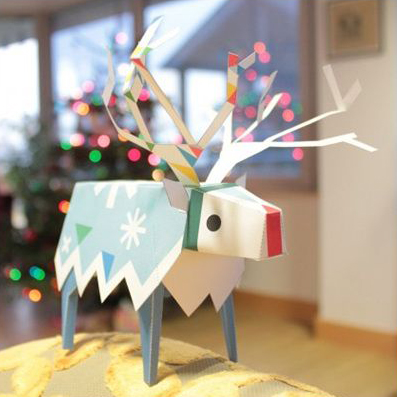
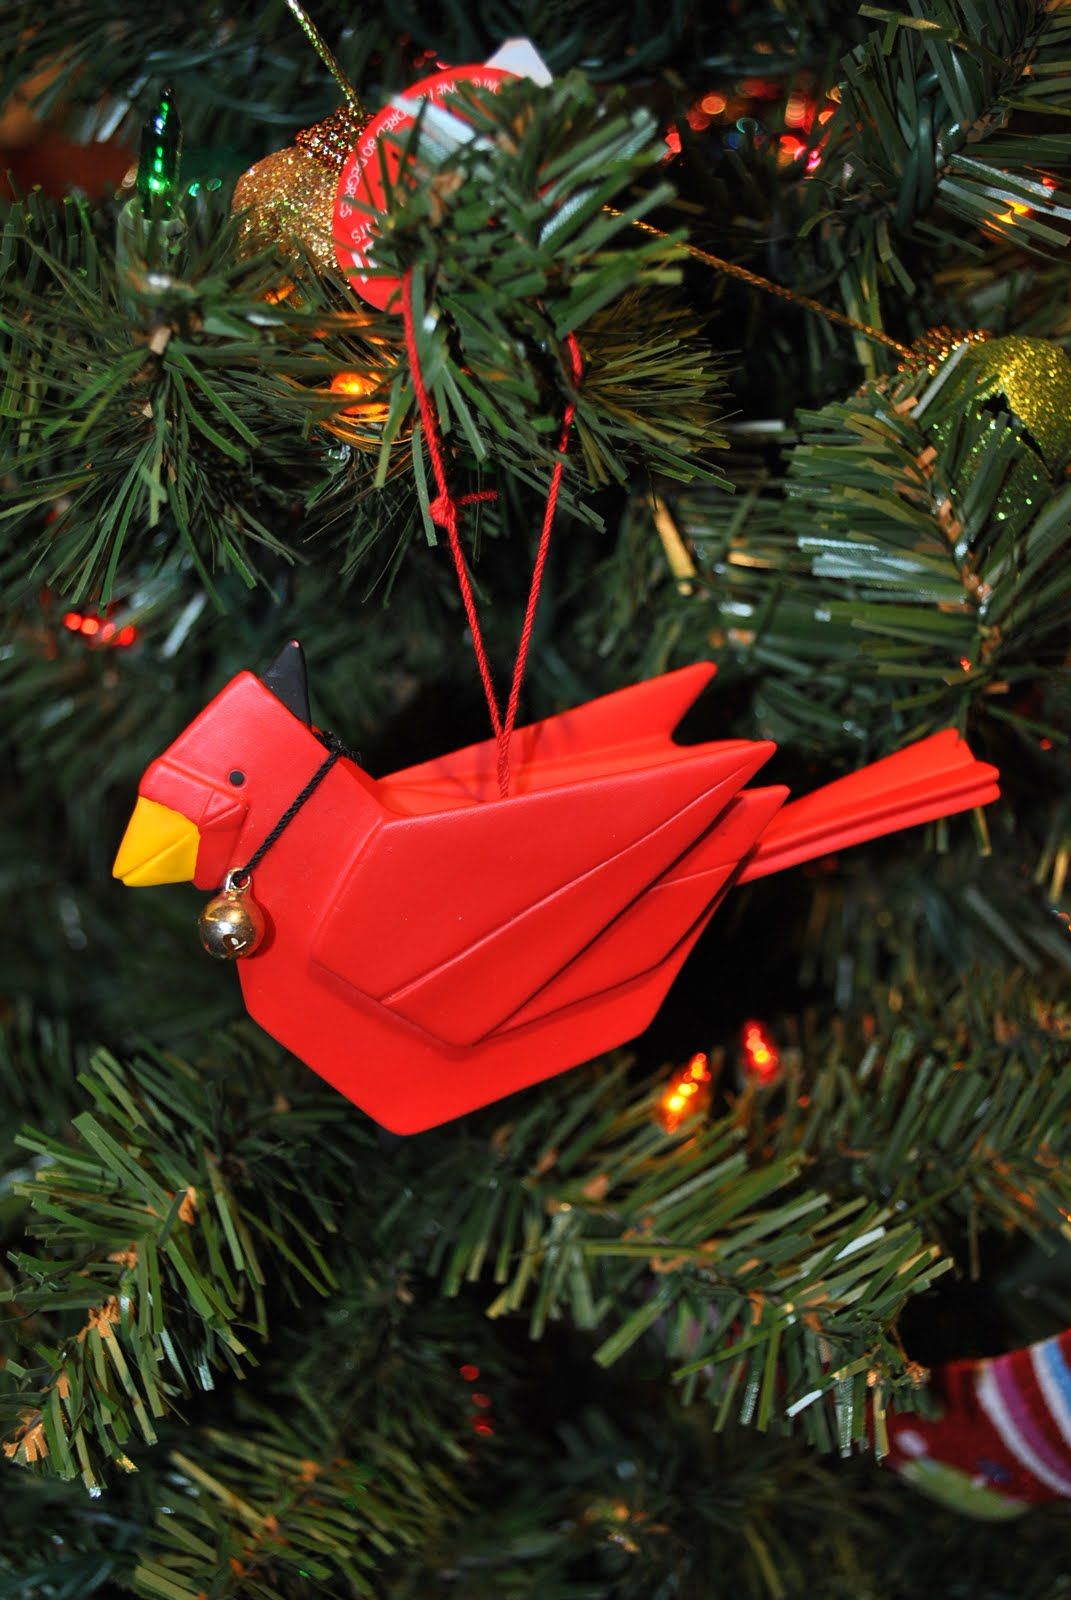
Deer
I was about to finish the article, when suddenly it dawned on me that another symbol of the new year was the deer on which Santa Claus was traveling. So let us make a deer head.
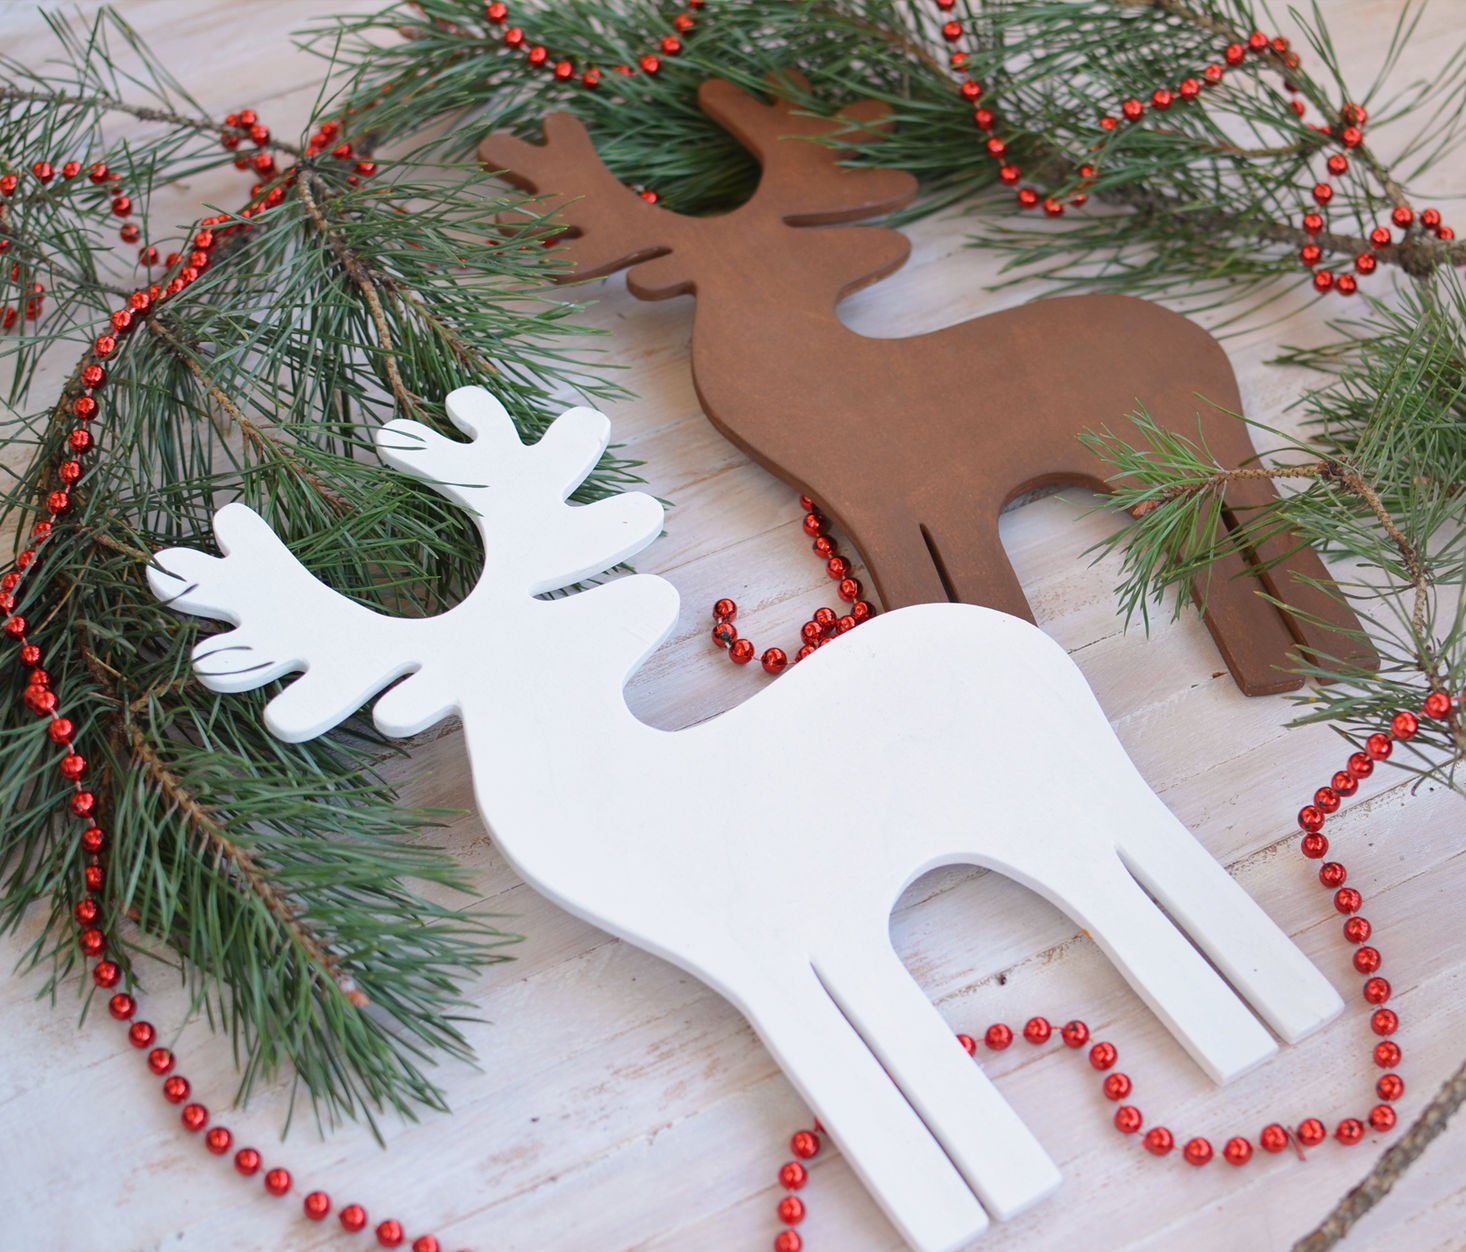
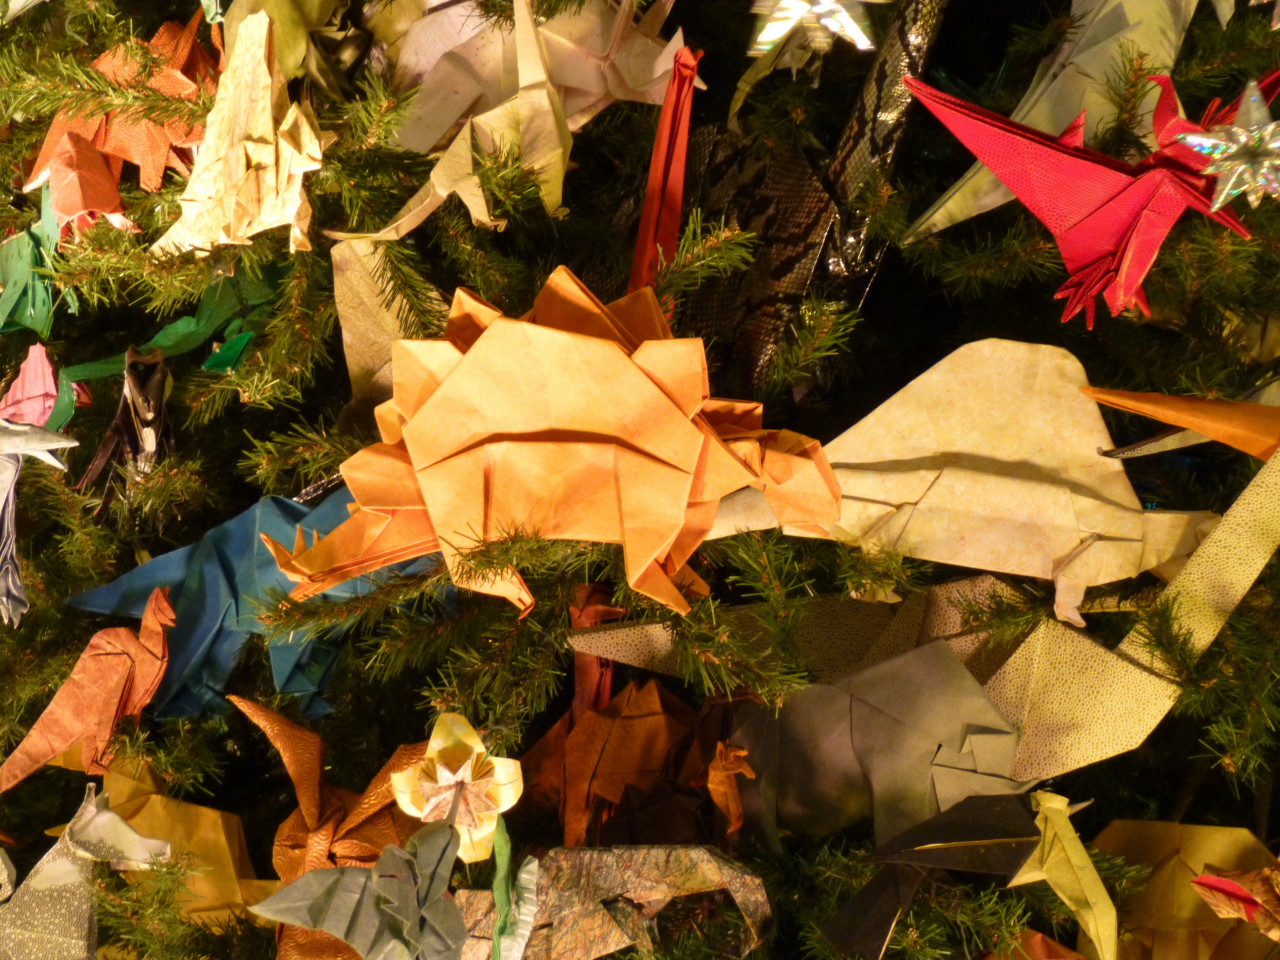
Deer as a symbol of any new year
To begin, explain what is papercraft. Papercraft (paper modeling) —creating or making images. It can be animals, household items, etc. And so how to build such a model? Watch carefully for the line type:
- Dotted line - fold outward.
- Point-dash (dash-dotted) - means to be bent inward.
- Solid - cut off.
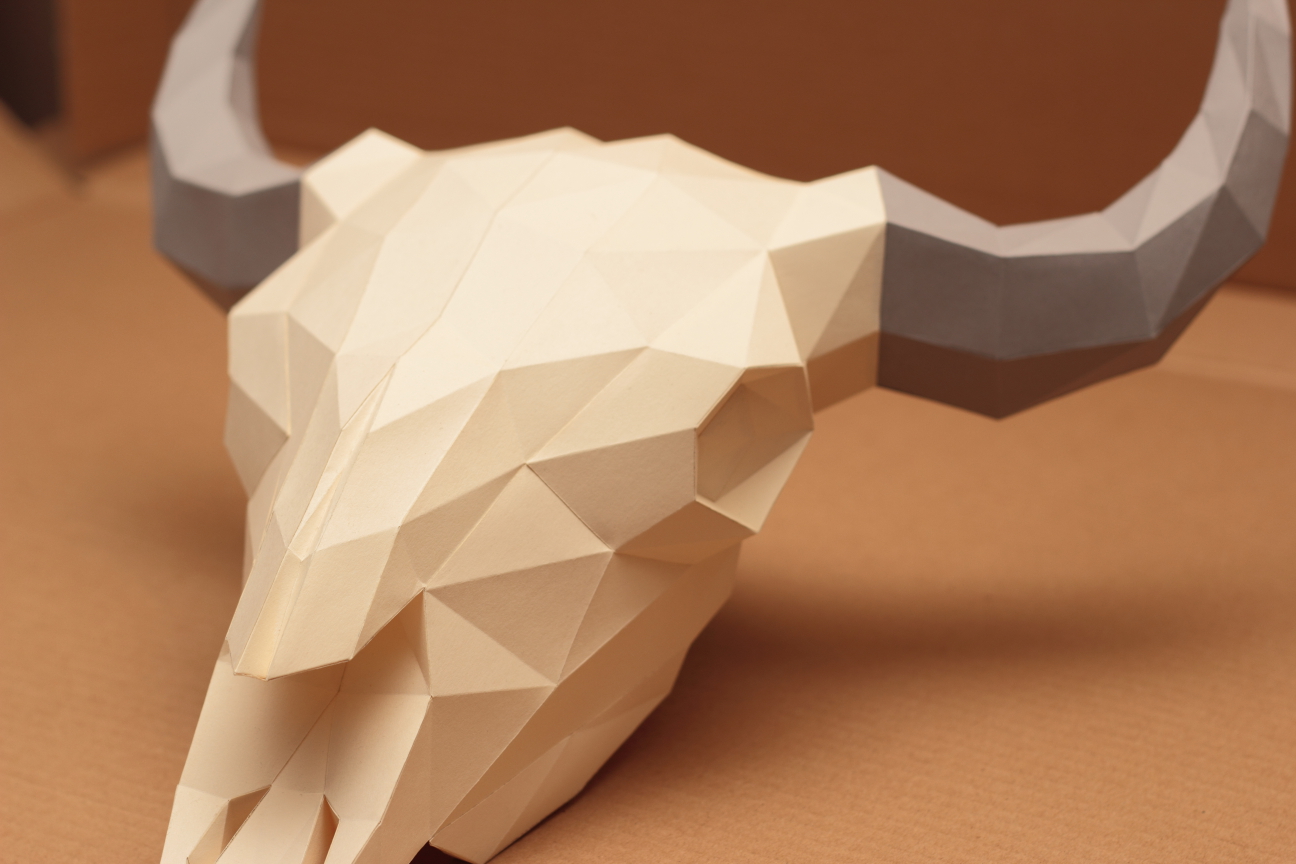
Original paper modeling idea
Find on the Internet a diagram of the head of a deer and print it on a regular sheet (it is easy to find a diagram of the head of a deer. Enter the “Head of a deer and a papercraft scheme.”)
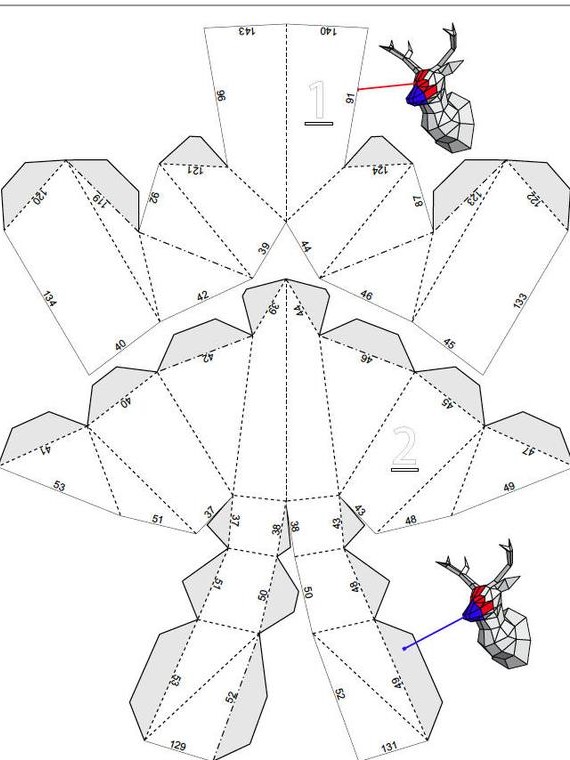
Deer head pattern
Now I need:
- 14 sheets of thick paper.
- Ruler.
- Scissors.
- Spoke or tweezers, but you can nail clippers.
- Double-sided scotch (what should a deer cling to?).
The head will take 10 sheets, and the horns 4 sheets. Now I have to cut all the parts. Further, I bend as shown in the diagram with the help of dashed, solid, dash-dashed lines. It remains only to glue.
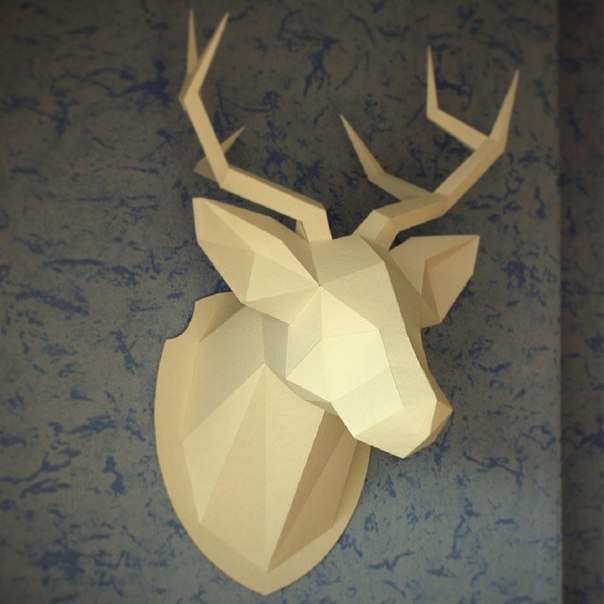
Originality for your home
Next, attach double-sided cattle and ready. Now we can attach to the wall. You can decorate this head with garlands.
return to menu ↑Snowman
Another symbol of the New Year and winter is the snowman. I will need:
- A4 white paper - 1 whole, 1 cut in half.
- White paper format a3 - 3 pieces.
- Orange paper (square) - 8 by 8 centimeters.
- Red paper measuring 4 by 15 centimeters.
- PVA glue.
- Markers
- Cloth cloth.
First you need to crumple sheet a3 and crush. After that, a lump of paper spread out to the original form. Then again I wrinkle the paper and again smooth it out. This procedure is carried out until the paper is soft. We perform the same procedure with the other sheets.
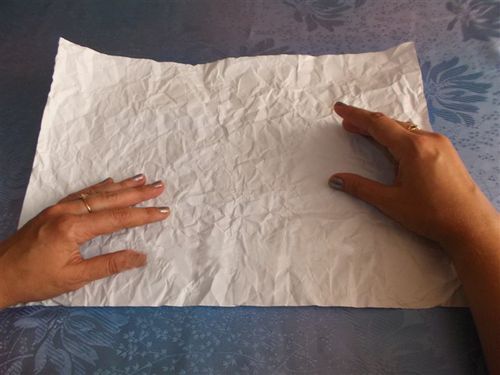
We throw paper to softness
After that I form a ball, tucking the corners inside. I turn to the handles. I do everything as well. Crushed orange paper and make a cone. Now I glue all the details together. Marker draw eyes.

Make such a snowman with children.
Conclusion
In this article, examples were given of how to decorate your room and Christmas tree with paper. The theme of paper weaving and papercraft was touched on. I have it all. I wish you creative success.
Paper Decorations
How to make curly snowflake


")
. DIY jewelry. New ideas and workshops")